 This was a fun one to do! I used papers by Crate Paper (Samantha Collection) and hand cut the large flower and the title. Prima Flowers are used to accent the title.
Monday, April 30, 2007
Emma's Luau
This was a fun one to do! I used papers by Crate Paper (Samantha Collection) and hand cut the large flower and the title. Prima Flowers are used to accent the title.Thank You for being my friend
 This Thank You card was created using a DCWV Card base, and paper by Daisy D's (Modern Romance) The band was created by using a strip of paper, and adhering a sticker by Melissa Frances onto the top. The sticker is backed with scrap paper so the band will slide off of the card easily.
 Sunday, April 29, 2007
Love You Much

This is a very simple 8X8 layout I created of my oldest nephew featuring the embossed prima flowers (love these things). Other products used include Crate Paper Zoom Kit, Lil' Davis ribbon and a Heidi Swapp journaling spot. I also sanded the edge of the picture to make it stand out more against the pp background. The title was cut from my cricut with the Opposites Attract cartridge & was outlined with a white Uniball signo pen.
Another BG LilyKate
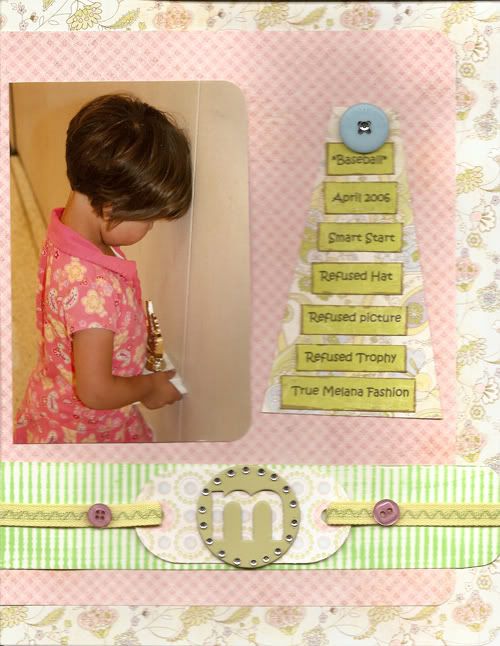
Another one done using the LilyKate collection from Basic Grey. This one is of Melana. She refuses to take pictures. So these are the types of layouts I am normally scrapping. Grrr!
Products used are:
Basic Grey LilyKatecollection
with matching ribbon
Foof-a-la happily ever after buttons
Heidi Swapp chipboard
Ranger Ink in vintage photo.
Other supplies used were Hero Arts Bling
Monogram Card:
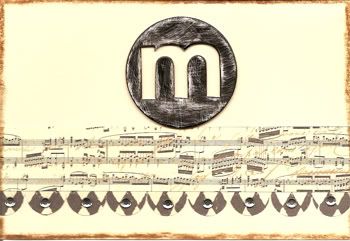
I used my slit punch to make my own scalloped edges for the botton of the pp.
Products used are:
7 Gypsies variety pack
ranger ink around the edges of the card and HS chipboard in jet and sanded with a file for distressing.
other products used: Hero Arts Bling
Friday, April 27, 2007
We R Memory Keepers Cards-Birthday

 These cards were so much fun to make. I rarely make cards and I think this is going to be a new addiction for me. For this card I used stickles, SEI buttons, Lil Davis ribbon, and EK stamps. (The stickles look so cool on this card, but it's hard to see in the scan. Love the way they look when you highlight part of the stamp!)
 For this card I used the Lil Davis Crillon 1 stamps, stickles and the Making Memories birthday rubons & SEI brads. Also used American Craft flowers.
 Used SEI buttons & Making Memories birthday rubons. Also used various ribbons and felt flowers from American Craft.
All these card are from We R Memory Keepers "Urban Window" diner note cards. They come in a cute little box with 12 cards and cute colorful envelopes. Cardstock used by DCWV.
Thursday, April 26, 2007
Love That Smile

My nephew had the biggest dimples, I just can't get enough of that smile. I created this layout with the Crate Paper Zoom kit. It's one of my favorites that I have worked with :) I also used Lil' Davis ribbon, a MM Metal Charm, Prima embossed flowers with SEI rhinestone jewels for the centers. I used my Dymo label maker for the title as well as a Heidi Swapp laser cut phrase. The 4 is from the cricut all mixed up cartridge.
Thank you, Thank you, Thank you
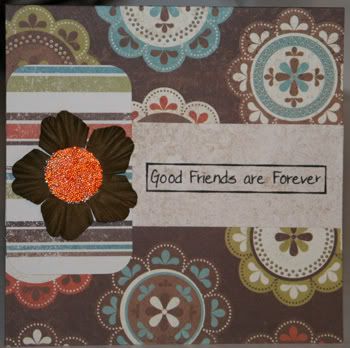
These are the last 2 cards I made using the We are Memory Keepers
Boho Chic card set. The rub on's are MM rub on's in black.
Other supplies used:
I know the flower came from noel but i am unsure who it is made by. The embellishment in the center I have no clue... sorry!
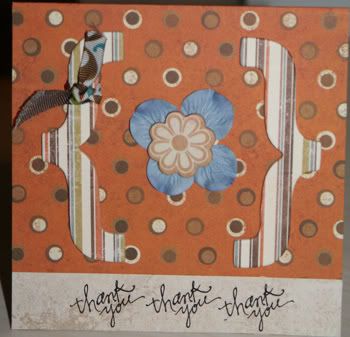
This card is also the boho chic set along with the coordinating ribbon. The matching goodie box was used for the brackets. The rub on's are MM rub on's in black.
other supplies used
Wooden flower-unknown
blue flower I believe is prima brand
Wednesday, April 25, 2007
Natural Beauty
 Another picture of my daughter from the park. I am really having fun with these stamps and the stickles. They add so much to any layout. The stickles looks so much better in real life. Decorated the prima flower & photo corners with them.
Supplies used here, pattern papers from the Scenic Route Laurel collection, stickles by ranger, flower by prima's silk road tin, stamps by Lil Davis-Crillon 1 and Heidi Swapp large flower jewels in pink.
Other supplies Queen & Co. felt border, letter stickers by Doodlebug and Heidi Swapp photo corners, brad-paper studio.
Flowers
 This layout features the several uses for glitter. The title is made of Double Churned Scrapboard Alphabets by We R Memory Keepers, and has been covered in glitter. Two of the larger flowers on the patterned paper have also been highlighted with glitter. To do this, I outlined each petal with a glaze pen and then sprinkled with white glitter. The Prima Floral Embellishments have also been edged with glitter. The paper is by Crate Paper, the Samantha Collection, and the sticker accent is by Melissa Frances.
 Greeting Cards!
All of these cards have the DCWV card stack as a base.

Tim Holtz Distress Ink

Crate Paper Samantha Collection
Melissa Frances Designer stickers
Making Memories Charmed Words
 You Did It Card Products:
Crate Paper Samantha Collection
Chipboard star with Melissa Frances glitter
Making Memories Rub On

Celebrate Card Products:
Crate Paper Samantha Collection
Making Memories Rub on
7 gypsies A LA CARD sticker
Tuesday, April 24, 2007
Pile on the Paper!
If you've been afraid to use a lot of patterned paper on your layouts, then these examples are for you! There is an art to using several patterns on one layout--you have to be careful to keep the focus on your photos. But when done with balance, lots of patterns can add personality and punch to your page.
On this first page, I used three patterned papers: one is the main background of the layout, and the other two are used to "break up" that pattern so that it is easier on the eye. I chose to place the grid pattern behind the photos in order to keep it from being too busy. And the green pattern is very subtle, and it serves as a background for my blue letters and helps them stand out on the page.
 Supplies: Bazzill cardstock, Piggy Tales Jack and Jill Kit (paper, tags, and photo turns), BasicGrey ribbon and chipboard arrow, Making Memories chipboard letters, paint, brads, Design Originals arrow
 On this next page, I took it even further and used four patterns. By using the green as my background, it served as a great contrast to the blue and red papers I used in the foreground. The other patterns are used in small strips. The focus is still on the green, and the blue and red still just serve as accent colors.
 Supplies: Bazzill cardstock, Piggy Tales Jack and Jill Kit, BasicGrey ribbon, Scenic Route letter stickers and chipboard stars, Design Originals arrow, Making Memories paint, brads, and rubons, Heidi Swapp rubons, American Craft letter stickers, 7 Gypsies photo turn
 Monday, April 23, 2007
Stickles

What are stickles? They are like the greatest invention
ever! No, not really but they are awesome, one of my
favorites. They are a must have for every scrapbooker!
Stickles are a thick glitter gel that comes in many
colors. They are so easy to use. The fine tip let's
you apply as much or as little as you want. All you
do is squeeze the bottle.
Here are some examples on how to used them, but
remember there are many more. I am
sure you can come up with some yourself.
**Used them to highlight circles, stars, squares or any other
form with dots (see ex. 1) see layout.
**Use as a flower center on small flowers like primas or
coat the entire flower for a sparkly look. Also use it
on brads. (see ex. 2)
**Use it to glue down ghost letters, flowers or stars
from Heidi Swapp. (see ex. 3)
**Use on chipboards, decorated them or outline them.
(see ex. 4)
Other ideas, try to highlight/enhance rubber
or clear stamps.
The possibilities
are endless. Remember to let them dry at least two hours or maybe
overnight if you use a lot of it.
So add sparkle and excitement to your layouts and cards. And remember
have fun.
You are my star

My son at a birthday party. Love the colors of this Scenic Route line, they are perfect for boy layouts.
Supplies used, used the Metropolis collection (the cardstock letter stickers come with this collection) & chipboard letters from Scenic Route. Also used chipboard stars from Lil Davis.
Other supplies, doodlebug frills and mini letter stickers from EK.
All Occasion Cards!
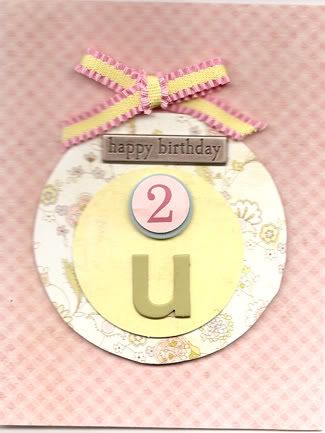
Happy Birthday!
for this card I used the following supplies:
LilyKate coordinating ribbon
BG LilyKate collection the yellow circle is a tag from the collection as well. I used a circle chipboard to give the card added dimension.
MM charmed words Happy Birthday
Foo-fa-la buttons in Happily ever after. It was used behind the number 2 that I punched out with my circle punch.
Heidi Swapp chipboard in the color grass.
HI!
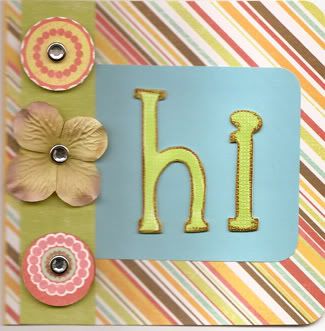
Diner card note set by We R Memory Keepers (love this set) is the striped pp then I used a strip of the solid off the back of another card and cut out flowers from the front of one of the note cards. I placed rhinestone brads from SEI in the middle of the cut out flowers. In the middle between those two flowers I used a Prima Quick Picks Hydrangea (Sand Beach) along with another rhinestone brad in the middle of it. Other products used on this card were blue solid paper and chipboard letters by pressed Petals inked with Ranger distress ink in vintage photo.
Thanks!
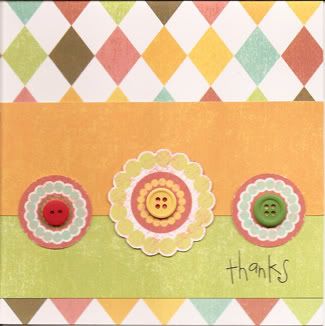
for this card I used Diner cardnote set by We R Memory Keepers {did I already mention I love this set ;)}
The solid pieces for the base of the flowers is the back of some of the cards. I cut out the card that had the circles and flowers on them glued them down and added a few buttons to the center and used Making Memories Rub-On's for the word Thanks in the bottom right hand corner.
Side Note: My scanner is acting a little wonky so i am going to try and replace these pictures with new ones that I photograph instead of scanning.
for this card I used the following supplies:
LilyKate coordinating ribbon
BG LilyKate collection the yellow circle is a tag from the collection as well. I used a circle chipboard to give the card added dimension.
MM charmed words Happy Birthday
Foo-fa-la buttons in Happily ever after. It was used behind the number 2 that I punched out with my circle punch.
Heidi Swapp chipboard in the color grass.
HI!
Diner card note set by We R Memory Keepers (love this set) is the striped pp then I used a strip of the solid off the back of another card and cut out flowers from the front of one of the note cards. I placed rhinestone brads from SEI in the middle of the cut out flowers. In the middle between those two flowers I used a Prima Quick Picks Hydrangea (Sand Beach) along with another rhinestone brad in the middle of it. Other products used on this card were blue solid paper and chipboard letters by pressed Petals inked with Ranger distress ink in vintage photo.
Thanks!
for this card I used Diner cardnote set by We R Memory Keepers {did I already mention I love this set ;)}
The solid pieces for the base of the flowers is the back of some of the cards. I cut out the card that had the circles and flowers on them glued them down and added a few buttons to the center and used Making Memories Rub-On's for the word Thanks in the bottom right hand corner.
Side Note: My scanner is acting a little wonky so i am going to try and replace these pictures with new ones that I photograph instead of scanning.
Sunday, April 22, 2007
Amazing you

I'm so happy with how this one turned out! But for some weird reason my jewels look clear, they are really the same green color as the stamp on the right and the chipboard block. I sepia toned my photo first in PSE5. I used the Crate Paper "Crush" kit, which I absolutely love!! The stamp up the right hand side is from Lil' Davis and I used the Versa Magic chalk ink in Aloe Vera. The vine chipboard is from Lil' Davis and I inked it with Ranger ink. I decorated that with some tiny primas and Heidi Swapp jewels. The chipboard block is from BasicGrey and I inked that in the aloe vera color and edged with the brown Ranger ink. I used a crate rub on for the "amazing". "you" is done with the Scenic Route chipboard in chestnut. Thanks for looking!
Heat Embossing
I was introduced to heat embossing a few years ago at a Stampin' Up workshop. At first I was really nervous and not sure what I was doing, but after a few tries I realized what a cool technique it was!
Supplies you will need are your stamp of choice (both rubber stamps and acrylic stamps are fine for this), versamark, a versamarker or versaink, embossing powder, a small paintbrush, a heating tool, and I like to have a funnel tray (although a paper towel or waxed paper will do nicely too).

First you want to ink up your stamp with your versamark, make sure you thoroughly cover your stamp but don't flood it or your detail will be ruined. Then ink your paper, if you are using versamark it will leave a watermark. Shake your embossing powder entirely over the stamped image, it should be entirely covered. Hold your image over your tray or waxed paper and tap off all excess powder and return to jar. With your small paintbrush sweep off any extra powder as this will melt when heated and show in your finished product.
Once you are happy with your powdered image get your heating tool out and turn it on for a few seconds to let it heat up. Hold it directly over your image but not to close, you can singe the paper. You're image is embossed when it turns from powdery to glossy (if you are using a distress powder it will not gloss). It usually takes only 2-3 seconds for it to change. Make sure you get the entire image glossy and then let it cool off. It will be a beautiful raised image when you are done.

Saturday, April 21, 2007
We Call Him... Jalen
 This is a layout of my youngest nephew and some of the MANY nicknames that he has :) His picture is not so dark in real life.
 Supplies Used: Zoom Kit Paper Collection by Crate Paper, dymo labeler, chipboard letters by Scrapboard, the title is cut from cricut base camp cartridge, my handwriting a various letter stickers for the names, and the photo corners are die cuts included in the zoom paper kit.
Birthday Cards
 These cards were all put together from the DCWV Card Kit in a stack. This kit was so easy to work with and I love the vibrant colors!
The cards, stickers and patterned paper are all included in the kit. Other supplies used include Heidi Swapp flowers and Bazzill Flowers & cardstock.
Friday, April 20, 2007
Basic Grey's Lily Kate Kit
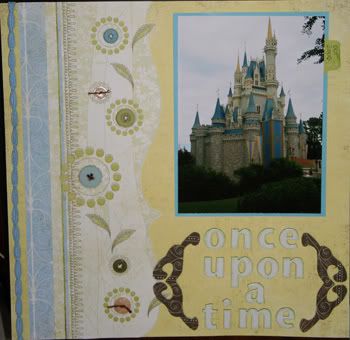
This picture was taken by me when we went to Disney World in October. If I do say so myself it is an awesome pic that turned out better than I expected. My hubby and the kiddos were rushing me.
Supplies used to create this layout were:
Basic Grey's Lily Kate Collection, happily ever after buttons by Foof-a-la, BG coordinating ribbon, Swirly Whirlie Chipboard by Rusty Pickle and the We R Memory KeepersDiner notecards.
Other supplies used:
The Stampin' Up!round tab punch
The paper studio chipboard letters inked with Green Galore dye ink.
Thursday, April 19, 2007
Create your own Rub On's
If any of you are like me you see some graphics, dingbats or other types of fonts you wished came in rub on's..well now you can have them.
Supplies you will need:
transparency
computer
word processing program
INK jet printer (you cannot use laset jet)
bone folder or craft stick
cardstock
Step one:
Open your word processing program and type the saying or whatever you want. Dingbats..alpahabet..phrases..graphics..clip art
(make sure you don't violate and copyright though!)
Step two:
Before printing, set your printer at the photo quality or “best” quality print so you can get a lot of ink transfered. Remember to reverse or mirror your text - it must print out backwards! Then print.
Step three:
Set your printed transparency aside for about 15 minutes for the ink to dry a bit. (If you use it too soon, it will smear.
Step four:
Flip the transparency over (ink-side down) and gently place over your cardstock exactly where you want the image. Using a craft stick or a bonefolder, rub over the entire printed image to transfer the ink to the cardstock. (This is the same process as using a store-bought rub-on's.) There may be some ink left over on the transparency; this can be cleaned off with alcohol and used again.
Step five:
Use your image or text to decorate a scrapbook page, a card, or even an altered gift item...the possibilities are endless!
Some tips-
*You can not use a laser printer for this...#1 - the transparency will melt (unless it is a special kind) and ruin your printer...#2 - the image/text is not printed with a wet ink...nothing will transfer from the transparency.
*I don’t know if it matters what side of the transparency you use. Some say you must use the shiny side and some say you must use the rough side. My transparency was shiny on both sides...
*Someone gave the tip of spraying the transparency with Krylon Preserve It before printing for easier removal of the rub-on...I didn’t try this and mine worked fine. If your image is not rubbing off smoothly, you may want to check it out.
*the only difference in making your own and store bought is when you rub off your own that you made only the image is rubbed off there is no "haze" around the image or letter like there is with store bought!
Happy Creating! It's addicting :)
NOTE: I did not come up with this I saw this somewhere a while back and don't remember where*
Greta...a side note from me (Noel)....I love this idea especially since you can make your rub ons any color you want (provided you have a color ink jet) and any size! Great tips!
SEI Winnie's Walls Kit


For Mommy's Girl I used Fab Flora from the Winnie's Walls kit & partially silhouetted the border. I placed jewel brads by making memories in the center. I also used a tag included in the kit and attached to it a strand of coordinating ribbon. The heart embellishment is from pressed petals and the title is cut from the Cricut Base Camp cartridge.
In Blessing Day I used the velvet paper (love this stuff!) from the Winnie's Walls Kit along with the available coordinating buttons and ribbon. The title is cut from the Cricut Opposites Attract cartridge.
Thanks for looking!
Jen
Tuesday, April 17, 2007
keila

One of the pictures I took recently of mine daughter at the park. She doesn't like to have her pictures taken by me, so I had to bribed her with a meal at McDonald's. Love the way they came out. Had lots of fun with this. Loving these stamps from Li'l Davis, stamped the center of the flowers and used them for borders.
Supplies used, papers from the Scenic Route Laurel collection, flowers "Silk Road Tin" by Prima, Scienic Route chipboard letters, buttons by SEI Winnies' Walls, SEI rhinestone brads in primary, stamps Lil Davis Crillion 1 and stickles by ranger. Other supplies felt ribbon and cardstock by bazzill.
Sunday, April 15, 2007
Basic Grey Blush Card Kit


I got these kits in about a month or so ago and I have been anxious to tear one open and give it a go! The package says each kit will make 7 cards, which is true, but you will have TONS of leftovers. You get 2 sheets of die cuts, 7 pieces of bazzill card stock, a sheet of rub ons and a package of raw chipboard. I did not include any chipboard on my cards so I have the whole sheet left! I have 2/3rds of the rub ons left and a few of the die cuts. So this is a really good value pack as I know I will use the chipboard and rub ons up on other projects. I would definitely recommend using a bone folder, a piercer and the BG file set for these as well. The edges of the die cuts come out a bit rough, but that will fix it right up. A fun kit that you can get together quickly!
Saturday, April 14, 2007
Easter Egg Hunt 2007

Thirteen photos on this page! I had alot of random photos from their egg hunt that I wanted to include, so I used 12 small photos and one larger one.
Papers are from Daisy D's Modern Romance line, Prima Flowers, and the title was cut using the QK Silhoutte!
Papers are from Daisy D's Modern Romance line, Prima Flowers, and the title was cut using the QK Silhoutte!
Tuesday, April 10, 2007
Sew Simple
When I first noticed stitching on layouts, I thought to myself, “I’ll never be able to try that—I can’t sew!” But you know what? Even the worst seamstress (which I would probably qualify for) can sew on layouts! Stitching on your layouts adds another dimension to your project and helps to “anchor” your elements to the page.
 **The first thing I do before sewing on any layout is practice on an extra sheet of paper. I like to make sure my stitching will look right and it helps to check the overall threading of the machine.
**When you are comfortable with the look of the stitch, sew directly on the paper BEFORE adhering it to the layout. If you adhere it first, you are likely to have bubbles in your page. Only after you stitch do you adhere to the layout.

 **If you find that you have trouble sewing a straight line, keep your layout in the “freestyle” form so that a crooked stitch fits right in with the design.
**Get the look of sewn on buttons by running thread through buttons with a needle as your guide. Simply attach them with a glue dot once they are threaded.

 **If you don’t have a sewing machine, you can still get the sewn look by handstitching. Use a needle and thick thread directly on your paper—it usually helps to punch the holes beforehand so that you can just run the stitch quickly through with the needle.
**Remember that sewing on paper usually wears out a needle faster than sewing on material. Change your needle often and have fun trying this new technique!
Friday, April 6, 2007
A World of Possibility

I wanted to keep this clean and simple. I sepia toned the photo so I wanted to stick to black and white paper. This is such a beautiful set called "Crate Avenue" from Crate Paper. I also used some black rick rack and some Bazzil black and cream paper and the font is from this cd.
Wednesday, April 4, 2007
The QuicKutz Silhoutte
by Apryl Herrell
Best thing since sliced bread? Almost! It’s the best thing since die cut machines anyway. The Silhoutte by QuicKutz is a very versatile crafting tool.
The software that comes with the Silhoutte is easy to use. There are preloaded shapes in the software, and you can use any font installed on your computer. Additional shapes are available to download, and can be purchased directly from the Silhoutte software.
The best part is; you aren’t limited to the QuicKutz shapes! There is an option in the software to capture the outline of any image you choose! For example: I needed a coffee cup for this layout.

I just found a coffee cup image online, and saved it to my computer. I then went into the Silhoutte software and clicked on the green square at the end of the toolbar. From there you can load your image and make a cutting outline. Obviously some shapes will work better than others, but imagine the possibilities!!
You can use this same technique to create welded (connected letter) words. I use Photoshop (or your favorite photo/graphic editing software) to type out a word. If the letters aren’t already connected, I move them around until they are. I then save it as a JPEG file. Then you can go into the Silhoutte software and capture an outline just like I did with the coffee cup.
All in all, the Silhoutte is a very versatile tool. You have complete control over the size and shape of your ‘die’ cutting. Let your imagination go wild!
Sunday, April 1, 2007
This is your Life

This is one I lifted from a LO I saw in Scrapbook Addict. I used my MME stash for it. These are from the Signature Suite line called "World of Play". Also used the 7 gypsies brads and some ink on the buck naked chipboard.
Subscribe to:
Posts (Atom)