Pages

Monday, October 31, 2016

Happy Halloween...and a "3-1" Challenge using the "Falloween" Classic Kit

Happy Halloween fellow Noel Mignon friends!!!  Today I'm going to be showcasing the "Falloween" Classic Kit.  This week the Design Team is doing a "3-1" Challenge in honor of October 31st!  Our goal is to use "3" of something and "1" of something on our layout.  I have lots of sets of "3" & "1" in the layout I am sharing today...


This layout features some of our family portraits from November 2015.  I choose these photos because they matched the papers and embellishments in the "Falloween" kit so well.  The most obvious set of "3" & "1" is that I used 3 landscape orientation photos, and 1 portrait orientation photo. 


There are many other sets of "3" on this layout that include the following...

3 wood veneers
3 sets of 3 enamel dots
3 pieces of woodgrain paper
3 other patterned papers
3 "subtitles" or phrases
3 photos of full body shots

There are also quite a few "1"s on the layout too...

1 strip of acorn paper on each side of the layout
1 fringed heart
1 main title
1 chipboard frame
1 fabric ribbon
1 heart button
1 journaling spot
1 photo close up of our feet
1 color of mist splatters

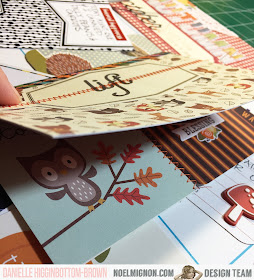
Here are a few close up shots depicting these "3" & "1" details.


Although this "Falloween" kit is sold out in the store, there are 4 more November "All Fall" Classic Kits.  These kits are perfect for fall and Thanksgiving photos!!!  Thank you for checking out my layout today.  Have a fun and safe Halloween. Stop back all week to see how the other designers use groups of "3" & "1" on their layouts.


Sunday, October 30, 2016

Planner Week 12 | Falloween Classic Kit

Welcome to the blog Noel Mignon friends!  Wendy here today sharing a planner spread using the Falloween Classic Kit.  Today's challenge is called the "3-1" challenge - use three of something and one of something on your layout.  


I was totally inspired to use the Falloween kit in my planner as we are having fall here in FL!  It is amazing and we've been able to sleep with the windows open and everything.

I really thought the cute owl and bear needed a place on my planner so I have 3 of the chipboard pieces on my planner.  To make the chipboard work on my pages and not be too bulky, I just removed the layers of the chipboard and glued the flat pieces to my pages.


My one piece, was the wood veneer leaf which I glued to the back of a paper clip to create a marker for my fall pages.


So what are you going to create for the "3-1" Challenge?  Have a great time creating and make sure you share with us on the FB page, we'd love to see!


Saturday, October 29, 2016

Spooky Halloween | Falloween Classic Kit

Happy Saturday! Laura here with you today sharing a new page using the October Falloween kit!  As you probably know, this week the DT members are adding interactive elements to our pages and I enjoyed creating my layout with a fun movable part!


I really wanted to use the sweet Lawn Fawn "Trick or Treat" stamp set on my layout and decided to stamp a tone on tone design using the bat stamp and the Tim Holtz orange distress ink from the kit. I love the way it turned out, it is subtle but interesting all at the same time.  And so super easy to do, too!


I created a print and cut ghost in my Silhouette Studio software and after cutting a few out I layered them together for my interactive element, which is a fun spinner design. As you tip and tilt the layout, he spins in circles and moves up and down!


I love this tissue-y spider web from the kit, it is a perfect layering element. The ribbon is super pretty, too!


I used a combination of glittery Heidi Swapp alpha stickers and a Pretty Little Studio cut apart phrase for my title.  I also added some black enamel dots from my stash, to make the "o's" in the title look like eyes! I thought the puffy bat, resembled a uni-brow! Ha!


There are so many cute Halloween elements in this kit, I had a hard time showing any restraint and not loading up my page, as you can see!

I have created another process video for this layout, you can check it out below or here on my You-Tube channel!


Supply List:  Bella Blvd Pumpkin Day patterned paper, clips and die cuts from the Spooktacular collection;  Pebbles patterned paper - moonlight, jackolantern from the Trick or Treat collection;  Echo Park "Fall is in the Air" chipboard; American Crafts Halloween spider web doily, wood shapes and puffy stickers; American Crafts cardstock;  Heidi Swapp glitter alphas; May Arts ribbon; Tim Holtz distress ink; Lawn Fawn "Trick or Treat" stamp set; Pretty Little Studio October phrase strips. (from my stash: DMC floss, Mr. Huey's black and white mist, Teresa Collins enamel dots)

Thanks so much for visiting, see you next week!

Friday, October 28, 2016

#24

Hey guys, Michelle here! While I'm saving some of my Falloween Daily Diary kit for my Halloween pics next week (can you believe Halloween is just 3 days away??!!) I thought I'd use the classic kit to create a page all about football! This is my son's first season playing football (he's been playing baseball for the last 7yrs) and he's done really well. His team has had a rough season but they've improved so much from the start of the season. And they've kept a great attitude despite their losses.
I started pulling out some of the non-Halloween pages, mostly ones that didn't have too many designs on them. I love using fall colored papers for this page but I didn't want owls or leaves on it since that didn't really go with the theme of my page. 
I also added some of the journaling cards from the Daily Diary kit behind some of my photos to help lighten up the page a bit since the papers were a bit darker in color. Plus it helped my #24 show up better on my page.
I love how the colors in this kit helped give my page a fall feel without taking away the football theme!

Thursday, October 27, 2016

Documenting Week 41 with Falloween

Happy Thursday! Danielle here today, and I have my Project Life Week 41 to share with you using the Noel Mignon Falloween Daily Diary Kit!


This weeks design team challenge is "Enter if you Dare Challenge"-Create an interactive element on your project

I created a flip up 4x6 card. I have a super easy tutorial a little further down in the post.


There are so many fun elements in this kit. I used one of the Simple Stories 3x4 horizontal card with the hedgehog & butterfly, fussy cut them out, the glued them to a vertical 3x4 card.


I also fussy cut the cute fox & hello friend from one of the Simple Stories cards and used them like little embellishments on my 4x6 card/photo. 

Another thing I enjoy adding to my Project Life is a screen shot of a new recipe I tried!


and now for the Tutorial of my flip up card


I used washi tape to adhere the 2 4x6 cards together, leaving just a touch of space between the two. Next I added some machine stitching for some extra detail, and also because I wanted to make sure that with all the handling of this card over time, the washi tape didn't peel off.


Here are some close up photos


I just love that Bella Blvd Washi strip!!


I used a few more of the Bella Blvd washi strips on this journal card, then fussy cut and created the "Today Was..." banner. I ran out of "w" alphas, you I used 2 "v" alphas and stitched them down.


Thanks for stopping by!

Wednesday, October 26, 2016

Falloween: Halloween

It's just a few days until my favorite holiday of the year and I seriously can not wait! I just love the magic feeling of Halloween night! I must have passed my love of Halloween onto my kids, because they are looking forward to it, too! They gear up for the holiday in their own way ... decorating their rooms and planning out their costumes ... last year, my daughter even used her own money to buy this cute tutu to wear to school during the month of October.

HALLOWEEN

For this page, I used the Bella Blvd. Washi Tape booklet that came in the Falloween Daily Diary Kit to create a background of tape strips. I love all of the colors and patterns together!


I matted my photo on a piece of scrap orange paper from my stash and then game it even more presence by matting it again on the black/white polka dot paper from the Classic kit. The top is accented with a cute cluster of stickers and a Bella Blvd. clip.


The title was cut using my Silhouette Cameo machine. I added the wood cat piece in place of the letter "o" to make it a bit more interesting ... and then anchored the title on a solid orange circle.

I used the stamp from the Falloween Classic kit to create another circle accent using the "Trick or Treat" stamp. I also made those cute little bats with the stamp ... coloring them with a blue colored pencil to match the title.


How gorgeous is that thick orange ribbon that came in the Classic kit this month?! I couldn't resist adding it around the bottom of my photo. I accented the center of the knotted ribbon with one of the die cuts from the Daily Dairy kit adhered to a punched black cardstock hexagon.

The number thickers are from my stash. I matted them with white cardstock so that they would stand out a bit better on the polka dot paper.


How are you gearing up for Halloween this week? Do you have a cute Halloween t-shirt, pin, or something else you like to wear to show your spirit of the season?

Happy scrapping!


Tuesday, October 25, 2016

"Enter if you Dare" with the FALLOWEEN Daily Diary Kit.

Hi There, Lynn here with a new pocket page using this month's "Falloween" Daily Diary Kit. The design team has a fun challenge this week called "Enter if you Dare". We added an interactive element somewhere on our project. This weekend I went to Home Goods and loved their Halloween decorations. I used the Collect App for my photos this week. Here's the whole page.
My title card
For my interactive element I used a craft knife to cut open the door on this next card. I added a button from the kit for the doorknob - it looks like an eyeball!
When the door is open ...
Here's more close ups of my cards. Check out the cute couple...
I added some embellishments to the photos to dress them up!
Here's the last few cards.
Check out the mummy display ...
Thanks for stopping by today and I hope your getting ready to scrap those Halloween pics!!
Have a great week!

Monday, October 24, 2016

{Apples & Peaches} with the "Falloween" Classic Kit

Happy Monday!  It's Meridy here this morning and today I will be sharing a double page spread using the "Falloween" Classic Kit.  I love the bright colors in the Pebbles "Woodland Forest" line of papers that pop up in this month's kit.  I decided to match the colors in these papers to the photos of my family picking apples and peaches last fall.


I really wanted to use the cute gnome paper on a layout, so I decided to use it in moderation, and place it like a border across the top of both sides of the layout.


Next, I took the wooden apple and painted it red to help it blend in with my layout a little better.  I also fussy cut a few butterflies out of the B side of one of the "Woodland Forest" papers. I added one of the epoxy buttons and a few enamel dots to these items and created a little sprinkling of embellishments along side of the main photo on my layout.


Again, I had fun with the title of this layout.  I was all out of "A"s by now, so I turned a couple of "V"s upside down and I think it reads easily.  The subtitle "Fall is in the Air" is actually part of an Echo Park branding strip.  I think my favorite part of the layout is the little chipboard tree.  I added 3 enamel dots to represent apples in the tree.  So fun!!!


As for the right side of the layout, I used an 8x10 collage print to fit lots of photos.  I do this from time to time because I cannot narrow down my photos sometimes and I want to include them all. 


Since the collage takes center stage on this side of the layout, I just layered a few simple papers and created a small embellishment cluster with some enamel dots, epoxy buttons, and a fussy cut butterfly.  Now I feel like these photos shine, yet coordinate with the papers on the layout.


And that wraps it up for today's layout.  Thank you so much for stopping by!  See you soon!