
I did this layout for Sketch This 48 using the Hopscotch Kit. Hurry! Only 5 of these kits are left in stock!


 This layout was done using the Tree House Kit and Janelle Richmond's Sketch #47. I added the orange patterned paper and journal tag, everything else is included in the kit. To create the curled edges on the Hambly transparency, I used a heat gun on them for a few seconds. I love the texture it adds!

 This second one is a 9x9. All the supplies on these two layouts came with the kit excluding the brads and thread.


For "The Next Generation," I used some fun new tags by Collage Press that help make journaling about the occassion a little more fun.
 And if tags are too big, you can always use small rubons or transparencies from Hambly or the little post-it notes from Heidi Swapp.


 The colors of the Tree House kit are so fresh and inviting! All items here are from the kit except for the orange stitching and one sheet of aqua cardstock from my stash. Thanks for looking!

This swirl was done by rubbing an ink pad across the template.
Paints and Templates
The key to working with paints is to keep your brush fairly dry. If you have too much paint on your brush it will leak under the edges of the template. Foam or stiff stenciling brushes work best. Dip the tip of the brush in paint then blot it until it’s fairly dry. Apply the paint with an up and down motion as opposed to a brush stroke.
Chalks and Templates
Chalks give a soft, pretty look. They are easy to blend, even within the boundaries of a template. Another advantage to chalks is they erase easily so if you don’t like the effect you’ve achieved, you can start over.

Same Template-different mediums
More Ideas
Use a pen, marker or pencil with your template, then cover your tracings with glitter glue.
Use embossing ink pads with doodling templates, then emboss.
Use the template as a guide for placing bling, brads or other embellishments.
Get those templates out and start playing!


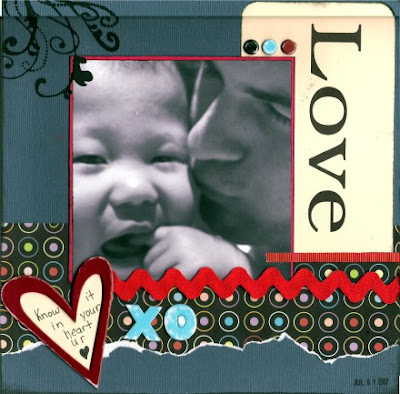
 It can be difficult to attach transparency, so here I decided to use eyelets and ribbon. It's anchors it to the page, but still gives me some texture. I also added ribbon to the strips of paper under her photo to tie it all together.
 And that is it :-)


In this next layout I altered the entire photograph to black and white as I felt colour was dominating the layout. I also think that using black and white made the arrangement appear more formal, which suited the occasion.
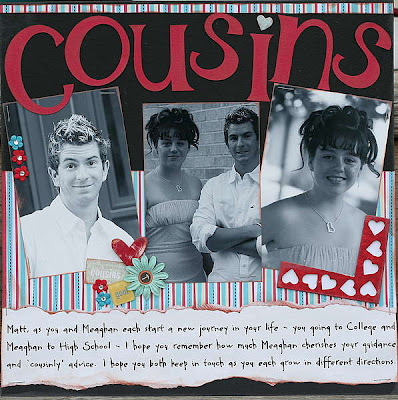


In closing, I hope my examples have illustrated the successful outcome of altering colour photographs to black and white. By manipulating your photographs you can open doors to new and exciting layout scenarios. Altering colour photographs helps to emphasize your subject without using embellishments or other additions that take away from the actual purpose of your layout.
Remember - it's not just laundry that should be separated by colour !
 Here's another LO using papers, stickers and alphas from the Sassafrass Lass Robotics paper pack. The rik rak is from the BasicGrey Gypsy ribbon pack. When my dd wore this tee to school her P.E. teacher tried to bribe her with good grades if she would give him her ticket!