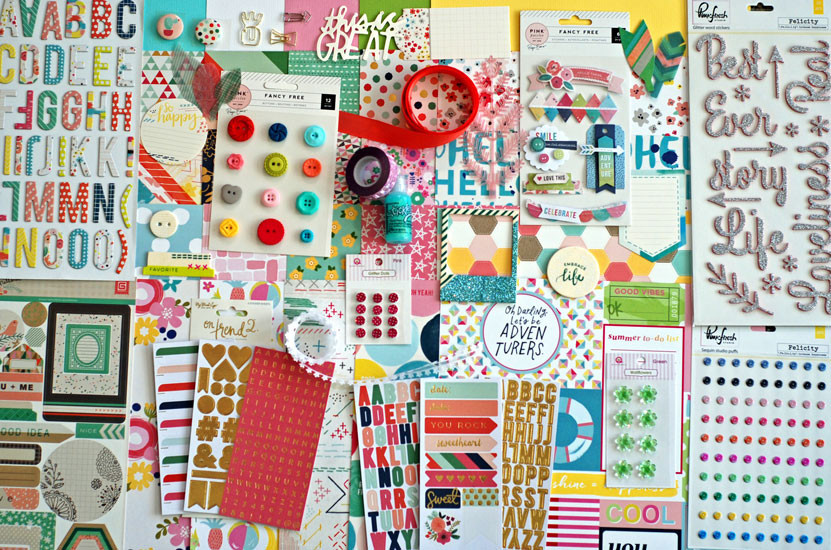
Showing posts with label Basic Grey. Show all posts

Monday, May 23, 2016

BIG or little..."Pure Bliss" Classic Kit

Hello, it's Meridy here!  This week's theme is BIG or little and I am working with the "Pure Bliss" Classic Kit.  

I decided to go with little for this layout, and took my cue from the AMAZING "Laundry" paper by Basic Grey in this month's kit.  As I was first going through my kit I noticed this super cute paper with little tiny laundry symbols on it.  You know, the symbols that are on clothing tags that tell you how to wash and dry your clothing?  This patterned paper had those symbols in miniature printed all over it...and guess what?  I JUST redid my laundry area last summer, AND I had taken before and after photos.  So I guess I was just waiting for this paper!!!  Oh, and bonus---the paper was the same shade of light blue that I painted the laundry room!  How perfect was that!!?!  


In this photo, you can see the little laundry symbols on the background paper...I also used some of the faux sequins, a button, and of course the little letter stickers by MME.


I loved that all of the pieces in this kit just worked with my layout.  The glitter foam stickers from Pinkfresh Studio made the perfect title and the glittered arrow helps in drawing your eye from the title back up to the photos. A few more faux sequins, some paper layers, and even a couple of branding strips of paper made this layout complete!


Thank you so much for joining me today...I would love to see how you used BIG or little elements on your most recent layouts.   You can share them over on our Noel Mignon Members Facebook page.

Have a great week!!!


Monday, May 2, 2016

Picnic in the Park Crop Challenge #1

Hello friends!!!  It's Meridy here, welcome to our "Picnic in the Park" Online Crop.  Today is the first day of the crop and I have your very first challenge ready for you...

I think one of the most fun things to do during a picnic in the park is to fly a kite!!!  Keeping a kite in mind, I decided today's challenge is to use diamond(s), ribbon, and bow(s) on your layout.  Below is my layout for the "Fly a Kite" challenge.  I used the Noel Mignon May 2016 "Pure Bliss" Classic Kit.

May 2016 "Pure Bliss" Classic Kit

I cut a few diamonds from the Basic Grey patterned paper in the kit and used them as a repeating element across the back of my layout.  You can see how the diamonds sometimes fall off the edge of the page.  I feel like this helps your eye move around the design and keeps the layout from looking too confined and cluttered.


As you can see I grounded my photo with the coral ribbon in this month's kit, gathering it as I adhered it.  Instead of using a real bow, I used the bow paperclip that came in the kit! 


A couple of other small embellishment clusters on the edges of the photo keep that photograph the focal point of the layout.


Everyone who finishes this challenge will be entered in a drawing for these cute Elle's Studio products.


To recap today's "Fly a Kite" challenge, use diamond(s), ribbon, and bow(s) on your layout.  Please upload your finished page to our Noel Mignon Members Facebook page in the "Fly a Kite" challenge album.  Also, keep in mind you do not have to use a Noel Mignon kit to enter your layout, everyone can play!!!

Check in tomorrow to see our next challenge and great prize.  We will have a challenge each day this week (Monday-Friday) and all of the winners will be announced on National Scrapbook Day--Saturday, May 7, 2016.  Thanks for stopping by!  I can't wait to see what you create!

Wednesday, August 26, 2015

Birthday Boy "Country Life" Classic Kit

This is my last post featuring the "Country Life" Classic Kit.  I simply adored this kit and all of the bright colors.  It worked so well with all kinds of pictures of mine, from birthday photos, to wildflower fields, to Spirit Week at my kid's school---and lots in between.

This week I'm sharing a layout that I used quite a few of the stickers from the 12x12 sheet of Basic Grey Tea Garden banner stickers.


First I used the banner stickers to create a traditional mini banner across the bottom of the pages. I also used a few chipboard frames from the Noel Mignon "Shine Bright" Classic Kit (from earlier this year).


I used the banner stickers to create a little cluster on the top of the right hand side of my layout as well.


The Pretty Little Studio word flags made for some cute additions on the layout, along with the piece of the branding strip  which says "Father, sister, brother, mother".  The branding strip is from a piece of Pebbles paper.


Thank you for checking out the blog today!  Have fun working with the "Country Life" Classic Kit.  If you don't have one yet, I believe there are 2 more available in the store, right here.  It is jam packed with cuteness!!!


Friday, November 28, 2014

Blessed: A family photo

Happy Black Friday friends! I hope you're enjoying the day whether you've been out shopping, if you're cuddled up at home or if you're still surrounded by lots of family. I hope you are enjoying the moment.

I thought I'd capture one of our big family moments with this layout using the Maple Creek kit. The photo is of my husband's ginormous family. Me? I come from a very small family. But HE has a huge one, and somehow we all managed to fit into a photo. So of course I had to scrap it. The Maple Creek kit was perfect for that!

I really love the bold colors of Basic Grey's geometric pattern. I pulled the gold color from it and chose to use that color as my background especially since it was also the color of the house. Then I flipped to the backside of the geometric paper and chose to use its pink color too.  Then I accented the page with rub-ons, the blessed tag, the wooden die cuts, and Elle's Studio tag.

On this Black Friday--whether you're in a shopping frenzy or enjoying a lazy day off--I hope you remember to tell your loved ones how cherished they are, and even capture them on a scrapbook page. That is, afterall, what scrapping is all about. Right?

Happy Black Friday!


Thursday, July 31, 2014

patterned paper bubbles

Good morning!

One warm morning about a month ago my kids thought it would be fun to play with bubbles in the backyard. They went out, armed with giant bubble wands and soap, and blew lots and lots of bubbles. They had so much fun that I decided to grab my camera and take some pictures. 

I decided to mimic the look of the bubbles by adding lots of circular elements to this page. 


I cut strips of patterned paper and then cut circles using a variety of circle paper punches. I used some of the leftover circles and popped them up randomly on my page. 


To continue the circle theme on my layout I also used a bunch of the My Mind's Eye brads included in the Sweet & Simple kit. 


Do you like to used shaped elements on your projects? 

We would love to see what you have created! 

I also wanted to remind you of this fun event coming soon: 


Come visit us in our Facebook group!


Thursday, February 21, 2013

Favorite Ride


Hello Everyone!  I know I have posted on the blog, but I had them scheduled, because the family and I were in Disney World all last week.  I am getting back into the groove of things.

Like most of us, I have over 1,000 photos from our trip.  When I came across these photos to edit, I had to pick these to scrap first...and the Dumbo ride was actually the first ride my daughter said she wanted to do at Magic Kingdom...we rode about 4 times total!  Still her number one favorite at Disney World.  We like it too...just our speed!  :)

Okay...so I wanted to use Lasting Love to make the layout, but I also had some very strong orange coming from Dumbo's hat.  So I pulled some orange and orange/yellow...some things from my stash and some things from the Soda Shoppe kit.  For the design, I wanted to use Julie Bonner's sketch from last week.  The photos I picked though have lots of detail and were getting lost with the sketch as is...I kept with the inspiration of the sketch, but changed it to fit the photos.

 The first paper I picked was the red and white My Mind's Eye paper.  Then I remembered about these Maya Road circle and star chipboard sets I had...I thought the paper and the stars went really well with the circus feel of the ride.  I loved the My Mind's Eye paper for the background...the layout was really starting to come together with the circus feel.  I pulled out some washi and buttons to help pull the layout together even more.  I used a couple of the aqua stickers from the Soda Shoppe kit from Dear Lizzy too.
 That floral card I cut from the Crate Paper pattern paper was my favorite and really reminded of that area of the park with the Pinnochio, Fantasyland feel.  I love creating a certain "feel" to a layout without too much of a theme.  I pulled out some die cuts from October Afternoon from my stash to bring the layout together even more.  I also used the My Mind's Eye dimensional stickers from Lasting Love, but didn't use them as is.  I took them apart and then used them.  That grey doily under the photo is from the large embellishment! 
 Circus, Pinnochio, Fantasyland feel was going great...and that finishing touch to that feel for me was to add some hand stitching to the heart and then add another heart on top.
I love these photos!  They just make me so happy.  And I love when that feeling comes across in a layout...definitely one of my favorites!  Hope everyone is having a great week!

Thursday, February 14, 2013

My World

 ~ HAPPY VALENTINE'S DAY ~

Hearts, candy, red, pink...however you celebrate, I hope you don't forget to treat yourself good too!

My family is "My World," day in and day out, we are together all the time.  We are a bunch of goofballs, but that's the way we like it.  This photo of us says it all.
My first idea to scrap about my family was to cut a lot of hearts, and stitch them into a heart shape.  It didn't turn out the way I expected.  I let the cut hearts just fall on the paper, hoping to spark something, and it did...so I glued them onto a piece of pattern paper, layering them one on top of another.  

Then pop dotted the frame to put on top, trimming the excess hearts.  So it looks like a shaker, but they don't shake.  I added the banner on top with more pop dots.  I picked a few more pieces of paper and embellishments, and I needed to find a photo or photos before I went on.  

This is from one of those photo booths at the mall, and was perfect.  I added a border punch to the Basic Grey paper, and started to layer.  Decided to add some swirls and drops of mist, and a little bit of masking with dye ink, so did that before I glued everything down.  For a little more color, I fussy cut the banner from Crate Paper to layer at the top.
That flower is just gorgeous, and even though I had the large embellished frame and hearts, the flower was a nice touch to add some sweetness to the quirky photos of us.
Love to you all, and hope you have a wonderful {Heart} day!
XOXO

Thursday, February 7, 2013

My Little Spicy Girl

I knew I had to get the February Lasting Love kit (now sold out)...and as soon as I got it, I couldn't resist digging into it.

I save and sometimes even cut backgrounds with the Silhouette just to use as a mask.  I loved the contrast with the blue background and all the shades and tints of red, I decided to use that Heidi Swapp mist with a heart background.

I wanted to soften the look of the misting, so I sprayed some white Studio Calico on top...all over it...so let that dry good before going on.  It does leave that chalkiness, sometimes I'll seal it with gel medium or Mod Podge, but left it as is.

I have a stash of photos...and I've been pulling a few of Emma when she was either a baby or around two (secretly wishing she would not grow up so fast)...she was two and a half here and wearing her little Asian outfit with her favorite blue flower...we were headed to celebrate the Chinese New Year.  So once the photo was picked, the Asian flair took over.  I cut the cherry blossoms.  It is a group of 3 of them, but cut them apart, and adhered.  The cut out envelope was perfect too for the look and feel of an Asian layout.
 I used to rip paper a lot when I started scrapping...just starting to do it again, sometimes it just adds to the dimension to a layout.  And since there was so much on the layout, I did back it with another piece of white cardstock.
February and this photo of my daughter are bittersweet...just a few days after this photo, my Mother-in-Law died from a heart attack, on the 8th...and Feb 18th will make 7 years since my mother's sudden death as well.  My father and father-in-law are also gone.  I have so many emotions looking at this photo of Emma, and I think that is why I came up with the title "full of life."  She would have loved her grandparents, of course, but she doesn't miss them, because she never knew them.  With the emotions of that, I remind myself how much she is loved by family and friends.  She brightens up any room with that smile as well as our lives.  It's funny how so many emotions can come from one photo...
Oh, and by the way, the reason I call my daughter my spicy girl is because she was born in the Hunan Province where the food is very spicy ;)

Tuesday, February 5, 2013

Kisses for Daddy


I was so excited to dig into the Lasting Love kit. It is full of fun embellishments and the trendy pink and blue color combo. While looking for a love themed photo for my first layout I ran across one of our daughter back when she gave out kisses freely...and inspiration for my title hit, "Kisses for Daddy."

Here is what I did...
You know I'm a banner girl and the Basic Grey pre-stitched banner along with the doily and bottle cap embellishments were a fun combination.
I added some mist splatters to my background using the Heidi Swapp Cherry mist included in the Lasting Love kit along with a blue and white from my stash.
Using my Cameo I cut out an arrow and misted it with blue metallic mist. I finished off the center with a piece of flair. Check out the shop to add some flair to your next order.

Last but not least, one of my favorite details. The title drawn with blue metallic ink using the sketch pen feature on my Cameo with a thin font.

How are you using the Lasting Love kit? Share your layouts on the message board...I'm looking forward to seeing your creations!

Thursday, January 31, 2013

It Started with One Little Bag

Hey Everyone!  I have a "fast and fabulous" layout to share with you today using the grey chevron bag from the Soda Shoppe kit, which pulled this layout together.

I backed a piece of white cardstock with the polka dot Basic Grey paper.  It added a really great contrast and grounded the layout well.  Then I used this triangle background from the Silhouette store.  No Silhouette?  If you have punches, especially those that punch anywhere, you could re-create a similar look.
The little bag was my focus and start of creating this layout...besides the photo, of course, which is one that I had lying around and just had to be scrapped of Emma when she was 13 mos.  We were only home for about a month and a half from China.  I have plenty documented, so this was a just-for-fun layout.  I used the last die-cut flower from the kit, stapled the folded in petals, and added a button in the center.  Everything clustered around the bag is from the kit, except the letters and numbers.  They are Basic Grey and I thought fit well with a baby-type theme.
 And, of course, the sweet photo.  I like to cut apart stickers to use in different ways.  Like the "remember this...the story of us" was a huge tree...I only wanted the trunk and the saying.  It worked out well with the branch sticker coming out from the right of the photo too...almost like it was part of that sticker, if you didn't know any better.
 Keeping my focus on using the bag, the photo, and the background already done for me, made this layout come together fast, but looks like it took awhile.

Hope everyone is having a great week!  Thanks for stopping by!