Hi! Sarah here with a layout using the January Daily Diary Kit. I wanted to document my daughter's first days of school this past school year.
For the patterned papers, I need to hit my stash because the ones in the kit were a bit too busy for what I was looking for. I grabbed a couple of Amy Tangerine papers and used them here.
I loved the black and white circle die cut and I used it in two spots to highlight the grades my girls started this year. I just cut it in half and got more use out of it.
I grabbed a small cut from an Amy Tangerine paper that is a bright green and I loved the words on them. I also used one of the die cuts from the kit for my journaling.
Some of the epoxy and enamel dots from the kit helped to bring it all together and add a little more detail and attention to those spots.
Thanks so much for joining me today! We'd love to see how you're using your January kits this month, don't forget to share them in the facebook group!
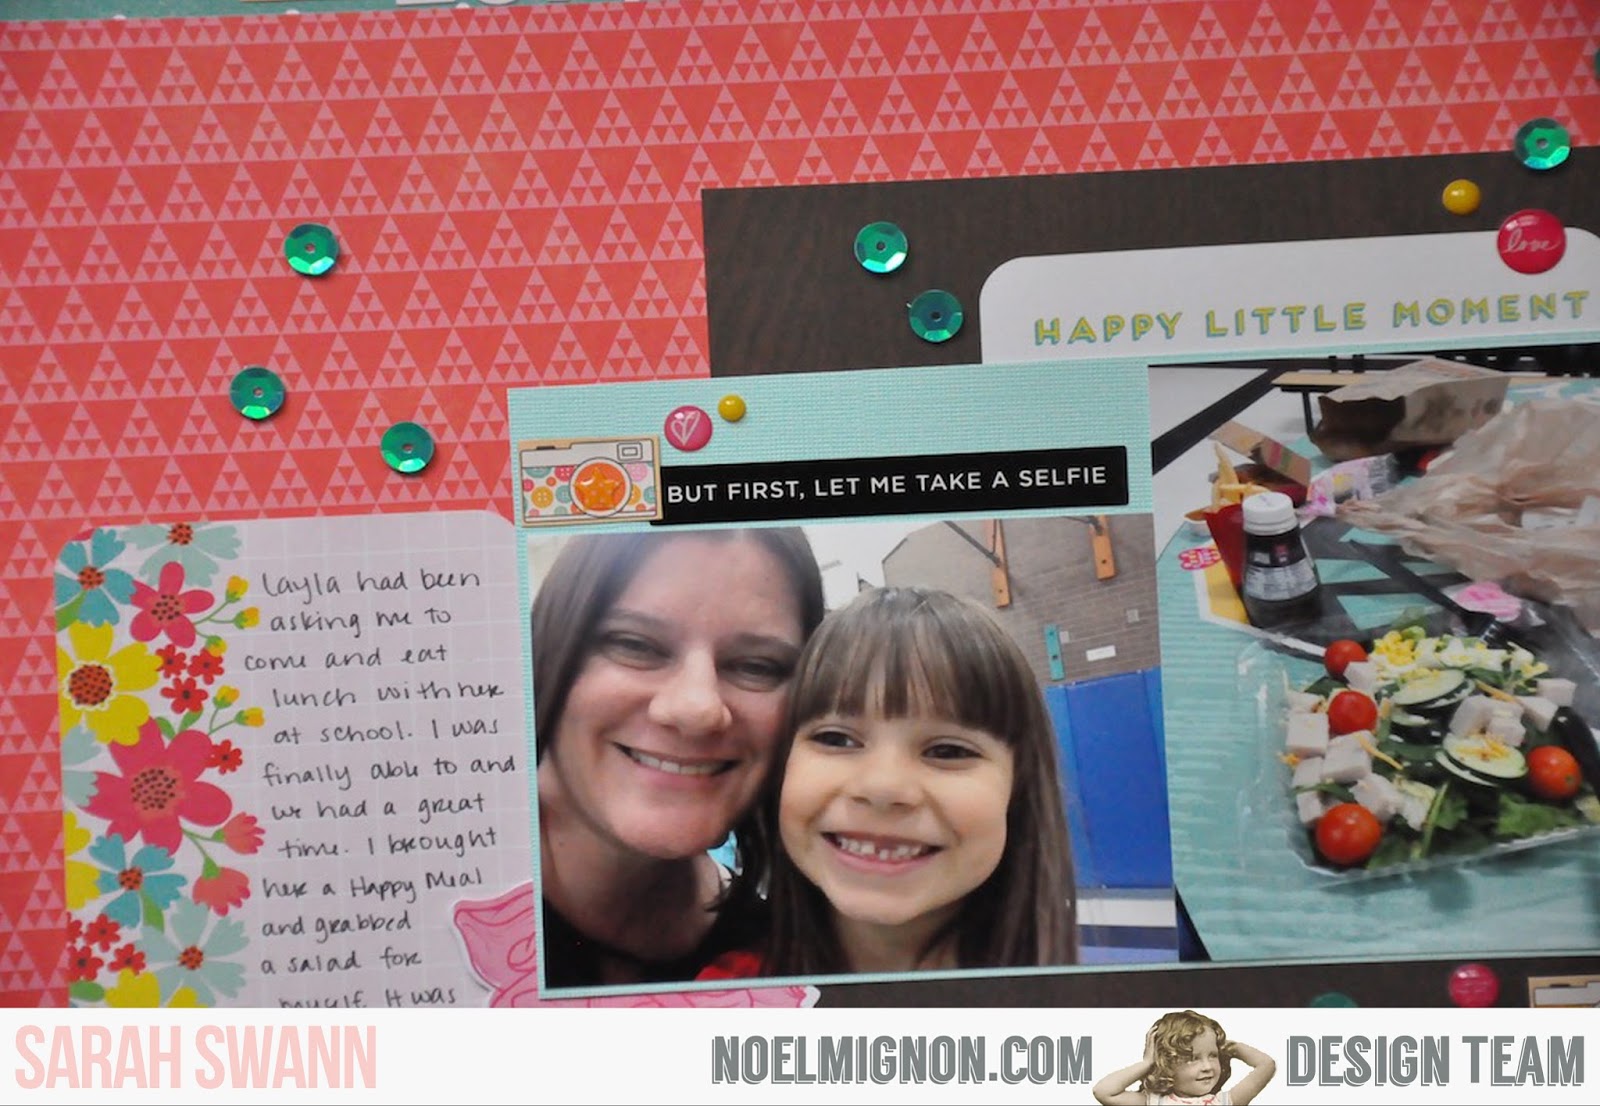
Hi! Sarah here with a layout using the January Daily Diary Kit. I went and had lunch with my daughter at school one day and she was just elated about it. I brought her a Happy Meal from McDonald's and I grabbed a salad for me. Just having me there and getting to have a special lunch was so fun for her and I loved being able to do it.
I wanted to bring out the blue from the photos by using some patterned paper from Amy Tangerine (not in the kit) and paired it with some bright pink from the kit. I love how the pink paper compliments the pink in the letter stickers.
I cut out a few little cameras from the 6x6 papers in the kit to use as embellishments. One of the project life cards had a great sentiment on it, so I tucked it behind the photos.
To play up on the pink, I used the large rose die cut around the picture of me and Layla. The phrase stickers were just perfect for the photos I had.
I used another project life card for my journaling and I love how the colors just came together. I sprinkled some enamel dots and sequins around the layout for extra dimension.
Thanks so much for joining me today! We'd love see how you're using your January kits, don't forget to share them in the FaceBook group!
Hello Friends! It's Meridy here and fall is in full swing, we had a Fall Festival and a visit to the Pumpkin Patch this weekend. I got lots of pictures, and I can't wait to get them printed. In the meantime, I worked on a layout with a photo of Thanksgiving 2016 for today's layout using the "Apple Crisp" Classic Kit. This week the design team is heading over to Pinterest for inspiration. I found this fall mood board, and decided to take cues from it when creating my layout this week. I mainly went with a similar color scheme, the wood grain, and falling leaves, for inspiration.
I used the wood grain patterned papers for the background of my layout, they just seemed to fit the style I was leaning towards from my inspiration board. Next, I layered a few strips of paper that I had left over from previous layouts I created this month. The photograph is the star of this layout for sure!!!
I did add a couple of doilies from my stash to bulk up the layers here, but I think they worked really well with the style and look I was going for.
I used the acrylic word "happy" from the kit as a starting point for my "Happy Thanksgiving" title, and finished it off with the gold Thickers from the kit.
Finally, I layered up some of the chipboard stickers from the kit, a little twine, some die cuts, crystal dots, and a few sequins (from my stash). I even used some of the Prima packaging from the puffy stickers to create a subtle layer peeking out from beneath the chipboard stickers.
That wraps up my layout for today! I can't wait to see what you create with your "Apple Crisp" Kits!!!
Hello all! It's Meridy here with a layout I made using the "Weekend in Paris" Classic Kit. I went for a bit of a monochromatic black and white look with a little touch of aqua. I thought that the black and white picture of my son from last year would go perfectly with this color combo.
I layered a piece of black cardstock with the "b" side of one of the Maggie Holmes papers from this month's kit and topped that with the heart print paper to create the base of my layout. Once I had that set up everything else layered together pretty quickly.
I knew right away that I wanted to use the "hello" wood veneer and paint it white to match the layout. As I was going through the rest of the embellishments from the kit I found the word "LOVE" on the puffy sticker sheet. I thought that the "hello" and "love" were perfect for a title, and I decided to add the word "my" with the mini alpha stickers for the final title of "hello my love".
I added the cute clip with hearts on it right above my title, a sprinkling of dark grey enamel dots and the self adhesive gold sequins, 2 banner die cuts, a bit of the gold washi tape, the date, and a couple of label stickers to finish off my layout.
Thank you for stopping by today! I would love to see what you have created lately with your Noel Mignon kits on Instagram #NoelMignon. Have a great week!!!
Hello friends! I cannot wait to share this layout with you. I used the "High Five" Daily Diary Kit and Paper Add-On. I think there are still a couple of these kits in the store. This background wave paper is so amazing, I couldn't wait to use it up! I found these photos of my baby's first time in a pool and knew right away that they would work with this kit.
Now, since I was so anxious to use these Thickers on every layout, I was running out of some very important letters, such as the letter "A". I wanted to title this layout "Water Baby", so I used the teal letter stickers from last month's kit to spell out "water" and the ombre Thickers to spell out "baby". I decided to turn a "V" upside down and thought that it read just fine as an "a". I think it totally works!
All of the cute stickers in this kit were perfect for this layout! And those orange-red sequins are AMAZING! Thankfully there are plenty of sequins in the pack and I can use them on lots and lots of future layouts.
I tried to put the stickers in small clusters, overlapping one another, so they packed a punch and looked "grounded". I also added in some yellow lollies and some teal puffy stickers from the kit to round off the embellishment clusters.
Thank you for stopping by! I would love to see what summery things you have created with your "High Five" kits on the Noel Mignon Members Facebook page or on Instagram #NoelMignon
Hello friends! Happy Monday! It's Meridy here and I have a 12x12 layout to share with you today. I am using the "High Five" Daily Diary Kit and the paper pack add on for today's layout. I am so happy to be using all of these bright summery colors this month, so I found some bright summery pictures to use on today's layout.
I started with the background papers and stitched them down to add some texture to the layout. Next, I started layering the patterned paper behind the photos, building up to the "Be Happy" bingo card.
Next, I pulled a variety of different embellishments from the kit, including enamel dots (from an older Noel Mignon kit), the puffy sticker labels, some sequins, and Thickers to spell "100%". I used these embellishments to create a couple of clusters, one on either side of the strip of photos. I added a little journaling, and that wrapped up the layout!
Thanks for stopping by the blog today! I would love to see what you made with your Noel Mignon kit this month on Instagram #NoelMignon.
Hello friends!!! It's Meridy here, I have a double page layout using the "Let's Get Lost" Classic Kit today. I choose some camping pictures from 2011 for my "Camp Cookout" layout.
I choose pictures that coordinated well with the mountain paper in this month's kit, then pulled a few more sheets of coordinating patterned paper from the kit to compliment those pictures.
I was able to fit 6 photos on this layout, and still have lots of room to play with embellishments, add some journaling, and add a title.
I cut apart a "camp" die cut that came in my kit and made it into a little banner to create my "Camp Cookout" title. I dressed it up with the deer flair, a cork sticker, a tag, and a puffy sticker from the kit. I added a few sequins from my stash to give the title area a little more interest.
I treated my journaling area the same as my title, repeating the same elements so that the layout and embellishmnets flow from one page to the next. I used the cute stamp that came in this month's kit for my journaling block.
Finally, I made a third embellishment cluster with the same elements that were in the title and journaling areas. This formed a visual triangle across the entire layout. I felt like the layout needed a little more "grounding" so I punched some starburst circles from a Martha Stewart punch I have and placed them to look like scallops across the bottom of the layout.
That wraps up my layout for today! Thank you for stopping by! I would love to see your work on Instagram #NoelMignon.
Hello Noel Mignon fans! If you were at the March kit reveal party on Facebook last night, you know we are up for some beautiful creations coming your way with next month's kit...but for now, I'm still getting plenty of layouts out of my 'love-ly' February "Happy Together" Classic Kit!!!
This week the design team is going to use the February kit for layouts and projects that are NOT Valentine's related. The Noel Mignon kits are so versatile, that you can use them for all sorts of topics and themes in your scrapbooking, cardmaking, and pocket pages.
I decided to make a page for my daughter's 9th birthday party this week.
I was able to use the "Happy Together" Classic Kit, although her party didn't have anything to do with Valentine's Day. It took place in the middle of July, and was Parisian themed. But the colors of the paper and embellishments matched my photos perfectly!
I really loved the different textures in this month's kit, I used chipboard, embroidered lace ribbon, and cardstock die cuts as embellishments on my layout. I even added in a few self adhesive sequins from a previous Noel Mignon kit.
I embellished my title with another chipboard sticker, one of the CUTE glittered bows, a flair button, and painted the wood veneer "Happy" pink to match the colors in the layout. I used the black Thickers that came in this month's kit for my title and continued using the adhesive lace ribbon and sequins to keep the layout looking cohesive.
I finished off my layout with a piece of vellum for my journaling, pink stitching around the entire page, a paper ribbon with part of the branding strip on the upper right hand side of the layout, and a few light pink mist splatters.
Thank you so much for stopping by! I would love to see what you are working on with your Noel Mignon kit over on our Member's Facebook Page, so please stop over and post your creations.
Hi! It's Meridy here. Before I share my layout, I want to share a link to my video showing everything you get in the January 2017 "Little Bird" Daily Diary Kit. There is so much great stuff in this kit, I wanted to share it with you! I think there are still a couple of these cute kits available in the Noel Mignon store.
Onto my layout share for today...The Design Team is sharing layouts about our GOALS this week.
Since I will be using the Daily Diary kit every other month, I decided I needed to create a pocket page album, and I wanted to go in a little different direction than a typical "project life" style album. I'm not sure exactly what direction this album will go, but for now, it's to track my goals and progress on my goals for 2017. This is an 8 1/2x11 album. I purchased one of the Becky Higgins Project Life Fuse Tools so that I can create my own page layouts and pockets in various sizes. I really love his little tool, it give me so much creative freedom!
The first layout in my album is where I documented my main goals for 2017. I used the "Reset Girls" 3x4 cards, since they were preprinted with "plan" and quotes about resetting your life. I decided to add a photo of my family, so every time I look at my goals, I will be reminded of why I am working so hard to achieve them.
I used some green Thickers from an older NM Kit to write "2017" and stickers from the "Little Bird" Kit for the subtitle "goals". I added stickers from this kit to all of the cards to dress them up a bit. I also added some of the pretty silk ribbon to one of the cards.
My "word" for 2017 is REDUCE. I would like to reduce things in all areas of my life, so I noted that on the card as well.
I decided to make one of the pockets into a shaker pocket. I filled it with a few sequins and sealed it up with my Fuse tool. I added 2 heart stickers from the kit to the outside of this pocket to complete it.
That wraps up my first pocket page of my new album. If you made a layout about your 2017 goals, please share it on our Noel Mignon Members Facebook page. I would love to see it!!!
Happy Day After Christmas! I hope you are all relaxing and enjoying your family and gifts. Hopefully you got some scrappy gifts! I'm sharing a layout of our Christmas Eve traditions, using the "Oh What Fun" Classic Kit...
I enjoyed creating this title space with the various alpha stickers, stamps, and the "santa's coming" label sticker from the kit.
I had lots of pictures to use on this layout and 3 different traditions that I wanted to document. So I decided to use the red glitter Thickers that came in this month's kit to number the different traditions, then describe them in the journaling space on the right hand side of the layout.
I used various embellishments to fill in areas around the photos with small clusters for a little added interest. I also used some branding strips to ground the bottom of the page.
I finished off the layout with the red Studio Calico color mist spray from the kit sprinkled with a few of the gold Heidi Swapp sequins. Thank you for stopping by today!!! I would love to see some of your creations with the "Oh What Fun" Classic Kit over at our Noel Mignon members FB page.