Showing posts with label 2017. Show all posts

Monday, November 6, 2017

{Visit to the Pumpkin Patch} Layout using the "Home Sweet Home" Classic Kit

Happy Monday, friends!  It's Meridy here and before I share my layout today, I wanted to remind everyone that sign ups for the next 6 month term of subs are closing in a couple of days.  If you want to sub to the Noel Mignon kit for January-June 2018, you can sign up right here.
Today I'm sharing a layout with the beautiful "Home Sweet Home" Classic Kit.  There are still a couple of these kits in the store.  They are perfect for documenting fall activities and traditions.  I used the "Home Sweet Home" Kit to document a trip to the pumpkin patch...


I decided to start this layout with the plaid patterned paper, I love the plaid pattern and colors in this paper, I really like that it was on the diagonal, so I had to use it right away.  After matting my photos I pulled the coordinating chipboard embellishments, brads, and rub-ons from the kit and put them to work on this page.  


I used a few scraps of lace trim that I had leftover from a previous Noel Mignon kit to add a little texture to the layout. I also decided to mat the whole layout on the orange patterned paper from this month's kit.  I thought it looked a little more "finished" matted on the orange.  I used one of the cut apart elements that reads "Happy Pumpkin Season", it was made for pictures like these!!!


Finally, I used the brown "faux-stitched" Thickers for part of my title that read "Visit", a couple of word stickers that read "to the", and a rub on that read "Pumpkin Patch" to complete the title.  I love mixing and matching fonts for my layout titles.  And this was no exception.  I layered a couple of chipboard pumpkins and sprinkled some chipboard leaves to finish off the title area.


And that wraps up my layout for today!  Thank you so much for stopping by, I hope you are having fun documenting your fall with the beautiful "Home Sweet Home" Noel Mignon Kits this month!!!


Monday, July 24, 2017

{Daddy's Girl & A Tilt-a-Whirl} with the "High Five" Daily Diary Kit

Hello friends!  It's Meridy here today and I'm working with the "High Five" Daily Diary kit and the Paper Add On.  There are still a few of these beautiful kits in the store!!!  This kit is PERFECT for summer days and the beach, but Noel Mignon kits are so versatile that this week the design team is going to be using our kits to scrapbook pages that aren't necessarily summer themed.  The layout I'm doing today is about my husband and my daughter taking a ride on a Tilt-A-Whirl.


The colors in the kit matched the photos of the tilt-a-whirl just perfectly. I really adore the Thickers that came in the Daily Diary Kit this month...their ombre color is just dreamy! So I had to use them for an EXTRA long title on this layout.


I added a small embellishment cluster near the two areas where I placed my title. 


I added a few mist splatters across the page to add just a little more color to the white background paper.  Once I finished my journaling, that wrapped up the layout.  Thank you for stopping by the blog today!  Check back all week to see what other types of "out of the box" layouts the design team creates with this month's kit!


Monday, May 29, 2017

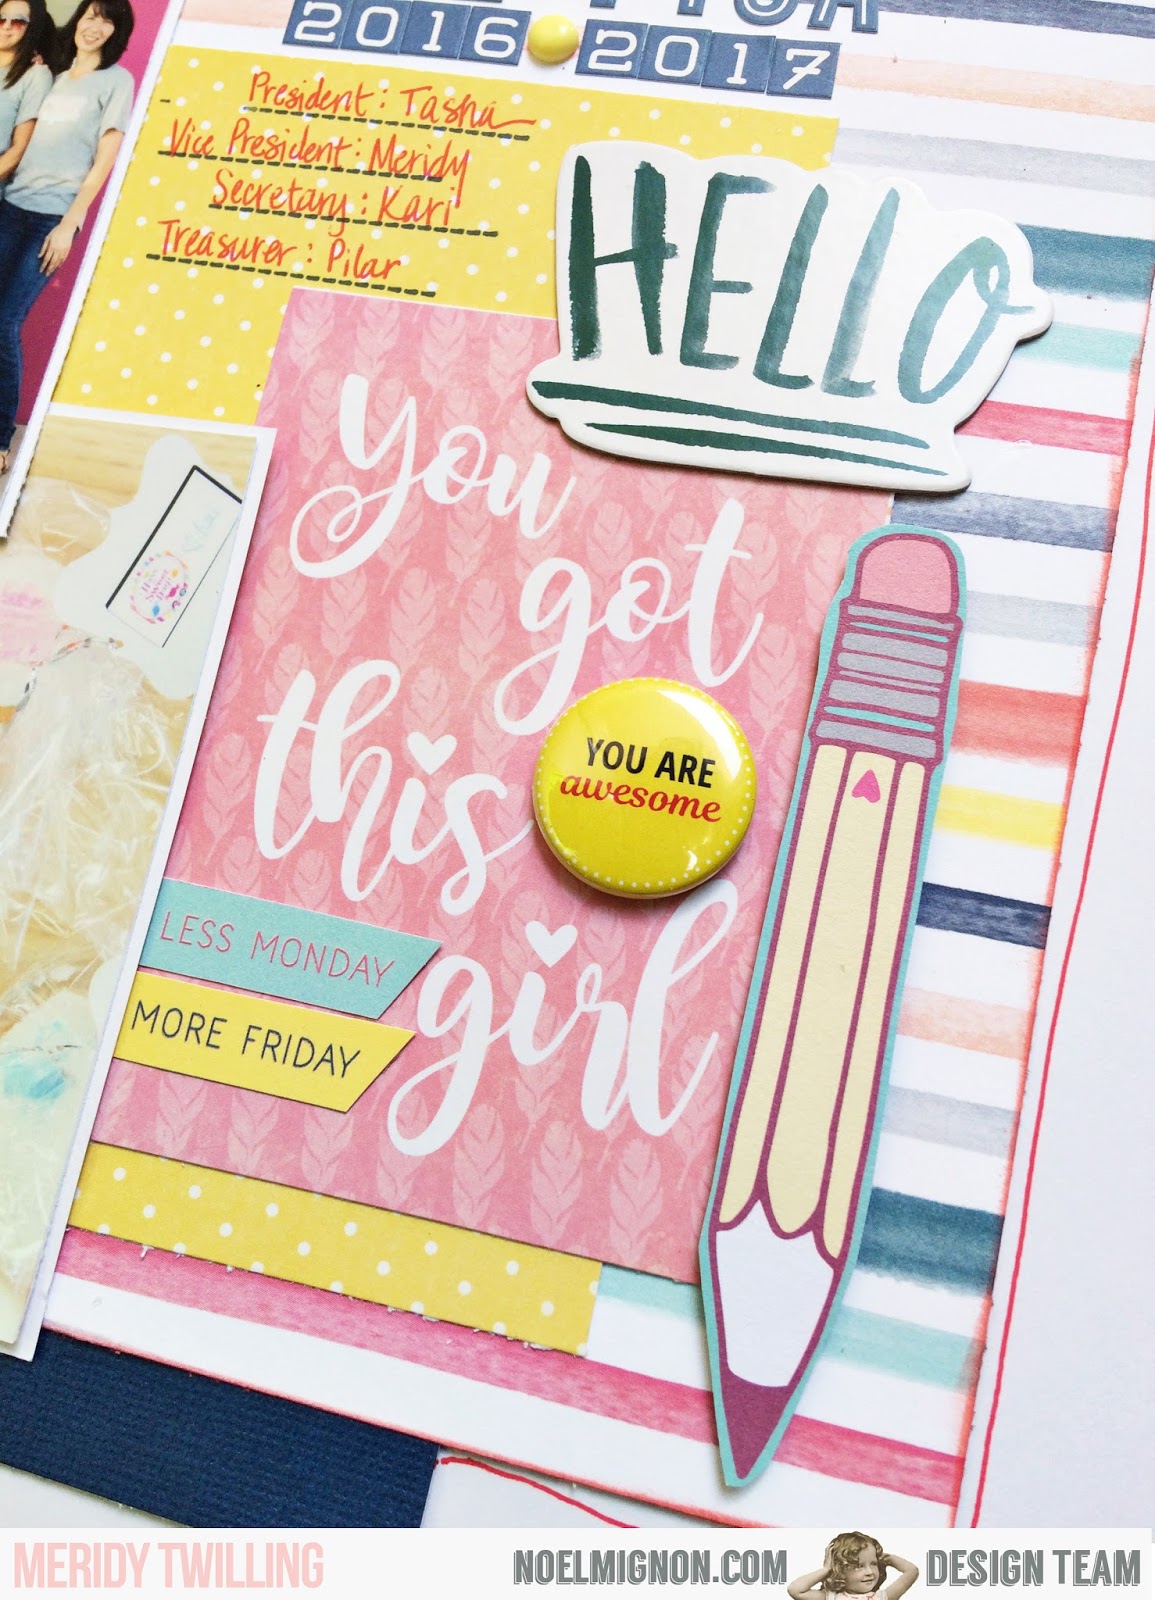
{CWE PTSA} Layout with the "Spring Fling" Daily Diary Kit

Happy Memorial Day, for those of you living in the USA!  

If you like scrapping patriotic events, Memorial Day parties, 4th of July festivities, or military photos, Noel has a Limited Edition "All Star" Kit.  This is not a monthly kit, but can be purchased separately via this link.  


I wanted to share that beautiful kit, before jumping into my layout for today!

It's Meridy here, I am sharing a 12x12 layout that I created with the "Spring Fling" Daily Diary Kit.  This is the last layout I made with this kit, and I created it using leftover scraps and bits and pieces.

I used a couple of pictures from the beginning of last school year, I paired them with coordinating patterned papers from the Daily Diary Kit and the paper add on pack.  Since I didn't have very many papers left, I used 2 branding strips across the top along with the yellow and white washi from the kit.


After I choose which papers to use, I began to arrange them on the layout, I used the striped paper as the anchor for my design and built up from there.  I used the "Hello" chipboard and the "you got this girl" 3x4 card as sort of a sub title.  I also added some flair from a previous kit, and fussy cut the "less Monday" & "more Friday" from a paper in this month's kit.


I did have to use some alpha stickers from my stash for my "CWE PTSA 2016-2017" title.  They matched the rest of the layout really well, so I decided to use them.  There was a cute 4x6 card with pencils in this month's kit.  I wanted to use it on this layout, but I was running out of room, so I decided to fussy cut the pencils from the card, pop them up with pop dots, and use them as embellishments!  I love how they turned out.


Thank you so much for stopping by today!  Have a great week.  See you next week where I'll be using the "Dive In" kit!


Monday, May 22, 2017

{Live Wild and Free} with the "Spring Fling" Daily Diary Kit

Hello friends!  It's Meridy here, working with the "Spring Fling" Daily Diary kit and the 12x12 paper add on.  This week the design team is featuring EMBELLISHMENTS on our layouts.  We are trying to use quite a few embellishments from Noel Mignon kits on our layouts.  I typically love using embellishments, so this was right up my alley!

I decided to scrap some photos of my kids at the splash pad last summer.  I love the navy color that is so trendy right now.  It looks excellent, and really pops when paired with soft, bright colors, like the salmon, yellow, and white on this layout.


First, I matted my photos into a strip, and placed them approximately where I wanted them to go on the layout.  Next, I began embellishing.  The first "embellishment" I made, was punched hexagons from the patterned papers.  I using those hexagons as the base for my layout.  I punched them in 2 different sizes, and placed them randomly across the layout until it looked balanced to me.

My next step was to add the title.  I used the chipboard that came in the Daily Diary kit.  The word "LIVE" kind of got lost on the white background paper, so I decided to mat it on some navy cardstock.  After I did that, it really popped!!!

I embellished the title with a yellow chipboard heart and a few enamel dots that I had left over from an older Noel Mignon kit.  The color scheme matched perfectly.


I added a wood veneer embellishment and a few more enamel dots to the upper right side of the layout, to balance out that area, and add a little interest to those few hexagons.
  

Finally, I decided to embellish my strip of photos a bit, I used some of the yellow washi tape that came in this month's kit, a few stamps that I had in my stash, and again, some enamel dots.


That wraps up my layout for today.  Thank you for stopping by.  Have a great week :)


Monday, March 6, 2017

{Adorably Dopey} Layout with the "Delightful" Daily Diary Kit

Hello NM fans, it's Meridy here!  Welcome to a week of "Delightful Layers" in honor of the "Delightful" Kits this month.  This week the design team is going to wow you with lots and lots of layering in our projects.  Before I share my project, I wanted to share a link to my unboxing video of the Daily Diary "Delightful" Kit.


As you can see, there are amazing products in this month's Daily Diary kit (as always).  There are still a couple of more kits in the store today too.

I have been working with this kit all weekend, and have created so much!  When I work with the Daily Diary kit, I usually order a paper add on kit, and this way I get the 20 12x12 papers that come in the Classic Kit as well.  I love creating 12x12 layouts with the Daily Diary kit. My favorite layout that I created with the "Delightful" Daily Diary Kit  is called "Adorably Dopey".  The photos I used are from a trip we took to Disneyland last month.


I started this layout by choosing papers and project life cards that coordinated with my son's Dopey outfit.  The bright greenish yellow, light blue, purple, and grey colors in the kit matched the photos perfectly!  

Next, I started building up my layers.  To make the 3x4 and 4x6 cards stretch a little more, I often trim off the portion that is layered under something else.  Then I can use that trimmed off piece on another area of the layout.  Although it looks like I used 10 different 3x4 cards, I actually only used 4 and trimmed them into small pieces.


After I got the main pieces in place, I needed to embellish. I fussy cut a few of the Pebbles cut apart 3x4 cards.  There were 2 cards with great cross sections of a tree and cute flowers and sayings, so I KNEW I had to use them with these photos with the tree in the background.  One of the cards read "together is my favorite place to be", but that quote didn't really go with my layout, so I altered it!  I cut the words "TO BE" off of the bottom, I covered the "together" with some mini alphas from my stash to spell out "Disneyland".  So now, that embellishment reads "Disneyland is my favorite place".  What a perfect subtitle to my main title "Adorably Dopey" that I created with a few letter stickers from my stash as well.  

3x4 card "Before" I altered it.


Next, I used the bottom half of that fussy cut tree cross section to embellish the top right hand side of my layout, I made sure to cover the "To Be" that was printed on it with some other embellishments---it's hiding under the blue cardstock flag.


I inked the edges of all of the layers with grey ink, to make them pop a little.  I used some foam tape to raise a few of the embellishments up and add some more dimension.  I also fussy cut another 3x4 Pebbles tag to place at the bottom of my layout, but I left this sentiment alone and didn't alter it. 


That wraps up my layout full of layers for this week.  I hope you got some ideas about how to alter something to make it work for what you need, and some tips on making smaller pieces stretch even further.  I do both of these things pretty often in my scrapbooking.

  Stop by all week to see more "Delightful Layers" on projects.  Bye!


Monday, February 27, 2017

{Valentine's Preparations} with the "Happy Together" Classic Kit

Hello all!  It's Meridy here today to share one last layout with the "Happy Together" Classic Kit.  I decided to scrap one more set of Valentine's pictures with this kit.

The bright colors in the papers in this kit really pulled in the colors from the photos I had of my kids creating their Valentine's cards for their classmates.


I started with the colorful background paper, and really wanted it to stand out on the layout, but it was a little too busy for my photos, so instead I decided to use it to mat my entire layout.  Next, I layered up a few other patterned papers and cardstock to build up my photos and make them stand out.  I wanted to use those cute banner stickers from the Pebbles sticker sheet, but they were not large enough to fit all of my journaling.  Instead I placed the banner stickers on the background, and built up some white strips of paper that were a little longer than the banner stickers and added my journaling to those.


I used both alphabets from the "Happy Together" Classic Kit to create my title.  I also added a few of the Pebbles stickers and puffy stickers to embellish my title a bit.  Finally, I outlined most of the layers and stickers with a thin black marker to make them really "pop".


Thank you so much for stopping by today!  I would love to see what you made with your "Happy Together" kits!


Tuesday, January 31, 2017

Cards, cards, cards with the Little Bird Classic Kit

Hey everyone!  I hope your week is going well.  Nicole here to share some cards I put together with the Little Bird Classic Kit.  I received in my kit the cork "Happy Birthday" and "Thank you" so I saved those for my sentiments. I LOVE making cards from the bits and pieces of kits.  I honestly could have made about 10 cards from all the wonderful product left, but stopped myself at four.  I always love having cards on hand especially thank you and happy birthday cards.

You'll notice I use layers and LOTS of foam adhesive when I make cards.  I rarely mail any of these out and they tend to be tied to packages or slipped into an envelope to hand deliver.  Because of this they get plenty bulky, the bulkier the better in my opinion.  ;)

This one I paired a die cut, some fussy cutting, ribbon flowers, and the wreath stamp to frame my sentiment.


The little teal pearls are from my stash.

I started this card base with a square punch to add in some of the different pattern papers from the kit.  More fussy cut leaves, ribbon flowers, and the vellum pocket under/around the sentiment.  


teal pearls, tag, and seam binding from my stash


The Happy Birthday cork I used a white gel pen to trace over the sentiment to help it stand out against the black.  Everything on this card besides the baker's twine is from the kit. 


My last card uses the stamp set from the kit.  I started by stamping the wreath with StazOn onto a piece of vellum.  I then used a watercolor brush to add color to the vellum.  

The watercolor puddles up a bit on top but eventually soaks into the vellum.   

I trimmed around the outside, stamped the sentiment, and attached to my card. 

I started my base by adding ink over the stencil and then layered my pattern paper strips on top.  I fussy cut butterflies and added them with foam.  As a final touch of color I added washi tape along the top and bottom.  


There you have it four cards to add to my card stash.  Do you use up the odds and ends of your kit up with any card making?  Share if you do over on the Facebook page, we would love to see.  

Thanks for stopping over here on the blog today.  Happy Scrapping! :)