Spring sports are in full swing at my house...and it's going to be a busy couple of months! I love documenting these memories because it's so much fun to look back and see how my kids have changed over the years!
The You Go Girl Classic Kit was fun and springy and brought a bit of whimsy to my page! I absolutely *love* those Pretty Little Studio black alphas...need more of those for sure!!!
Showing posts with label You Go Girl Classic Kit. Show all posts
Wednesday, April 25, 2018
Thursday, March 29, 2018
It's a great life
How are y'all doing today?
This will be my last post for a while...life necessitates that I cut back on scrapping for a little while but hopefully in the not-too-distant future maybe I will be able to do more again. With 4 kids things can get a little hectic. I don't know how I managed years ago to take on multiple design teams and actually get everything done!
I think that maybe it's because the kids were tiny and there was this thing called nap time when I could get some things done everyday. ☺
Anyway, I've used both You Go Girl kits from this month to create this layout below:
Thank you for stopping by Noel Mignon today ♥
This will be my last post for a while...life necessitates that I cut back on scrapping for a little while but hopefully in the not-too-distant future maybe I will be able to do more again. With 4 kids things can get a little hectic. I don't know how I managed years ago to take on multiple design teams and actually get everything done!
I think that maybe it's because the kids were tiny and there was this thing called nap time when I could get some things done everyday. ☺
Anyway, I've used both You Go Girl kits from this month to create this layout below:
I started with a white cardstock base like I do a lot of the time and added some spray mist in pink hues to match my girls' shirts and then added the cute x's and o's diecut mat. I layered some patterned paper, Simple Stories little squares of paper and a journaling spot from the Elle's Studio calendar cards.
The pale pink heart was cut from another calendar card from the Daily Diary kit. I added some washi and stickers to the card with the green box at the top.
One of my favorite parts of these March kits was the cute icons like these adorable girls, pretzels, flowers and sunshines. SO fun!
Thank you for stopping by Noel Mignon today ♥
Stay tuned every day for more creations with the You Go Girl kits and soon the design team will share some projects with the beautiful new Vintage Spring kits. As always, check out the store to see what other things you might like to have to go along with your kits.
Wednesday, March 28, 2018
Disney pages // You Go Girl Classic Kit
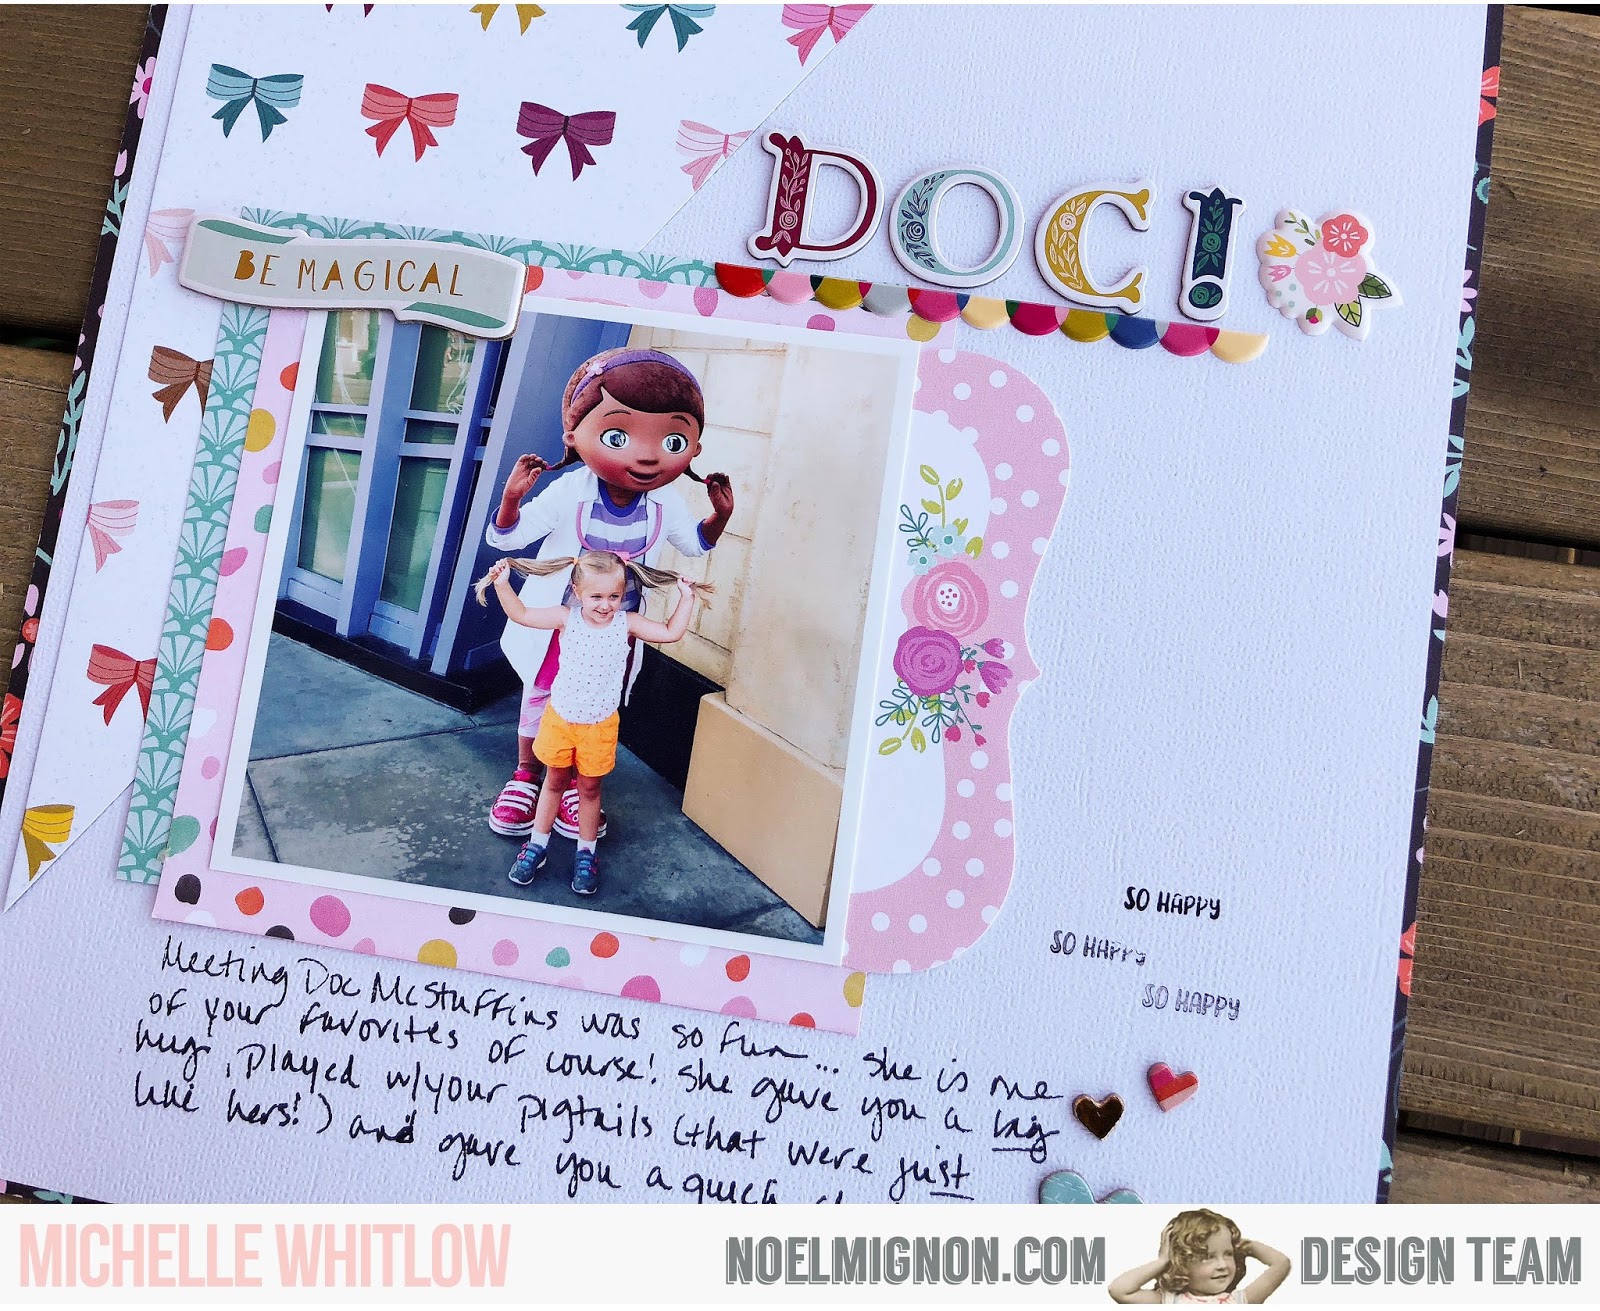
This week I was inspired to create some Disney pages after seeing what fellow DT member Meridy was creating with the You Go Girl kits. I have 2 pages to share today. The first is from my last trip to Disneyland last November. My son & I went for the 5k and even though we were only there for a few days we had so much fun. I mean, it's Disney! How could you not have fun, right?!
Most of my pages were created with the You Go Girl Classic Kit. Although I did use a few elements from the Daily Diary Kit. "The Best Thing" paper was actually the packaging from the Pretty Little Studio alphas. The "happiness" tag was from one of the 4x4 journaling cards that I cut down.
My second layout is actually 9x12 since that is the size album I'm using for that trip...I thought I'd mix things up a bit and deviate from the standard 12x12 size. I love this size when you're working with just 1 photo, it's much easier to manage.
Most of my pages were created with the You Go Girl Classic Kit. Although I did use a few elements from the Daily Diary Kit. "The Best Thing" paper was actually the packaging from the Pretty Little Studio alphas. The "happiness" tag was from one of the 4x4 journaling cards that I cut down.
My second layout is actually 9x12 since that is the size album I'm using for that trip...I thought I'd mix things up a bit and deviate from the standard 12x12 size. I love this size when you're working with just 1 photo, it's much easier to manage.
Monday, March 26, 2018
{Disneyland Day 2} with the "You Go Girl" Classic Kit
Hello friends, it's finally SPRING!!!! And I'm super excited to get BOTH of the "Vintage Spring" Kits next month. If you have not seen them yet, you should go check them out. Until then, I have one more layout to share with you using the "You Go Girl" Classic Kit. I really enjoyed scrapping quite a few Disneyland layouts with this kit, and the layout I'm sharing today is no exception...
I started with the frame background paper, built up my layers for my photo mat and then started adding scraps of paper, chipoard stickers, and pieces of washi tape in the frames to fill them up.
Once I felt like the background was complete, I went to work adding my title "California Adventure" with the beautiful Thickers that came in this month's kit.
Next, I worked on an embellishment cluster for the top right hand side of the layout to balance out the title area. I used chipboard stickers, ephemera die cuts, the double sided tassles, and a flower for this embellishment cluster. I added the subtitle "Day #2" in the same Thickers I used for the main title.
And that wraps up my layout for today! Thank you so much for stopping by. Have a great week.
Wednesday, March 21, 2018
Sweet Moments
Hey all! I'm here with another layout using the You Go Girl kits. This week I'm combining elements from the Classic and Daily Diary Kits...something I always love to do!
The background paper is from the Classic Kit and all of the embellishments are from the Daily Diary Kit. There were lots of fun little die cut shapes and embellishments to choose from!
The stamp is from the classic kit and helped fill in that space to the right of my photo. Tip: The words on this roller stamp are very small so be sure to lightly tap on your stamp pad and test on a scratch piece of paper.
The background paper is from the Classic Kit and all of the embellishments are from the Daily Diary Kit. There were lots of fun little die cut shapes and embellishments to choose from!
The stamp is from the classic kit and helped fill in that space to the right of my photo. Tip: The words on this roller stamp are very small so be sure to lightly tap on your stamp pad and test on a scratch piece of paper.
Tuesday, March 20, 2018
Unicorns Exist with the You Go Girl Classic Kit
Happy Tuesday! I have really enjoyed creating with this months kit and have made quite a few fun projects. I decided though to make an actual scrapbook page this week. A few of the products in the kit reminded me of a few cakes I have made lately at my new job and I thought it would be fun to document the trend of unicorns that seems to be making an appearance everywhere.
I started with my title. I used a combination of chipboard stickers and a Silhouette machine cut. I then backed this with pattern paper and a tag.
I then started layering my photos and pattern paper strips on the bottom. Placing a few bits of washi tape down and tucked in the date.
Once I had placed all my elements I began to embellish with rubons, chipboard stickers, and a rhinestone brad to dot the "i" in my title.
I decided the left hand side needed something so I took a couple of pattern papers and placed them along the side and topped the corner with an old photo corner from my stash.
I love how all the colors and supplies work in this months kit and it was fun to use a feminine color palette. What are you making with this months kit? Be sure to share with us over on the Noel Mignon Member Facebook group.
Happy Crafting!
I started with my title. I used a combination of chipboard stickers and a Silhouette machine cut. I then backed this with pattern paper and a tag.
I then started layering my photos and pattern paper strips on the bottom. Placing a few bits of washi tape down and tucked in the date.
Once I had placed all my elements I began to embellish with rubons, chipboard stickers, and a rhinestone brad to dot the "i" in my title.
I decided the left hand side needed something so I took a couple of pattern papers and placed them along the side and topped the corner with an old photo corner from my stash.
I love how all the colors and supplies work in this months kit and it was fun to use a feminine color palette. What are you making with this months kit? Be sure to share with us over on the Noel Mignon Member Facebook group.
Happy Crafting!
Monday, March 19, 2018
{Meeting Belle} Layout with the "You Go Girl" Classic Kit
Hello, it's Meridy here, and I have another Disney layout to share with you using the "You Go Girl" Classic Kit. I loved the butterfly paper that came in the kit, and I immediately knew I wanted to fussy cut the butterflies from the paper. So that's what I did for today's layout.
I popped the butterfly wing up with small pop dots to add dimention. Naturally, the butterflies are the focal point of ths layout but I also used a couple of layers layered some cardstock with packaging from the embellishments. I used a piece of the gold washi to seperate the patterned paper on the top portion of the layout from the bottom portion of cardstock.
I stamped the journaling lines right onto the layout and added a few phrase stickers around the photo.
I created my title with a stamped tag I made and the mini alphabet stickers from last month's kit. I used some stickers and a small strip of the bow washi from the kit to embellish my title.
The layout itself is really fairly simple, since the butterflies add such a punch. Thank you so much for stopping by!!!
Wednesday, March 14, 2018
Fill, Pour, Repeat
Hey guys, happy Pi day :) This week I got a bit more creative with my layout. I found this pics of my daughter in the tub, doing what she always did with cups...filling them up, pouring them out, on repeat over and over and over again :)
I wanted to create movement with my page so I started with my photos. I would have preferred to have square photos but the nature of the images just didn't allow for cropping them that way so I rolled with it. Then I just started placing all of my embellishments around them, creating a circle. I adhered everything down except for the photos, added some messy circular stitching, then adhered my photos and a few more stickers.
There are so many fun embellishments with this month's You Go Girl kits with the die-cut shaped, chipboard stickers, & puffy stickers. Not to mention those aqua alphas that are reminiscent of the old October Afternoon alphas that I used to love so much!
Tuesday, March 13, 2018
Photo Booth Props with the You Go Girl Classic Kit
Hey all! I am back with another project this week. I last minute had to make photo booth props for our upcoming girls night at church. I again decided to reach for this months kit. It has the perfect mix of girly color scheme and fun embellishments.
I put my Silhouette to work and cut out the base of all the props. I then went through and looked through the different embellishments to decorate each one.
The mustache and crown are cut from glitter paper from my stash. The crown I embellished with washi tape and gemstone brads.
The exclamation speech bubble: topped with the chipboard words and hearts and outlined with the distressed marker.
Hat: embellished with a prima flower and a puffy sticker.
Glasses: pearl rhinestones
Speech bubble: outlined the perimeter with washi tape and topped it with a chipboard sticker and rubon.
Mask: outlined with the distress marker and embellished with chipboard stickers.
Bow tie: Embellished the middle with chipboard stickers.
The props I placed in a mason jar where I added ribbon from last months kit and the camera die cut to around the top.
These turned out to be a little more time consuming than I originally planned, but only because I was torn with what paper to use for each prop. I love the way these all came together and I know they are going to make some really fun props for later this week.
Thanks for stopping by! Happy Scrapping :)
Monday, March 12, 2018
{Tasty Treats} with the "You Go Girl" Classic Kit
Hello Friends! It's Monday, so it's Meridy here. I have been working with my "You Go Girl" Classic Kit this month, and I have been working on my Disneyland album. Today's layout is another one for that album. I just love how great the colors in this kit work with my Disneyland photos...
I really like the bright diagonal patterned paper in this kit, but once I pulled my photo it looked too busy for the background, so instead I used it as a mat for my layout...the result was a perfect hint of the bright diagonal paper, without being overwhelming.
I thought that the pretzel paper was an amazing addition to the layers on this page, since we LOVE the Mickey pretzels in Disneyland, and I even mention them in my journaling. After I layered various scraps of patterned paper beneath my photo, I started adding embellishments that went with the food theme of the page.
The Thickers in this month's kit are so super cute. I really like the font and the variety of colors, so I used them, along with some letter stickers I had leftover from last month's kit to create my "Tasty Treats" title.
I finished off the page by adding my journaling right on the page and a small embellishment cluster on the top left of the layout. I added the trim from my stash to add a little texture to the page. I would love to see what you create with your Noel Mignon kit on Instagram #NoelMignon. Have a great week!!!
Thursday, March 8, 2018
Selfies from a silly 6 year old
It's a beautiful spring-like day and I'm happy to share my first layout with the You Go Girl kits from this month. I got both kits because they are so cute, and plan to mix and match items from both kits on my projects. This page, though, uses only product from the Classic kit.
Do your kids ever leave funny selfies on your phone?
I was moving pics from my phone to the computer and found these pics of my youngest daughter (along with about ten more pictures) and decided to use them for this page. The little camera and smile! chipboard went perfectly with the theme of my page.
Do your kids ever leave funny selfies on your phone?
I was moving pics from my phone to the computer and found these pics of my youngest daughter (along with about ten more pictures) and decided to use them for this page. The little camera and smile! chipboard went perfectly with the theme of my page.
It's been a bit of a crazy week and the west Texas wind lately has given me headaches. Truth be told, I made this layout late last night and decided to keep things quick and easy.
Sometimes that is the best, though, to allow the photographs to take center stage.
I used some strips of patterned paper along with some Pink Paislee washi tape strips.
I drew some lines with the nozzle of my spray mist to create a spot for hand journaling.
I finished off the page with lots of Simple Stories stickers and a mixed-alpha title using the chipboard Thickers and blue alphas from the You Go Girl Classic kit.
I thought the little pink sunglasses were so cute and liked how they looked right on one of the pics of my silly girl ☺
Have a fantastic day!
Subscribe to:
Posts (Atom)