Showing posts with label 3x4 project life cards. Show all posts

Tuesday, October 10, 2017

Fall Banner with the Apple Crisp Daily Diary Kit

Fall y'all!  I love, love, love fall.  This year I am a little sad since I am usually crazy decorating our house for the upcoming holidays and this year my living room is full of boxes.  To make myself a little happier as moving day is quickly coming I bought a few little pumpkins and whipped up this little fall banner with the Apple Crisp Daily Diary Kit.


I used foam adhesive to place the large die cut letters on the Becky Higgins Project Life cards.  To add a little more color I added some teal ink around the edges of the cards.


I then cut tabs from the Echo Park pattern paper and stapled them to the top of each card.  

I strung them on the yellow Maya Road twine and hung it off the pumpkin stems since I have already taken down on the hooks from my mantle.  I am so happy with this cute little banner and the decorator inside of me is incredible happy to have a little color added to my mantle for the last time.  

And for a real life look here is a snap of my current mess.  ;)  

Crafting can be such a nice break!  Hope you are all enjoying a little craftiness in your own neck of the woods.  Thanks for stopping by the blog today.  


Monday, September 25, 2017

{My Boys} with the "Study Guide" Kits

Hello, it's Meridy here today.  I have one more "first day of school" layout to share with you using the "Study Guide" Daily Diary Kit and paper add on.  This layout is a bit more masculine, since it's starring my "boys".  


I really love the 3x4 cards that come in the Daily Diary kits, they are perfect for adding lots of layers, colors, and patterns to my layouts.


I also LOVE that all of the Noel Mignon kits are so versatile, I used a couple of tags from past kits to add a little more embellishment to this layout.  Instead of doing a multi color title, I decided to use all of the same color navy Thickers from the kit for my title on this layout.  I thought the navy color really worked with the colors in this masculine layout.  


That wraps up my layout for today!  Thank you so much for stopping by.  Have a great week!


Monday, September 4, 2017

{First Day of Jr. High} with the "Study Guide" Kit

Hello friends, it's Meridy here today with my first layout using the "Study Guide" Daily Diary Kit and paper add-on.  In 1 1/2 weeks my kids will already be done with their first quarter of this school year!  We started school in mid-July, so I already have my "back to school" photos from this year printed.  They worked great with this month's kit, and I decided to make a double page layout...


I started by choosing some pictures of my daughter and some of my favorite Daily Diary cards from the kit, and built my layout around those.  I choose papers that pulled in colors from both the photos and the cards.  


After I got the base of the layout in place, I decided to add some "notebook" punched navy strips of paper and washi from the kit across the bottom of the layout to ground it.


I started pulling embellishments that worked with the daily diary cards, and that's when I KNEW I would use the great multicolored Thickers on the layout for my title.  

I stamped some red triangles near the title and used the mini alpha stickers that came in last month's kit to spell "first day of" on my title.  I added a cute paper clip tag and a die cut to finish off the title area.


Next, I embellished the other card, added the date, added a journaling card, and one of the flowers from the kit.


I thought the layout still needed something to draw your eye towards the top, so that's when I pulled out my star punch and grabbed scraps in various colors.  I decided to line the stars up right across the top of the pink cardstock background layer.  But there was still something missing, so that's when I pulled out the sewing machine and machine stitched right across the row of stars.  I also sewed around the entire layout with a subtle light mint green thread.  It added just a little bit of texture, without overwhelming the layout.


And that wrapped up my layout for this week.  Thank you for stopping by!


Monday, May 15, 2017

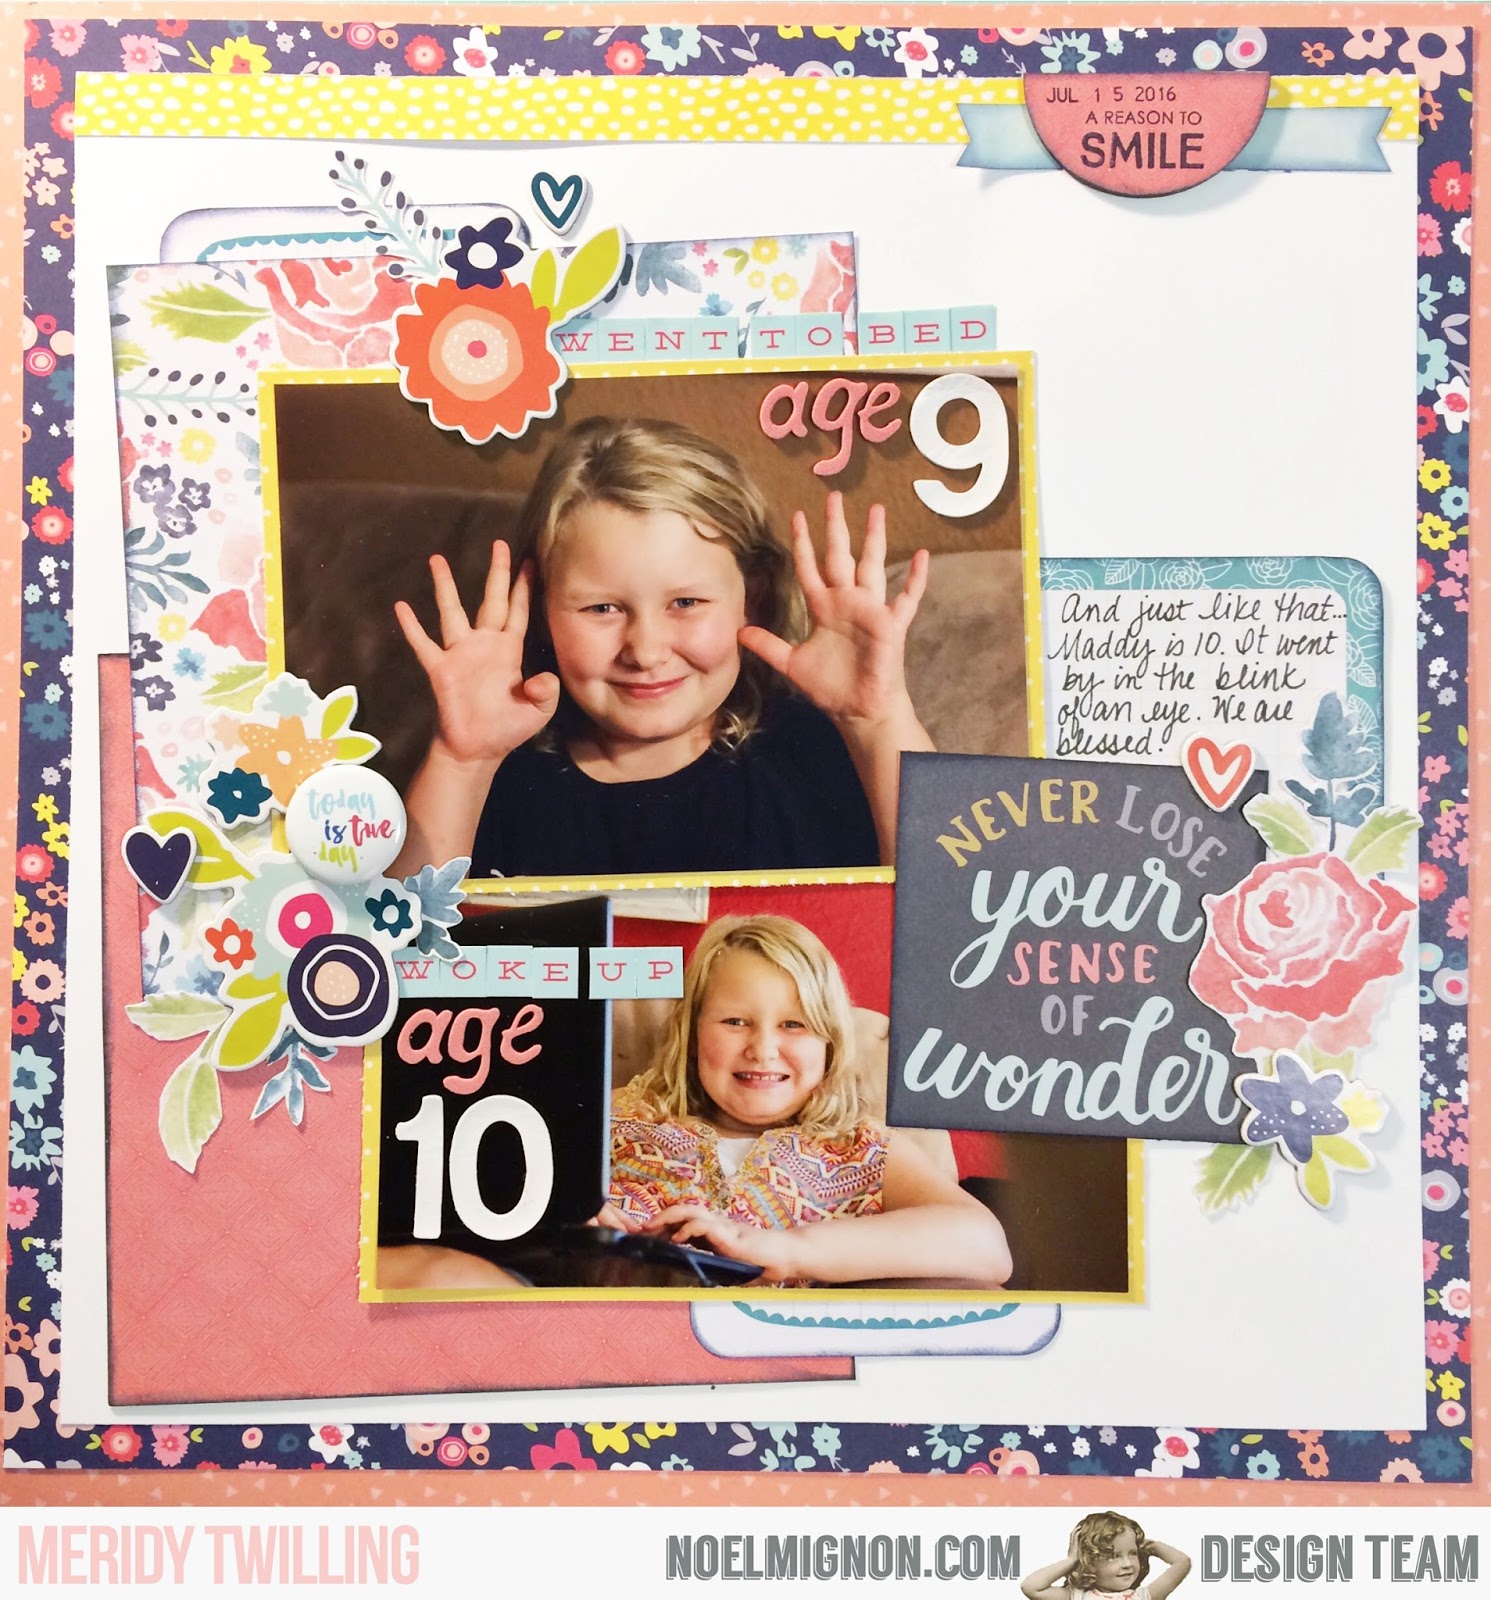
{Went to Bed Age 9...} Layout with the Spring Fling Daily Diary Kit

Hello friends!  First off, I wanted to remind everyone that subscriptions for July-December 2017 are only open through today, so if you would like to sign up to sub to Noel Mignon kits, today is your last chance to do that for another 6 months.  


And now for my layout using the Spring Fling Daily Diary Kit and the 12x12 paper add on.  I really love the color schemes in the products this month.  I am really excited about all of the navy in the various paper lines lately, so the navy floral paper is the foundation of today's layout. 


I had a lot of fun fussy cutting floral elements from papers in this month's kit.  I mixed those cuts with a few of the chipboard stickers, and a flair button, to build up my embellishment clusters.


I also used a few different 3x4 project life cards to add more layers to the layout.  Once I mixed in a couple of Thickers from my stash, I was able to use some of the mini letter stickers to finish off my titles.  I covered one of the wood veneer half circles with paper and stamped a few sentiments on it before placing  it on the top right of my layout. Finally, I added a little bit of journaling to the journaling card on the right hand side of my layout. 


That wraps up my layout share for today! Thank you for stopping by.


Monday, May 8, 2017

{Spring Fling} with the "Spring Fling" Daily Diary Kit

Hello, friends!  It's Meridy here.  In honor of our "Spring Fling" Kits this month, the design team is creating layouts of spring flings, fairs, carnivals, or amusement parks.  I would like to share a double page layout.  I am using the Daily Diary kit and a 12x12 paper add on kit to create my layout today.


I started off my layout by cutting strips of some of the 12x12 papers as well as some of the 6x6 papers from the Daily Diary kit into 6"x 2" rectangles to go across the top of my layout.  Next, I used a polka dot stamp to add the "waterfall" of polka dots across the middle of the layout.  Next, I added a strip of the yellow washi from the kit and one of the branding strips to finish off the seam across the middle of the page. Then it was time for me to add my photos. 

Since I only had 2 photos of my daughter, but 5 of my son, I decided to add the title and journaling to the side of the layout with my daughter's photos.


I grabbed some of the 3x4 cards, painted the wood veneer yellow, used a Thicker "love" sticker from the kit to embellish this side of the page.  I also pulled a couple of heart embellishments from a previous Noel Mignon kit to dress up this page a bit more.


Since I had so many photos of my son, I didn't add too many other things on this side of the layout.


A few embellishments to match those on the opposite side of the layout was all I needed to complete this half.  I cut the hot air balloon from one of the cut apart patterned papers from the kit and popped it up with pop dots.


I love all of the beautiful papers in this month's kit and was happy to have them be a prominent feature on my layout this week!  Thank you for stopping by!


Monday, May 1, 2017

{Girl Scouts} Layout with the "Spring Fling" Daily Diary Kit

Happy May!!! I can't believe it's already May!  This year has just flown by, and with spring in full swing, I'm so excited to be working the the May Daily Diary "Spring Fling" kit .  The kit is just filled with bright colors and cute embellishments.  Perfect for all types of layouts and photos.

Here is what is included in the kit.


I used the paper add on in addition to the Daily Diary kit, since I LOVE working with 12x12 layouts.  This week I'm sharing a layout of my daughter on her first day of Gril Scouts for the 2016-2017 school year.  I take a photo of her in her uniform at the beginning of each school year. 


I loved the water colored patterned paper that came in the paper add on, and used it as my background paper.  It had so many pretty colors, and coordinated well with all of the 3x4 and 4x6 cards I wanted to use on the layout.

After loosely placing my photos, I started adding the 3x4 and 4x6 cards.  I left the cards sticking out from under the photos to create lots of layers.  Once all of that was in place, I adhered it to the page.   I don't put tape all the way to the edges of the layers, this way I can slip bits and pieces of tags and embellishments under the layers easily.  

I started building up embellishments on the bottom right and bottom left of the layout.  The title area of my layout is my favorite part.  I did have to pull some green Thickers from my stash to spell "Girl Scouts", and paired that with a chipboard sticker, a few puffy stickers, and a cut apart quote, all of which are from the kit.  


I really liked the sprig of flowers that came in the kit, so I disassembled the sprig and rearranged three flowers into a "bouquet" for this layout.  I used some baker's twine from an old Noel Mignon kit to keep the bouquet in place and glued it to my layout with Eileen's Tacky Glue.  I like using Tacky Glue to adhere fabrics, silk flowers, wood veneer, and baker's twine to my layouts.  It dries quickly and holds great!  

Next, I added a few puffy stickers around the bouquet, and that finished off the layout.


Thank you so much for stopping by today!  I hope you are having fun with your "Spring Fling" Kits this month!  I would love to see what you make on Instagram #NoelMignon.


Monday, March 27, 2017

Cardmaking with the "Delightful" Daily Diary Kit

Happy Monday!  I'm here today to share a few cards I made with the "Delightful" Daily Dairy Kit.  The kit is so versatile, not only can it be used to make project life pages, but I used it to make a few 12x12 scrapbook layouts, and some cards.

I mainly used the Echo Park "Flora" alphabet sticker sheet and a few of the Becky Higgins 3x4 project life cards from this month's kit to create these greeting cards.  I used a little bit of cardstock from my stash, and a few enamel dots and silk ribbon from a previous Noel Mignon kit.


The cards went together pretty easily, I concentrated on adding layers with stickers and pop dots to create some dimension.  But I kept them pretty clean and simple.


I added some handwriting to the "you are my sunshine" sentiment on the front of this last card.  


Thank you for stopping by today!  I can't wait to see what other projects our design team posts this week.