Showing posts with label Diane Payne. Show all posts

Tuesday, June 25, 2013

The Sweetest


Hi everyone, Diane here with my very last post as a design team member at Noel Mignon! If you've been paying attention you know I like to use banners...A LOT! :) So, I thought it would be fitting to go out with a banner layout and a little tutorial on how you can make your very own paper chain, like the ones you received in the Beach Blvd kit.


Here is how I made my homemade banner:
You can make your banner/paper chain with any shape you want. I decided to make my banner using the Crate Paper hexagon paper (Love!).
 Using the lines on each hexagon, I cut them apart into triangles.
Next, I set my sewing machine at the longest stitch, leaving a long tail, I fed the first pieces under the foot. After it goes all the way through stitch 2-3 more times (or more). The more stitches you leave in between the bigger the gap between each paper piece.
This is how each piece looked when finished. For a little variety, I also added in a couple die cut tags that coordinated with the Crate Paper collection that was included in the Beach Blvd kit.

If you like stitching on your layouts, you can adjust the width and length of your stitches for more variety. This little sample below shows a zig zag stitch done at different widths and lengths on my machine.

Pretty cool, don't you think? Here are a few more ideas for stitching:

  • Use stitching to add a decorative element to corners
  • Stitch on top of a photo
  • Did you know you can stitch over chipboard? Yes you can, just take it slow with your speed
  • Use stitching as a form of adhesive (think transparencies and vellum)

Don't be afraid to experiment with your stitching, test it out on a piece of scrap paper first if you are unsure. If you have any stitching questions, leave a comment here on this post and I'll do my best to answer them.

Thank you so much to Noel and Virginia for having me on the team and to all of you for the friendships and sweet words. It has been a fabulous year!

Tuesday, June 18, 2013

The Terrific 2's

Hi everyone! I'm up with another Beach Blvd layout.


This picture says it all with that look on my daughter's face and me holding her hand back from the candles and cupcake...she's going to be an explorer. I thought it would be fun to showcase the photo with the title "Terrific 2's" instead of "Terrible 2's." 

Here are a few close-ups.


In hindsight, the 2's were terrific. It was fun watching her learn and grow and she really wasn't all that terrible, in fact she was a lover, rather sweet most of the time. :)

All supplies are from the Beach Blvd kit, with the exception of the die cut envelope which is from the February, Lasting Love kit.

Tuesday, June 11, 2013

Love this girl...


It's true...she does puts the "Shine" in sunshine!

For this layout, I paper pieced a sunburst and then placed my photo layered with a tab from the mini album and some embellishments all from the June Beach Blvd kit.

I love this photo of my daughter and I. She is a pro at taking selfies so I just smiled and let her snap a few photos with my iPhone.

Here are a couple close-ups.

All supplies are from the June Beach Blvd kit. It is the perfect summer kit and is available in the shop.

Thanks for stopping by. Have a fabulous day!

Tuesday, May 28, 2013

Joy


I've had a lot of fun working with all the new goodies that were packed into the Country Lane kit. I must admit, I've been hoarding the beautiful yellow Pink Paislee paper all month long. Since I'm down to my last layout of the month I knew I had to use it since I rarely have time to go back to a kit once I start in on a new one.

The yellow rays and black "Today" paper looked great together so I started with those and went searching for a photo. When I found the picture of my daughter running through  a field of wildflowers I knew it would be perfect, especially paired with the Elle's Studio "Pure Joy" stamp which inspired my title.

To add a little texture to my layout, I stitched some of the rays with white thread to add some detailing without taking away from the photo.

The "Pure Joy" tickets were stamped using the Elle's Studio stamp set included in the Country Lane kit.
I typed my journaling on vellum and stamped "this moment documented" directly above the journaling with the included stamp set.
 I topped it off with some stickers and brads.

The Country Lane kit is sold out, but you can pick up the Paper Only kit in the shop and play with some amazing papers.

Thanks for visiting today! I'll be back next week with a project from the brand new June kit, Beach Blvd!

Tuesday, May 14, 2013

Love You to the Stars and Back


Hi everyone! I really love the new Elle's Studio papers in the Country Lane kit this month. They have design elements and/or journaling tags built right into to the design, which is a great starting point and a time saver too.
The chevron design on the left side of this paper, was a great beginning to my layout, I simply selected some coordinating papers and started building my page.
I love the "Love You to the Stars and Back" text paper and used that as inspiration for my title, theme and photo choice.

I used the beautiful gray burlap to create a picture hanger.
I was also able to incorporate the Elle's Studio stamp set again...it was perfect for the theme of my layout.

All the supplies for this layout (with the exception of small bits of gold dot washi tape) are from the Country Lane kit. Unfortunately, it is sold out but you can get your hands on the fabulous papers in this kit by purchasing the Country Lane Paper Only kit.

Thanks for visiting! I hope you have a fabulous day!

Tuesday, May 7, 2013

Homemade Happiness


Hello everyone! I finally got to dig into the May kit, Country Lane. It is gorgeous and was perfect for putting together a layout that celebrates my Mom. She provided her own version of the perfect June Cleaver home. I had a happy childhood with lots of wonderful memories...she is my everyday hero!

I used a candid shot I found of my Mom sweeping out the garage in a dress and apron back in the late 60's with her car in the background. I love how a vintage photo can literally transport you to another era!
 I love the Elle's Studio stamps included in this month's kit. I can see using this one a lot.
To tie into the home (homemade) theme of my layout, I pulled a couple pieces of chipboard homes and home brad from my stash. They complemented Country Lane, so well!
Country Lane is sold out, but you can pick-up the Country Lane Papers Only that were in the May kit.

To all of you mothers out there I hope you have a wonderful Mother's day! What will you be doing to celebrate?

Tuesday, April 30, 2013

He's All Swagger


Hi everyone and happy Tuesday to you! I'm here to share my last Melrose layout today. I LOVED this kit, so much! Are you sick of hearing me say that because I think I've told you every week how much I love it.

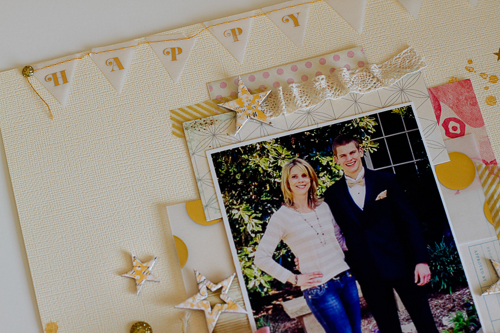
The gold in the Melrose kit was perfect for scrapping a photo of my handsome son all dressed up in his tuxedo for prom with his gold tie. He just looked so grown up too I had to have a photo of the two of us together.
I stuck with a gold/cream color scheme except for the little pops of pink. I figured I could get a way with a little pink since it was a prom page, lol! :)
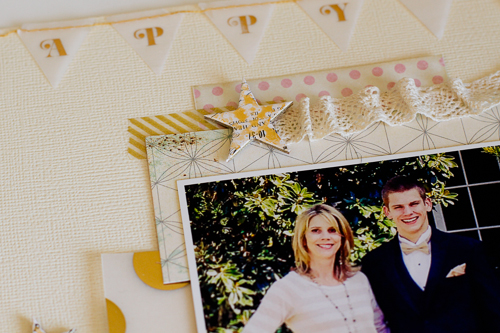
I wanted to include some stars to make it feel a little more masculine didn't have any chipboard stars from the kit left so I substituted some from my stash and splattered them with the Heidi Swapp Gold mist available in the shop.

I also found a cute vellum and gold banner when digging through my stash for some stars that complemented the Melrose kit perfectly so I added it across the top.
I used the prom slogan from the tuxedo rental company for the title of my layout. I felt it was perfect for scrapping teen boys all dressed up. I used those fabulous gold Thickers from the kit and the pink letter stickers are from the Lasting Love kit.

If you have any prom pictures, whether they were taken this year or in years past, the Melrose kit is perfect for any dress/tuxedo combo with the multiple colors and gold accents.

The Melrose kit is sold out, if you missed out on the kit you can pick up the Melrose Paper Only Kit in the shop. Also, don't forget to sign up for a kit subscription so you don't miss out on any future kits!

Thanks for visiting today. I'll see you back here next week with something fun using the brand new Country Lane kit.

Tuesday, April 23, 2013

Joy RIde


Hi everyone! A couple weeks ago my son's wrestling team had their awards banquet. They had a recording breaking season both as a team and individual wrestlers. After recognizing them for a job well done they hit the games. I captured a couple of photos that show their fun but yet competitive side off the mat!

I used Julie's sketch for my layout. I think this one is really versatile, I'm anxious to try some more ideas with the sketch.
I added punched circles in three sizes onto each upper color blocks. I really love what it added to the layout.


 The journaling is tucked behind that photo on the Take Note card.
All supplies come from the Melrose kit, except the piece of wood veneer and the flair. Add some flair to your next Noel Mignon order, it is available in the shop! The Melrose kit is sold out but the Melrose paper only kit is available, if you don't already have it I highly recommend picking it up.


Did you know that kit subscriptions are being taken right now for the next term. You can sign up right here!

Did you also know that if you share the news about kit subscriptions you will be entered for an awesome giveaway? You can read how to enter right here on the blog.

Thanks for visiting! Have a fabulous day!