Showing posts with label Baby Reed. Show all posts

Monday, August 17, 2015

Learning From Daddy

This week, we are celebrating Life Lessons. We'll be bringing you our versions of our life lessons through our layouts, and we very much hope that you will show us yours, over on the Facebook Members page!

Here's mine:


I can't even tell you how happy this photo makes me. I was washing dishes one afternoon, and looked up to see Eric teaching Reed how to water the tiny little patch of grass we have. And it was awesome. Reed was watering like a pro, and you could see how proud of himself he was. Heart. Melted.


You know what else melts my heart? That denim pocket. Lots. So much so that I had to make a 12x12 layout to accommodate it. Now that's love!


Wednesday, August 12, 2015

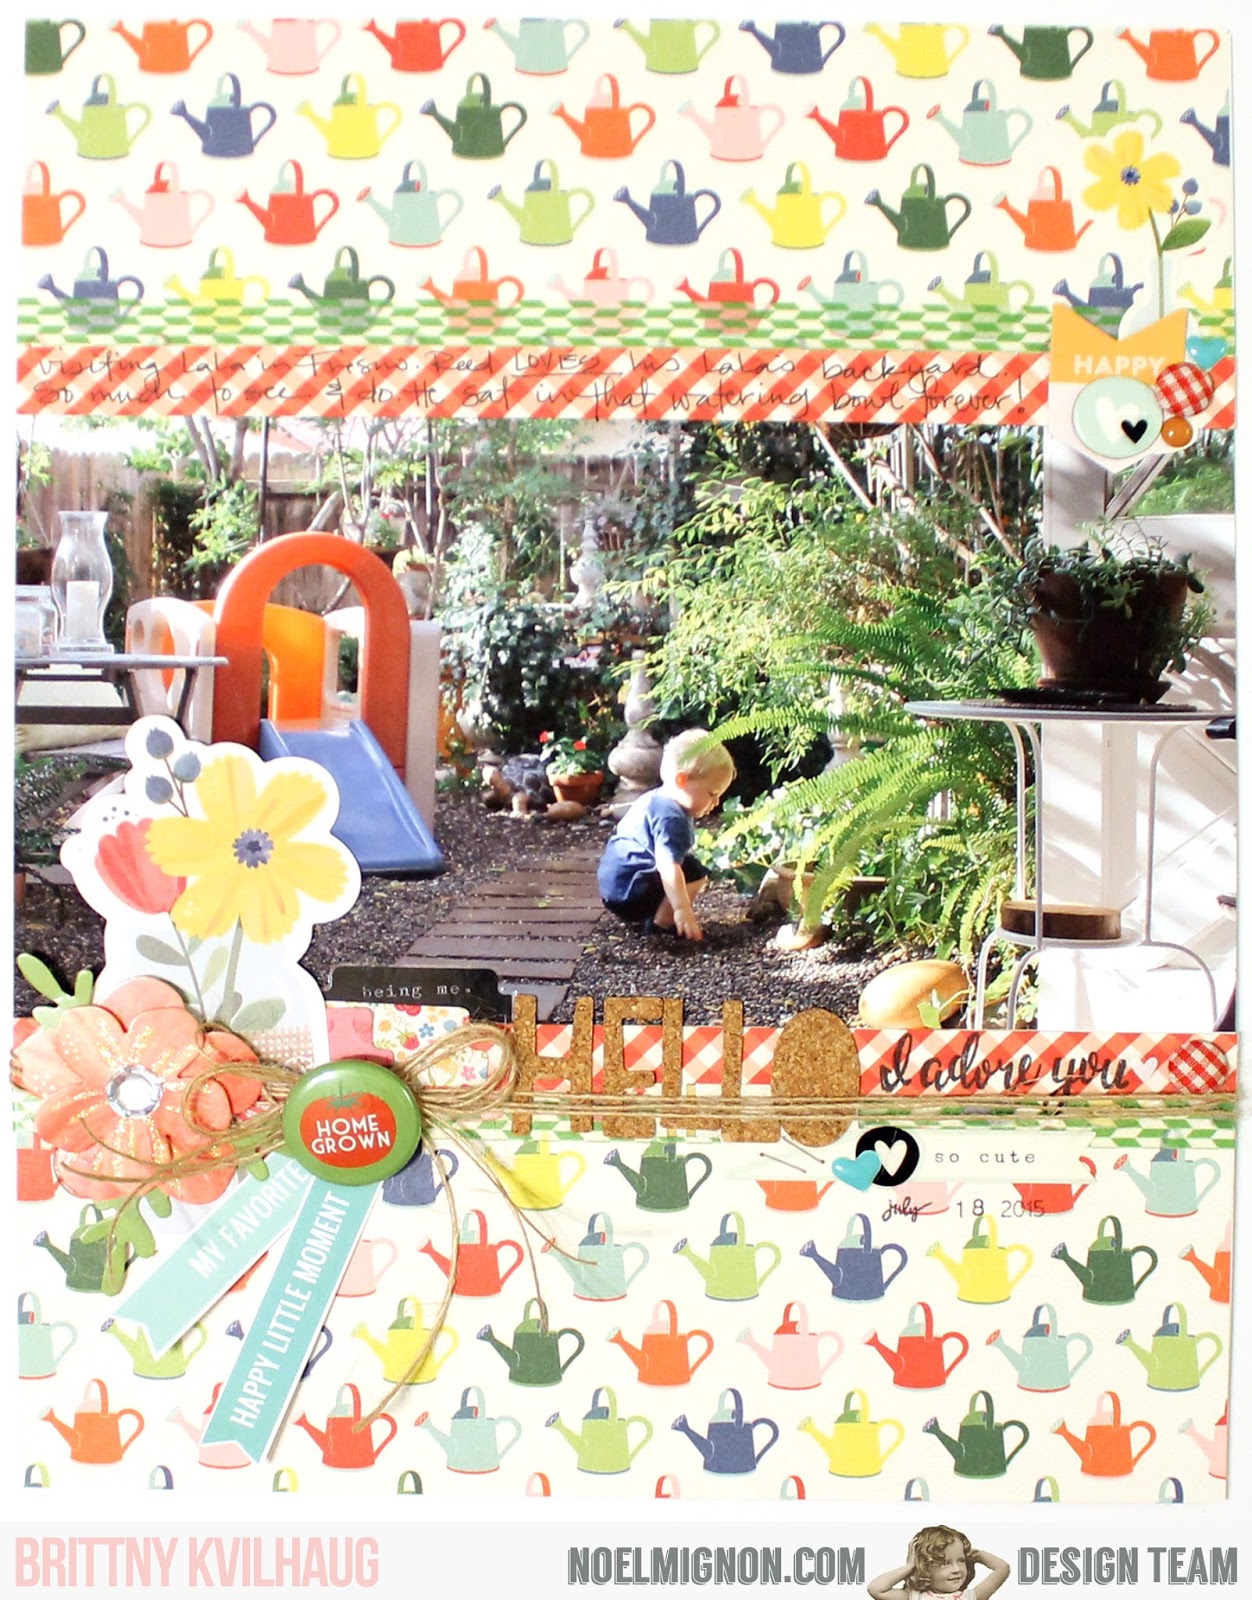
Hello, I Adore You!

Pardon the crappy lighting. I procrastinated myself right into the wee hours this morning. And wow. Does my studio light not flatter anything. Not a thing. Anywhooo....

This Country Life kit is so stinkin' fun to play with! I am not normally a primary color kinda gal, but this is just so fun and cute and wholesome and and and and... I could go on....

We took a trip to see my mom a few weeks ago, and my little guy fell in love with the backyard watering bowls and ponds. Couldn't get that kid back in the house.


But, can I just say that I am loving that 50% photo concept? I printed this right into the center of my 8.5x11 cardstock, and built around it.


I just can't help but cluster all those fun little doodads. The red gingham ones? Swoon!


 Those watering cans. You you just not even handle it? Nomnomnom!!!


And you know what else? Noel put that date stamp in a kit about a thousand years ago, and I use it ALL THE TIME! Probably my very favorite thing in any kit, ever. LOVE!


Friday, August 7, 2015

I'm baaaaaack!

So, did you miss me? Didja, didja? Ha! Did you even know I was gone?

Virginia and I are switching off months this term, and my goodness, after a month off, I am ready to be back! And helllllooooooooo Country Life! You are the adorablest widdle kit everrrrrrrr!! I mean, nomnomnom!

We have had so many good challenges so far this week, and here's mine:

Make your photo 50% of your layout. Doesn't matter which 50, but it needs to take up half the space! And for you Daily Diary makers, you can absolutely participate in this challenge! Use a small sleeve, print a large photo and cut it to fit multiple pockets - sky's the limit!

Here's my take:

 
I printed my photo right onto my page, and then added the patterned paper to the bottom. I love doing this - the big photo just makes me so happy!


I tried to keep the embellies fairly simple this time - just s couple of smaller clusters, some real typing, and a few splatters of Color Shine!

Want a little tip?


Before you start sticking your stickers down, line them up on a ruler in about the style of placement you want. Then, just brush on some baby powder to remove the stickiness. Voila! Placement is a breeze! Now you can move those stickers all over the place, without worrying that they will accidentally stick to the page before you are ready.


I also used the ruler to plan out how wide my title would be - so helpful!

That's all for me today! Head on over to the member's Facebook page to post your challenge layouts in the albums - winner gets a Daily Diary kit of their choice! Woohoo!


Monday, April 20, 2015

My Dog Ate My Homework...

I swear!

Well, no. But I DID have a little accident involving my original page I had planned to post today.

SO my bootay was up bright and early to make you this little page to share a couple of my favorite techniques. Because that's what we're doing here this week - TECHNIQUES! Love these posts!


So here's the page I made at the butt crack of dawn - lol! 


I love using up all my scraps - almost nothing as satisfying for me, where scrapping is concerned. So I grabbed a bunch of leftovers from the Hello Darling and Shine Bright kits, and some of the cute stickers and cut-aparts and just went for it.


I started in the bottom corner, and just applied a little glue runner to the center of each piece of paper to stick them down. Be sure not to get too gluey when you do this, because your sewing machine will revolt! Fill the whole page with scraps of paper, stickers that fit just right, and any ol thing you just love. And don't be afraid to leave a blank spot here or there, if you have a plan for something that might go there later.


 I didn't stitch around every edge, but most of them, and made little leaps with my machine so that I had fewer starts and stops to deal with.


Here's a peek of what I did with one of my pieces - put just enough glue to hold it in place, stitched just one side, and lifted it back up to hide some secret journaling, backed with a few stamps of that Wild Honey Distress Ink Noel included in the kit. And you can see how I added a strip of chipboard in my open space, with a line of dots above it, created by the stamp from the kit. Don't be afraid to ink just part of the stamp to make it fit the area you have to work with.


And of course I couldn't help but add some layers to the page. Love those Thickers, and the Craft Market stickers are my new faves!!

Be sure to check in all week for more techniqes from the rest of the team!


Monday, March 16, 2015

Welcome Spring!

Well, we are officially in Spring, y'all! And this week on the blog, we are all going to be celebrating!

I got my new Fuse the very same day I got my Shine Bright kit, and I cannot even tell you how much I have been looking forward to use that little lady in my Daily Diary Album! This month, Michelle and I switched kits, so I got to play with the Classic Kit. And oh em gee is it seriously sweet!


 We R Memory Keeper's new tool, The Fuse, is so awesome. It literally has changed the way I work on my Daily Diary.


The secret is the glass mat. I use one from EK Success, and it really helps to make nice, crisp cuts and joins. And tape. Tape is imperative to keep that slippery little sleeve from sliding around all over the glass.


Here's the layout I made with the Shine Bright Classic kit. And I have to say, I added some of the Simple Stories "I Am" line to the mix - much of which can be found in the Daily Diary kit!


I LOVE the Thickers in the kit - the gold center just makes me giddy! And the 'Snapshot' paper from the Confetti collection is perfect for making pocket card backgrounds!


LOVE LOVE LOVE my typewriter these days! Adding journaling to my pocket cards is so much easier this way, rather than using photoshop and printing onto the card. Plus, it's fun plinking away on that ol machine. Almost as fun as watching my son run around naked with his towel turned turbin, after bathtime.


I grabbed that green "current song on a loop" card from the Love Life Daily Diary kit - I've been saving that one up! But I have to say, the rounded corners threw my whole spread for a loop. Every single other card had square edges, and my OCD brain COULD NOT have just one rounded card. COULD. NOT. I have to round at least two other cards in the spread. Am I the only one who feels that way? PS. I used my Fuse here to create two 3x4 pockets out of the 4x6 pocket. LOVE life so much more now that I have that option! I will never have to buy sleeves again!


 I got some waterfall sleeves in my shipment, so I grabbed a 4x6 sleeve, turned it into two 3x4s, and added my photos and confetti. Once the sleeve was full, I fused it to the top of the 4x6 pocket on the spread.


The Good Morning card is from a past kit, and I just couldn't bring myself to get rid of it. SO glad I had it now! Of course, the downside of using a typewriter is the lack of ctrl+z, so the Simple Stories I Am chipboard sticker came in awfully handy to cover up that little boo boo. Is it wrong how happy that sequins confetti makes me? I also used one of the enamel Bradz, backed with some paper, and a wood veneer in the pocket, too. Love the look of it!

And since I haven't been able to stay out of this kit, I thought I'd also share a layout I made this weekend with the kit.


 I love using these tradionally "non-boy" colors to scrap photos of my Reed. He's so much boy all by himself, though, it doesn't matter how much pink I use!


Gotta love a good cluster of pretties...


Phew! That was a lotta word vomit - thanks for hanging in there with me!
Don't forget, our 'Springtime in Paris' crop is coming up soon! Be sure to join us for lots of great challenges and TONS of inspiration! I think there are even a few kits left, so be sure you have yours ready!

Have a great week!
xoxo


Tuesday, October 21, 2014

Dino Baby!

Trick or Treat? Well, today you get a trick from me. Not a terribly fancy one, but a nice and easy one, that's for sure!


Yesterday I finished up my son's Halloween costume, and snapped a couple of pics to remember him in it, before he inevitable barfs and/or poops all over it. I just love it. And he is, I have to say, the chillest baby ever. He crawled all over the house in that thing. Never took his hoodie off, waggling that tail up and down the hall. LOVE THAT GUY!


I jotted down a few thoughts about the day on one of those adorable October Afternoon journaling cards from my Early Autumn Daily Diary kit, and stole the "lovely day" card from my much-loved Tea For Two kit. I have a tendency to want to fill all empty spaces with journaling, so it is a real win for me that I was able to resist on that card.


As for my trick - I grabbed one of the 3x4 filler cards and the stamp set from the Daily Diary kit and went to town. I used a tinted embossing ink and white embossing powder to add as much contrast as possible. To finish it off I pop-dotted on that super cute "hello there" diecut. I love having a totally unique filler card every now and then. And it's so easy it feels like cheating.

I hope you're loving the start of our Holiday Season as much as I am! Happy scrapping, friends!


Wednesday, September 24, 2014

Lift Challenge: Jackie George!

Hi all! This week we've been scrap-lifting member layouts, and I picked Jackie George to lift!
Here is her layout:

I love the strips and all the scattered sequins! Also, I love the little clusters of embellies around the photos - so cute!

For my take on this layout, I used the Tea for Two kit. This has been my very favorite kit to date. And as I sit here writing this, I know my new Early Autumn kit is "out for delivery" and will be on my doorstep in just a few hours. And I'm so excited to crack that little baby open! But I must say, I am so sad to move Tea for Two out of it's little special spot on my desk for current kits. Sad indeed. So sad that I might not. I might just have to keep pulling from that one for a while...

But I digress.

We are here for a scraplift, and here it is!


I copied all the strips Jackie used - a great way to get rid of scraps, by the way! I just notched the ends and stitched them onto the base. This added a whole lotta dimension just right there!


Then I added a couple of cards from my Daily Diary kit as a background for the photos. From there I just kept layering and layering, trying to stay true to where Jackie had her layers and clusters around her photos.


This is kind of  an unofficial title. It's in a different cluster than Jackie has hers, but I just couldn't find the perfect thing for a title in that spot. I love how these two pieces sit above the stitched pieces, and the confetti fell so nicely around them. How perfect is it that the card pack in the Daily Diary kit had that cute little envelope of confetti?! Lucky me!


I had to steal a couple of little things from my stash - this "love this" sticker from the Shimelle sticker pack, a little type-written sticker, and the "remember" is from a roller stamp I got a million years ago. I love the look of stamping off!


 The last little cluster Jackie had was at the top right of the page. I just cut down a tag from the kit, layered a couple of stickers, and stitched the whole thing to the page. Easy peasy.

And that's my scraplift! Thanks for the inspiration, Jackie - love your layout!
Have a great HUMP DAAAAAAY everyone!


Saturday, September 20, 2014

Hello Happiness

Happy Saturday! I am here to show you my latest layout using the Tea For Two kits, with Noel's latest Pinspiration Board! Every Monday, Noel will be pinning lots of inspirational photos over on her Pinterest Inspiration Monday board, so be sure to check it out!

 This is my inspiration piece:


I love everything about it. Love love love.


Now, usually I don't use pink when scrapping about my son. It just feels a little odd. Call it gender stereotyping if you want, but there's just something about him that is so anti-pink. BUT. This layout is going into MY album, which is the very essence of pink and girly, and so very Tea for Two, that I couldn't resist pinking up these cute photos of him. And I looooove how it turned out!


I used my Cameo to cut out a couple of feathers that I stitched onto the page.


I threw on a couple more butterflies, that I just happen to have on the brain from my last layout and used the rubons to make some fake stitching down the center of the large one.


This layout has quite a few layers to it. I generally go with a white background on all of my layouts, but I loved that the polka dot on this one was subtle, and just enough green to neutralize the amount of pink I slathered around. I used lots of bits and pieces from both of the kits. LOVE those wooden heart stickers! I happened to grab a pad of 6x6 foiled vellum a few weeks ago, and I couldn't resist the gold foil heart sheet! I HAD to add that in!


This layout was supposed to be titled, "Boing!" because of the stuffed giraffe he's holding. It literally makes this loud and crazy boooooooiiiiiiinnnnggggg!!!! So naturally, he bangs it as hard as he can against the ground over and over and OVER again. Loves that thing. Anywho... "Boing!" looked really weird as a title, so I grabbed this wood veneer and did a little Gelato painting on it. Kind of an ombre effect. And for my first try at it, I'm pretty happy.

And that's all for me today! Be sure to check out Noel's Pinspiration Monday Board next week for more fun stuff!