Saturday, January 21, 2017

Traveler's Notebook Simple Set Up with Little Bird Classic Kit


Have you heard of Traveler's Notebooks? They have been increasing in popularity over the last few years in the planning community, and of course, the scrapbooking community saw what a fantastic way it is to have memory journaling and pretty papers on-the-go and it's being adapted by all sorts of creative folks! I've spotted several new product sneak peeks with a Traveler's Notebook influence this week at CHA, and I'll be excited to see what else comes out for us scrapbookers! 


I am leaving tomorrow for a trip to Colorado with my family. It's been ages since I've flown and I am trying to be wise with my packing space... but I knew I'd want a place to journal and record our adventures. I decided I'd use the Little Bird Classic Kit to make some beauty to travel with me. This little Traveler's Notebook cover came from Amazon about a year ago, and it was around $20. 


I made a paper "cover" to slide in and encase everything inside. I folded over an edge to create a small pocket right inside the cover. 


The elements in this kit were perfect for adding special, easy touches throughout. This section is for a blank book, where I can sketch, practice hand lettering, write out quotes and memories from our week. 


This little plastic pocket is perfect for adding post it notes and little cards with washi tape to,, because it's easily removeable!


The other side has these small pockets that I was able to slide some extra sequins and a card with washi tape in. Those vellum bags from the kit slid in as if they were made for it and it made me so happy!


A section with lined paper for me to journal and make lists in is covered with another sheet of paper, with the back side including a slant pocket I made to slide in additional notes or photos. 


I hope you enjoyed my little notebook! You can follow me on Instagram to keep up with our adventures this week if you'd like!

If you liked this kit, just wait 'til you see the February kit! Come join us on facebook for the kit reveal tomorrow night! 


Friday, January 20, 2017

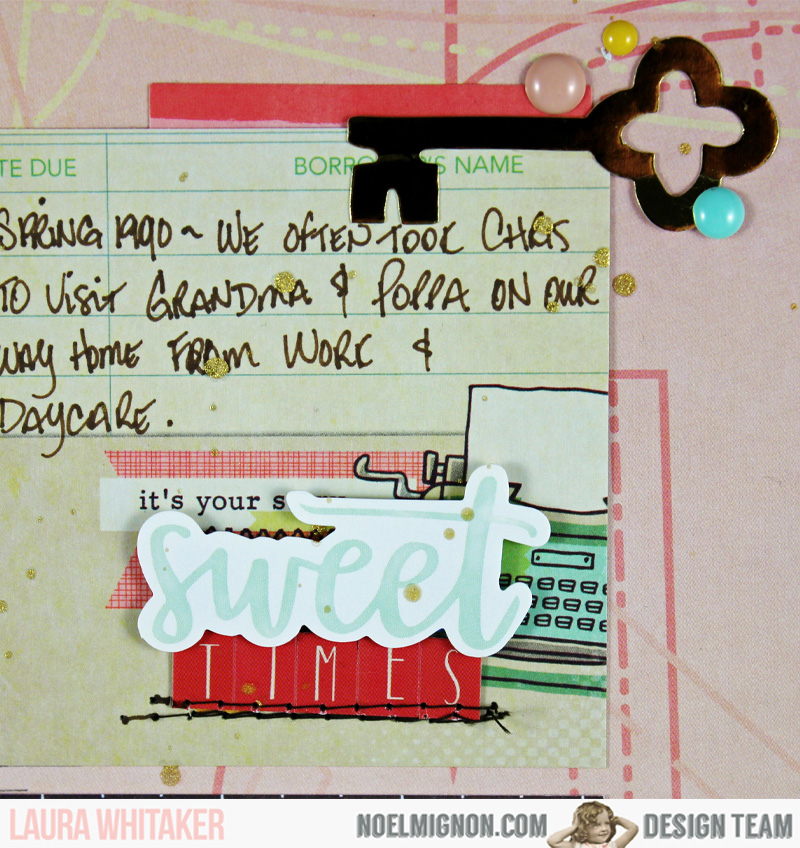
Sweet Times | Little Bird Daily Diary Kit

He there!  It's Laura here with a new layout to share today!  The design team had an open week, so anything goes for us!  Since I am playing with the Daily Diary kit this month, which includes a lot of pocket cards etc., I opted for a grid design for my page.  I pulled in some 12 x 12 paper from my stash to act as my background.


The Pocket Cards from the Simple Stories Reset Girl collection have a fun vintage vibe, so I pulled out this photo of my oldest son, my mother in law and myself from way back in 1990. And as luck would have it I had a couple of 12x12 sheets of this collection left over from my Simple Stories design team kit, so they were perfect for my background!

I trimmed down my photo to 3 x 3 and matted it with some cream cardstock.  Then I trimmed down three 3 x 4 pocket cards to 3 x 3, as well.


I kept one card fairly plain so that I could add my title and journalling to it. Of course, I added in an embellishment or two, too!


This photo was challenging because there are so many different colours going on in it.  This was taken long before I thought about scrapbooking!  But I think I made it work.  You can see I pulled in the twine and the Heidi Swapp gold color shine from a previous Noel Mignon kit.


Each quadrant got fancied up, in some small or not so small way.  This one got layers and layers of stickers!


I cut this large ampersand from another pocket card and popped it up on this pretty floral card.  I  love the way it looks and it was a fun way to use it!

Supply List: (from the kit) May Arts ribbon; American Crafts Hazelwood stickers; Simple Stories "The Reset Girl" pocket cards, enamel shapes and phrase stickers; Echo Park Just Be You stickers; (from my stash) Simple Stories "The Reset Girl"patterned papers (6819, 6810); The Twinery gold and cream bakers twine; Heidi Swapp gold Color Shine; Staples card stock.

Thanks for visiting today!

Thursday, January 19, 2017

Hello, New World (Little Bird Classic Kit)

Hello friends! Sherry here, with a fun mixed-media layout. I was so excited to see the Echo Park Stencil and Distress Ink in the kit. These products were the inspiration for my layout.
I stamped the Distress Ink onto a craft mat and mixed with Whipped Spackle (from my stash); I love the soft, buttery color it creates.
I used a palette knife to spread the spackle through the stencil. I didn't worry that it wasn't perfect; it just adds to the loose, artistic look. :)
I adore the buffalo plaid washi tape, from the kit, and used it to frame the center portion of the layout.
I fussy-cut butterflies from the Hazelwood paper and also used a small butterfly punch to create tiny butterflies to scatter throughout the layout.
I needed the tile to pop of the dark negative space of the photo, so I used white alpha stickers (from my stash) and colored the word "world" with the Distress ink.
Of course the stencil can be used in many ways: mists, paints, or even just stamping with the little ink pad. I hope you've been inspired to create with stencils! Thanks for joining us today!

Wednesday, January 18, 2017

Snow day!

Hey everyone, Michelle here! I have a traditional page to share today along with a pocket page. I had a lot of photos from our snow day last week that I wanted to use so that's why I added a pocket page to go along with my traditional page.
For my pages I used the Little Bird Daily Diary Kit along with the extra papers that were from the classic kit. I absolutely loved that heart shaped paper and knew I wanted to cut that out so that's exactly what I did. I also added stitching around each triangle. It doesn't show up much in photos but in person it just adds a subtle amount of texture to my page. The silver glitter thickers are from a kit from last year and were perfect for my snow theme!
The pocket pages I used a mix of photos, journaling cards, and stickers. Love those epoxy stickers in the kit!
It was such a fun snow day! My dogs especially enjoyed it :) 

Tuesday, January 17, 2017

"Oh, they're teenagers." - Little Bird Classic Kit

Hello all!  Nicole here this week to share a layout that I put together to remember a conversation my youngest had with my husband.  I overheard them talking and after having a good laugh I quickly pulled out my phone and typed it up in a memo.  I love doing this and have a place in my memo lists for each family member.

I feel like this layout needs a little explanation and why I might find this funny.  We have a unique situation with our kids because of their age difference, they are nine years apart in age.  The younger just started Kindergarten and the older is in 9th grade.  The little guy gets to hear us blame a lot of the older ones mumbling, grumbling cave man noises (please tell me this is normal!) and other random weird behavior  that he and his friends do on them being "teenagers".  The little guy has now decided that he himself doesn't want to become a teenager and basically thinks being a teenager is something he should avoid at all costs.  The hubs and I did explain that no matter how hard he tried that one day he also would be a teenager. ;)

Part of the journaling:

Overheard as we were getting ready to go to the summer concert in the park
T:  Are Jake and Shane going to be there?
B:  Yes they are coming
T:  (laughing to himself) Oh . . .  they're teenagers.


I started by arranging part of my title and journaling in Photoshop.  I measured for the photo and then printed this out on white cardstock.  Since this layout was based on a conversation and not an actual event I went through some photos and picked ones of the people that were mentioned in the conversation .  I happened to find the main photo as an outtake from our family photo shoot and knew it would make a great focal photo since the three teenagers are looking at the little guy.

After getting my title, journaling, and pictures printed.  I then just played around with lots of the different pattern papers in the kit until I was happy with the mix.

I placed the epoxy stickers to draw attention to my title.


I used the Distress Ink to tone down the outside of my white cardstock to help it blend into the background cardstock.


Overall, I was going for a bright and fun layout that documented this little conversation and I'm very happy with the results.  Everything on this layout in exception of the red shipping tag is from the kit.

 I have a few more conversations like this one saved on my phone that I hope to get documented on future layouts.  I love that modern technology can help make this process of getting things recorded a breeze.

Thanks so much for stopping by the blog today!


Monday, January 16, 2017

{Mommy's Little Artist} with the "Little Bird" Daily Diary Kit

Hello Noel Mignon fans!  Today I am sharing a 12x12 layout that I made using the "Little Bird" Daily Diary Kit and the "Little Bird" Paper Add On.  But first I want to share a photo of the kit, there are still a couple left in the store!!!


Isn't this kit just full of awesomeness!!!?!


I started this layout by blocking off the bottom half with the diamond patterned paper and the herringbone navy paper on the left hand side.  Next I built up the "love to create" card and the photo by layering them on some of he light blue paper from the paper pack.  I really loved the bright red Daily Diary card, but I didn't want to use the whole card on this layout.  So I cut it on the diagonal and created a partial photo matt and punched a heart out of the section that is behind the photo.  


I added a few really cute flags, tags, and tabs to embellish the 4x6 "love to create" card.  I also outlined a few various pieces with a thin red marker to bring in a little more red, and to make them stand out a little more.  I cut the lined paper I used for my journaling card from one of the 3x4 cards from this month's kit.   


I added a few splashes of mist since the pictures are of my son painting.  I thought the mist mimicked the look of paint splatters.  And finally, I added my title "Mommy's Little Artist".  The letters for the word "Mommy's" came from the sticker sheet in the Little Bird Daily Diary kit.  The red Thickers for the word "artist" came from my stash.  And that about wraps up my layout.  I love seeing you share your work on the Noel Mignon Members Facebook Page---I hope to see you there!  Have a great week.


Saturday, January 14, 2017

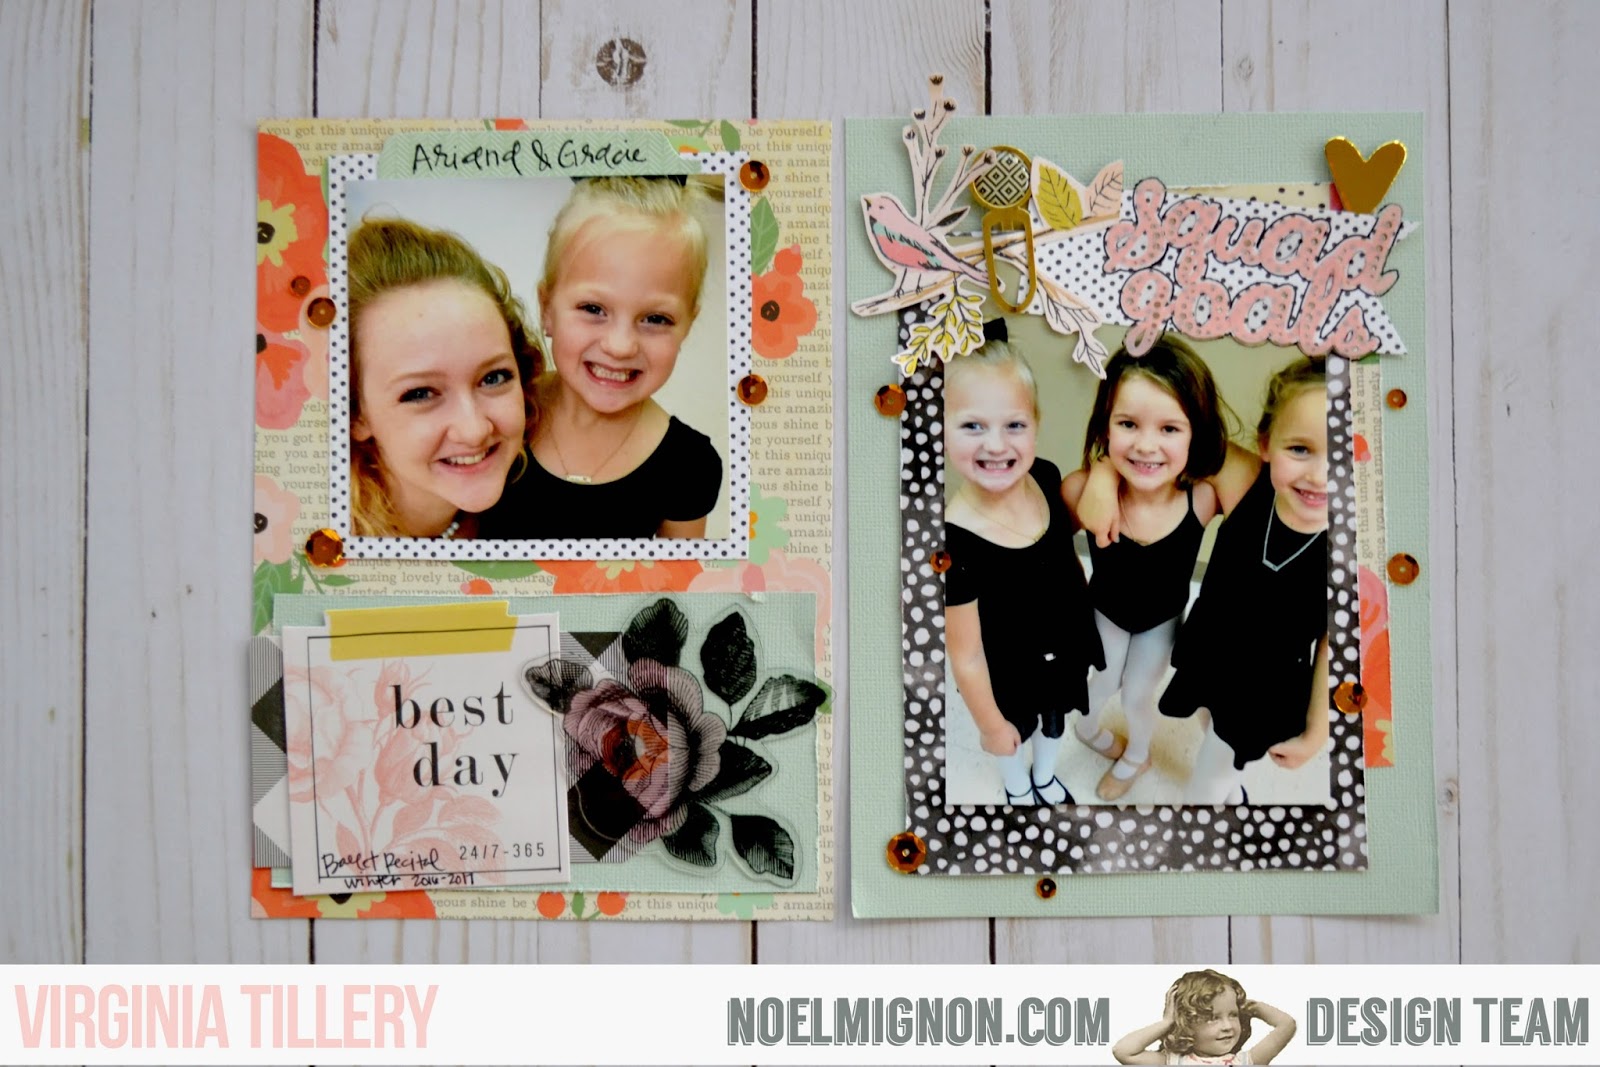
Squad Goals * Little Bird Classic Kit *

Hey guys! This week is all about "goals" and I thought I'd make a lighthearted twist on the topic... with a pic of my 7 year old and some of her best buddies. 

How darling are those little pink letter stickers from the Little Bird kit?  I love them. 

I recently have been trying to figure out what a family album looks like for us (after taking some time away from scrapbooking). I wanted something that was a little easier to hold and interact with than a 12x12 album, so I settled on a 6x8 album. So what you see here are my first pages for that album!