Showing posts with label 12x12. Show all posts

Monday, April 2, 2018

{Chalk Art Fest} with the "Vintage Spring" Kits

Hello all, it's Meridy here and today I am working with pieces from both "Vintage Spring" Kits, the Classic Kit and the Daily Diary Kit.  I also mixed in a few pieces from last month's "You Go, Girl" Classic Kit. 

I started with a single picture from a chalk art festival, and I wanted to incorporate many of the colors from the kits, so I decided to just use simple strips of paper, ribbon, and washi.


I decided my layout needed a little more texture and detail, so I decided to machine stitch in between the strips of paper.  Some of my stitches are straight, regular stitching, some are zig zags in various widths.  I decided to use various colors of thread to add more color to the layout.


Next, I added a few small embellishment clusters.  I added one on each side of the photo to draw a little more attention to it, and another cluster around the title and journaling.


For my title, I used Thickers from last month's kit along with the black letter stickers from the Vintage Spring kit.  I sprinkled in some chipboard stickers, a star epoxy embellishment, a phrase sticker, and trimmed a journaling card down quite a bit since I didn't need a whole 3x4 space to journal.


That wraps up my layout for today, I really love all of the colors and the stitching.  This was a great way to use up some scraps. 

Have a great week!


Monday, March 26, 2018

{Disneyland Day 2} with the "You Go Girl" Classic Kit

Hello friends, it's finally SPRING!!!!  And I'm super excited to get BOTH of the "Vintage Spring" Kits next month.  If you have not seen them yet, you should go check them out.  Until then, I have one more layout to share with you using the "You Go Girl" Classic Kit.  I really enjoyed scrapping quite a few Disneyland layouts with this kit, and the layout I'm sharing today is no exception...


I started with the frame background paper, built up my layers for my photo mat and then started adding scraps of paper, chipoard stickers, and pieces of washi tape in the frames to fill them up.


Once I felt like the background was complete, I went to work adding my title "California Adventure" with the beautiful Thickers that came in this month's kit.


Next, I worked on an embellishment cluster for the top right hand side of the layout to balance out the title area.  I used chipboard stickers, ephemera die cuts, the double sided tassles, and a flower for this embellishment cluster.  I added the subtitle "Day #2" in the same Thickers I used for the main title.


And that wraps up my layout for today!  Thank you so much for stopping by.  Have a great week.


Monday, February 19, 2018

{5 Years} with the "So Sweet" Kits

Happy Monday!  It's Meridy here today.  I have a layout to share with you using the "So Sweet" Daily Diary and paper add kits.  I went back to pictures from 2011 of my 5th Anniversary for this layout.


I started out by picking the patterned paper that I felt matched my photos to best, and started layering it on the page to form the base of the layout.  Next, I used some of the 6x6 patterned papers from the Daily Diary kit to layer underneath the photo cluster. I cut apart a couple of the mini cards that read "You & Me Forever" and "My Heart Belongs to You" to use as embellishments on the layout.


Next, I added a journaling card and my journaling.  Then it was time for a title.  The beautiful gold Thickers make for an easy title and subtitle, so I went with it!  The gold hearts on the Thickers sheet were another easy embellishment to sprinkle around the page.  I also placed some of the typed phrase stickers around the page to add a little more detail. 


I like the little bits and pieces I was able to use, such as washi tape and branding strips from the 6x6 paper pad, they just are just the perfect small accents to add to layouts.  

Thank you for stopping by today!!!


Monday, February 12, 2018

Creating Coordinating Layouts with the "So Sweet" Daily Diary Kits

Hi Friends, it's Meridy here today.  I have a couple of 12x12 layouts to share with you today using the "So Sweet" Daily Diary Kit and paper add on.  

I really like the look of double page layouts in my albums, so that both sides match.  I used to scrap double pagers almost 100% of the time.  But I liked making single page layouts for the first and last page of my albums, and I wanted to make more.  So I tried making 2 single page layouts with the same supplies (and pictures from the same event), this way when they are displayed in my album, both sides still match.  I really like how it's working out.  I still feel like the 2 pages flow together, but I get to be more creative working with a 12x12 space rather than always working with a 12x24 space.  

The last 2 weeks I shared the following layouts:


Today I want to share the coordinating pages I made for them!  This is the first layout. I used quite a few pictures, and layered up the paper and embellishments.


I tried to really use the same supplies that I used on the page I made a few weeks ago.


The gold Thickers, puffy hearts, and word stickers were just what I needed to pull it together.  I was also able to mat the photos on the same red cardstock.  


I think they will look great next to one another in my album.  Even though they don't exactly match, they have some of the same elements, all of the same colors, and photos from the same event.


This is the page I made to coordinate with the layout I shared last week.


Again, I used the same elements, patterned paper, Thickers, the heart charm, washi tape, and the cute heart with the tassle.


I outlined each layer with black pen, just like I did on the page I created last week.  This is just one more way that the layouts will flow together and "read" as coherent pages.


Here are both layouts that will go next to each other in the album.


Thank you for stopping by today!


Monday, January 29, 2018

{New Haircuts} with the "So Sweet" Kits

Good morning!  It's Meridy here, and I could not wait to break into my February "So Sweet" Daily Diary Kit and paper add on.  This kit is filled with Valentine's goodness, but it's also versatile to use with photos that aren't lovey dovey too.  Today I'm sharing a layout from last spring when we took the baby to get his first haircut, and ended up getting all 3 kids' haircut.


As you can see, the colors in this month's kit went really well with my bright photos. I started with the scalloped paper and broke it up a bit with the teal and white striped paper strip across the top of the layout.  

Next, I began layering the 6x6 papers and branding strips from the Daily Diary kit to create a resting place for my photos.  You can see I used lots of different patterns on this layout, but since the kit coordinates so well, it all flows.


I used some Thickers I had in my stash and an alphabet stamp I got in a Noel Mignon kit last summer for the title.  I even pulled the chipboard scissors and the acrylic "love" from last month's Classic Kit to use on this layout.  I know they are sewing scissors, but that's ok with me. 


I placed a few of the heart embellishments on the layout, outlined each layer with a thin black pen, and added a bit of washi here and there.  Finally, I added my journaling to the journaling card, and with those finishing touches, my layout is complete.


I really love the hearts with the tassel dangling from the bottom, so adorable!!!  Thanks for stopping by today!  


Monday, January 22, 2018

{Chick-let Crop} Layout with the "She's So Crafty" Classic Kit

Hello everyone, it's Meridy here.  I have another "crafty" layout to share this week with the "She's So Crafty" Classic Kit.  Today I'm sharing a layout about my kids scrapbooking with me, at a crop especially for kids!  I'm so lucky to have such a great group of scrapbooking friends, we do all kinds of cool things at our crops all year long.

The bright colors in my photos were just perfect for the bright colors in this month's kit!  I started with a couple of strips of the patterned paper with scissors, rulers, and paint brushes on it.  I didn't want that busy pattern to overwhelm my layout, so I just used 2 small strips.


I wanted to try something different, that I don't usually do, to mix things up a bit, so I decided to do a very symmetrical design.  I placed everything fairly evenly right down the center of the 12x12 page. 

The "LOVE" card, was one of the cut apart cards in the kit.  I added the large button to read as a "O" instead of using the vintage sewing machine that was printed on the card. 


I dressed that card up with the cute scissors charm from the kit, a few enamel dots, and a chipboard camera.


Finally, I added my journaling and the title across the top of the photos to finish off the layout. 


And that wraps up my layout share for today.  I would love to see your Noel Mignon "She's So Crafty" layouts on Instagram #NoelMignon 


Monday, January 8, 2018

{Creative Spaces Tour} with the "She's So Crafty" Classic Kit

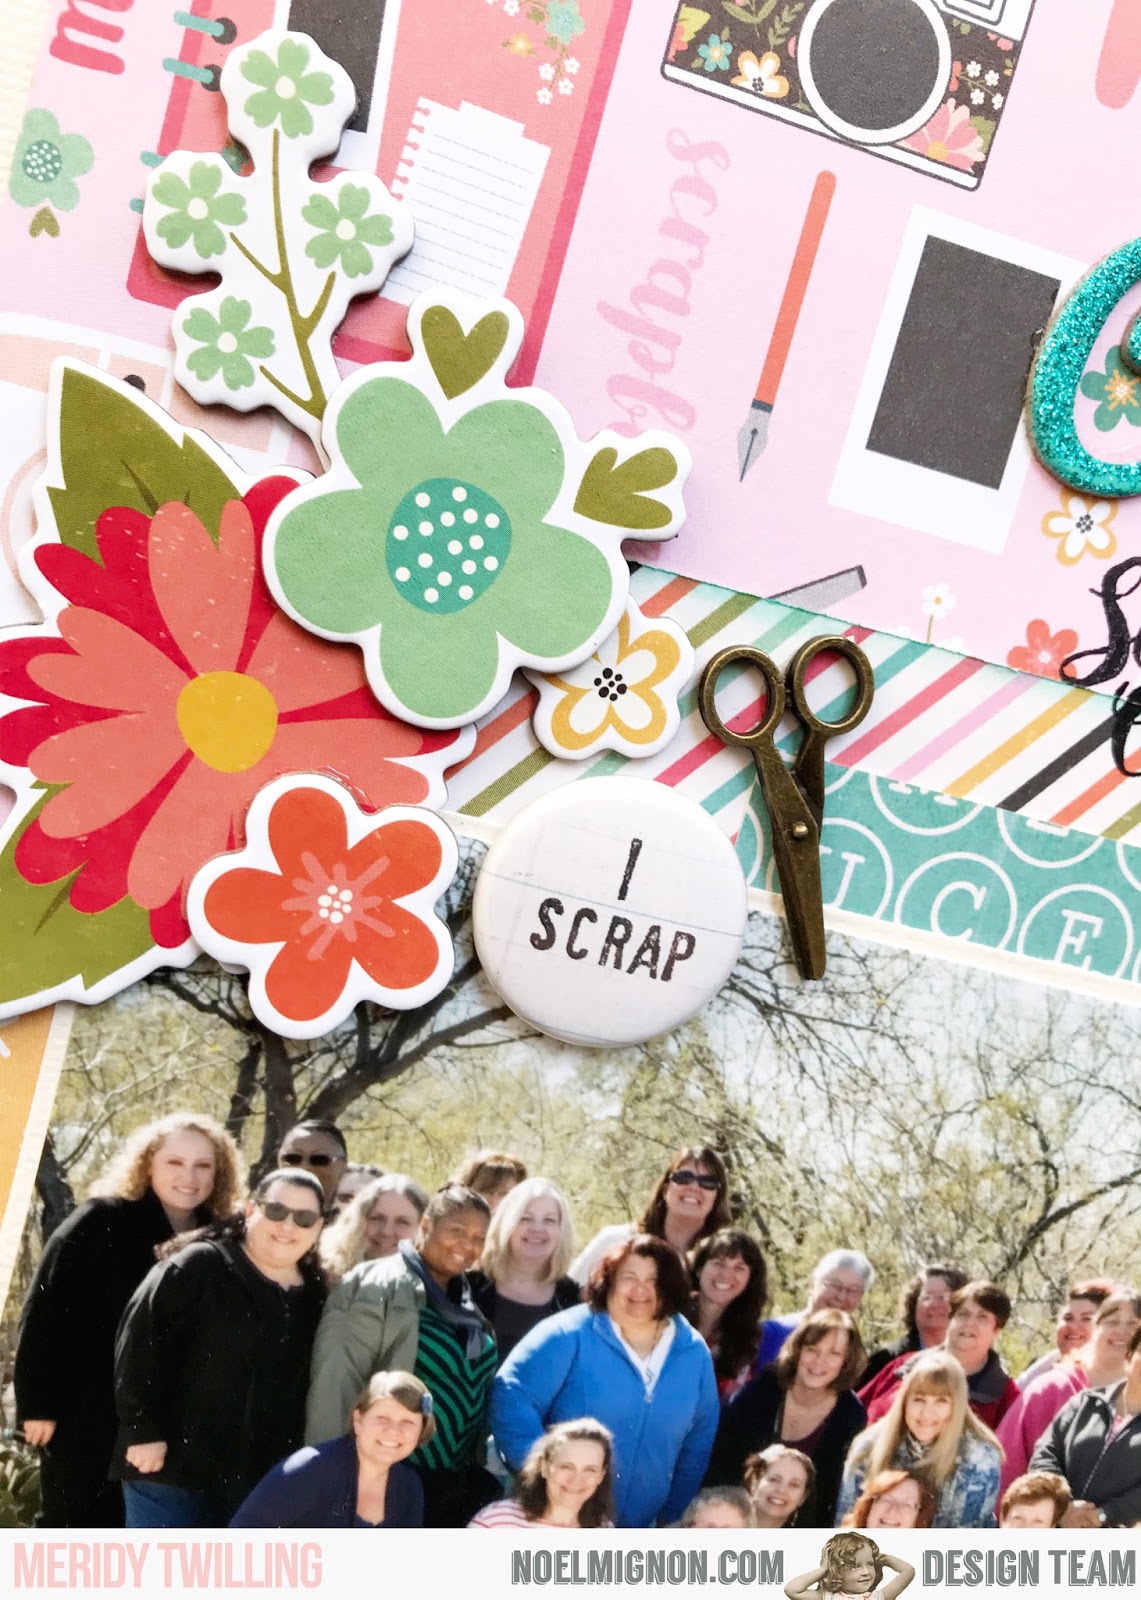
Hello scrappy friends!  It's Meridy here today, and I'm working with the "She's So Crafty" Classic Kit today.  There is only one more of these left in the store, and they are PERFECT to document our crafty hobbies!  Therefore, I decided to scrap a group photo of some of my scrappy friends and I at our annual "Creative Spaces Tour".  


Each January/February about 5 of my crafty friends open their creative spaces for an open house tour.  We travel as a group from house to house until we visit everyone.  The ladies on the tour provide snacks and the whole event is so much fun!  We also get some GREAT ideas for organizing our own stuff.  

When I got the "She's So Crafty" kit, I just knew that I would be using it to document the tour!  I started with the super cute scrapbook themed patterned paper as my background paper.  I built up layers of patterned paper peeking out from under the photo.

Next, I started adding clusters of chipboard stickers in a few areas, to keep the eye moving around the page.


I just adore the little scissor charms that came in the kit.  I cut off the little round part that is used to hang the charm from, because I just wanted to glue it flush to the page.  I added the "I scrap" flair to this little cluster as well.


I used some glittery Thickers that I had in my stash, every so often I pull something into my Noel Mignon kit.  The kits are so beautiful and versatile, so it's easy to use some stash mixed in with them.

And that wraps up my layout for today! Thank you for stopping by!


Thursday, November 30, 2017

Remember Happy

Hello again!

I have one final project to share using the Home Sweet Home Classic kit before moving on to our December kit, Gingerbread and Peppermint. There are still some of each of these kits left in the Noel Mignon shop.


This picture to me exudes happiness. This is my youngest daughter and she is very happy most of the time. She's a sweet girl who loves life and loves to smile and do things to cheer others. I love this picture of her with a pumpkin on her head ☺

Here is a closer look at my page: 


I love how the blues and greens of the Elle's Studio products work so well with the autumn tones of the Echo Park collection. I used a mix of both on this layout. 


These felt flowers from Jillibean Soup were the perfect way to finish off my page. 

Have a wonderful rest of your week!