Showing posts with label She's So Crafty Classic Kit. Show all posts

Monday, January 22, 2018

{Chick-let Crop} Layout with the "She's So Crafty" Classic Kit

Hello everyone, it's Meridy here.  I have another "crafty" layout to share this week with the "She's So Crafty" Classic Kit.  Today I'm sharing a layout about my kids scrapbooking with me, at a crop especially for kids!  I'm so lucky to have such a great group of scrapbooking friends, we do all kinds of cool things at our crops all year long.

The bright colors in my photos were just perfect for the bright colors in this month's kit!  I started with a couple of strips of the patterned paper with scissors, rulers, and paint brushes on it.  I didn't want that busy pattern to overwhelm my layout, so I just used 2 small strips.


I wanted to try something different, that I don't usually do, to mix things up a bit, so I decided to do a very symmetrical design.  I placed everything fairly evenly right down the center of the 12x12 page. 

The "LOVE" card, was one of the cut apart cards in the kit.  I added the large button to read as a "O" instead of using the vintage sewing machine that was printed on the card. 


I dressed that card up with the cute scissors charm from the kit, a few enamel dots, and a chipboard camera.


Finally, I added my journaling and the title across the top of the photos to finish off the layout. 


And that wraps up my layout share for today.  I would love to see your Noel Mignon "She's So Crafty" layouts on Instagram #NoelMignon 


Monday, January 15, 2018

{First Colors} Layout with the "She's So Crafty" Classic Kit

It's Monday and that means it's Meridy here, thanks for stopping by!  I want to share another layout I made with the "She's So Crafty" Classic Kit.  There were lots of vibrant colors in this month's kit and some really cool patterned papers, I decided to use this "color wheel" type of paper for a layout about my baby's first box of colors.  


As soon as I pulled this paper to work with, I knew I wanted to use the circle shape as a major design element for the layout.  First, I matted and placed my photos on the bottom right of the paper, then I fussy cut a  couple of the paint swatches from another paper.  Next, I punched a bunch of 2 different size hexagons and sprinkled them around the circle to fill in the blank spaces.


Finally, I got the puffy stickers out and sprinkled them around as well.  I decided to add a small cluster of these embellishments in some of the "white space" on the photos as  well, to visually bring the circle around.


I decided the layout looked a little bare, so I added some of the acrylic words to read "Little You", and the "I Love" flair button.  But the layout still looked a little disconnected.  So I decided to hand stitch in white embroidery floss around where the white circle I covered up on the patterned background was.  This finished the embellishments off. 


Last, it was time to add my title & journaling, again along the arch of the circle.  And with that, the layout was finally complete.  


Thank you for stopping by today!  I would love to see how you used this piece of patterend paper from the kit this month.  Share your layouts on our Noel Mignon Members Facebook page or on Instagram #NoelMignon.  Have a great day!!!


Monday, January 8, 2018

{Creative Spaces Tour} with the "She's So Crafty" Classic Kit

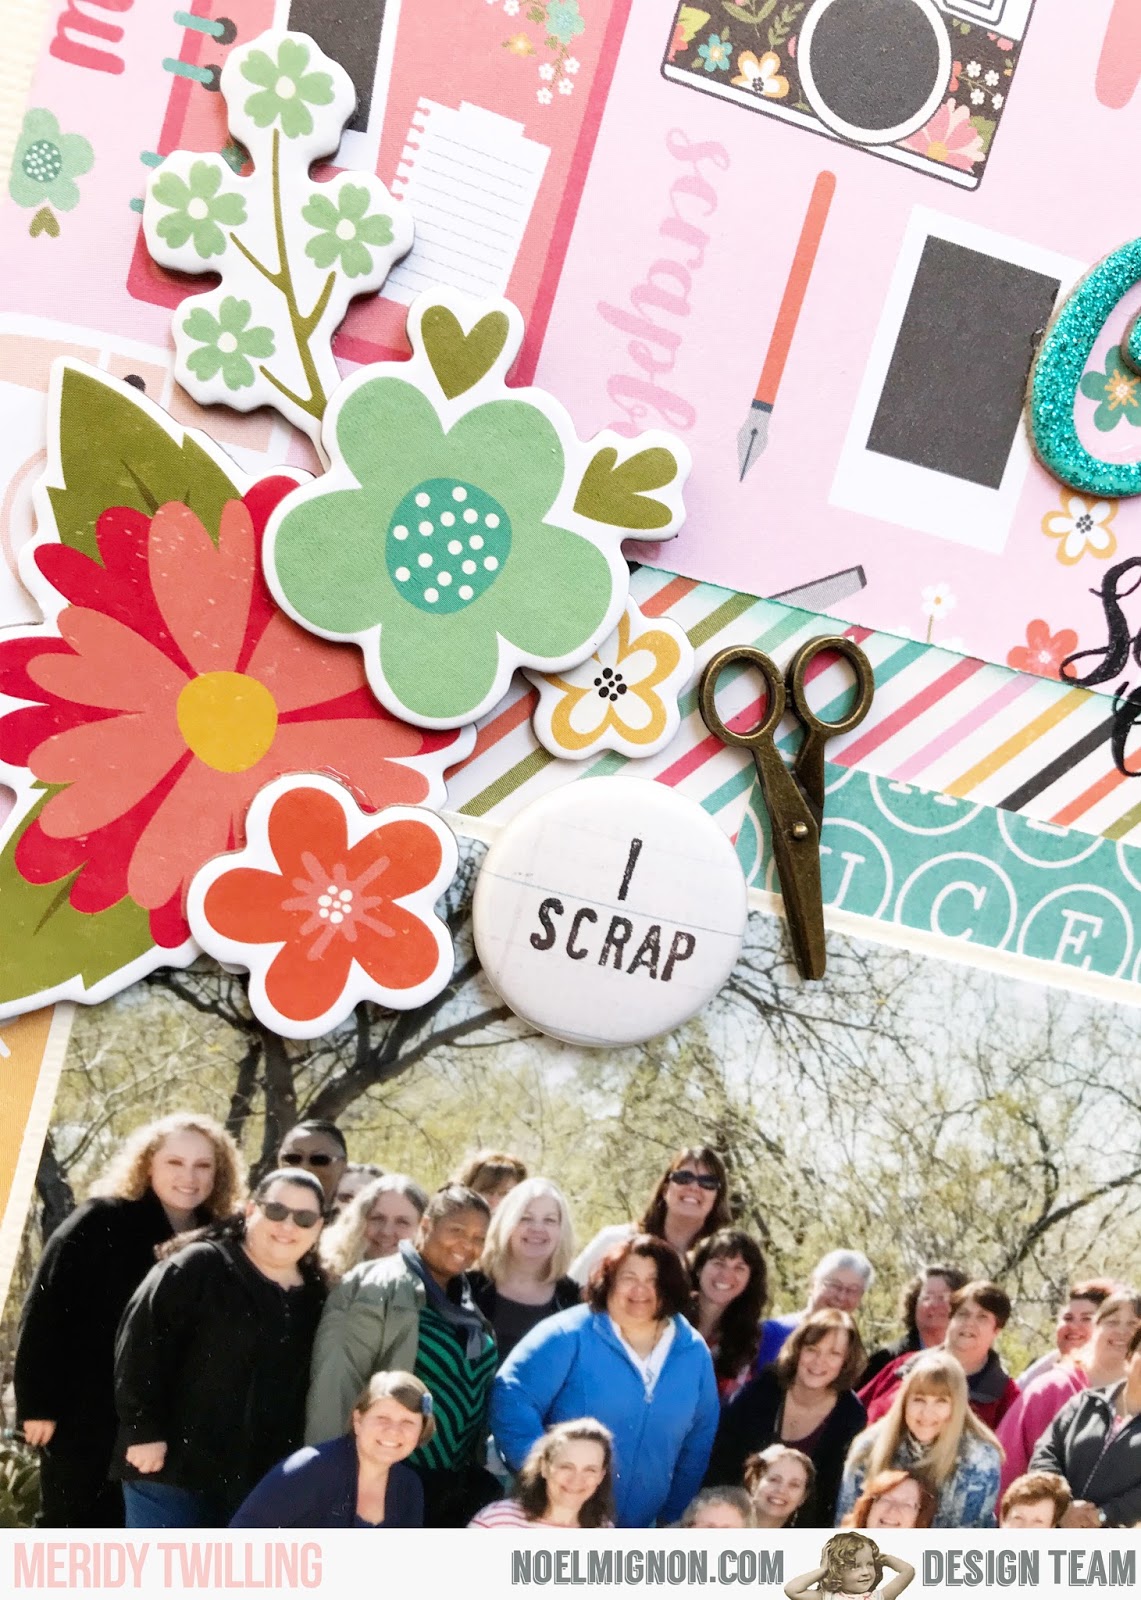
Hello scrappy friends!  It's Meridy here today, and I'm working with the "She's So Crafty" Classic Kit today.  There is only one more of these left in the store, and they are PERFECT to document our crafty hobbies!  Therefore, I decided to scrap a group photo of some of my scrappy friends and I at our annual "Creative Spaces Tour".  


Each January/February about 5 of my crafty friends open their creative spaces for an open house tour.  We travel as a group from house to house until we visit everyone.  The ladies on the tour provide snacks and the whole event is so much fun!  We also get some GREAT ideas for organizing our own stuff.  

When I got the "She's So Crafty" kit, I just knew that I would be using it to document the tour!  I started with the super cute scrapbook themed patterned paper as my background paper.  I built up layers of patterned paper peeking out from under the photo.

Next, I started adding clusters of chipboard stickers in a few areas, to keep the eye moving around the page.


I just adore the little scissor charms that came in the kit.  I cut off the little round part that is used to hang the charm from, because I just wanted to glue it flush to the page.  I added the "I scrap" flair to this little cluster as well.


I used some glittery Thickers that I had in my stash, every so often I pull something into my Noel Mignon kit.  The kits are so beautiful and versatile, so it's easy to use some stash mixed in with them.

And that wraps up my layout for today! Thank you for stopping by!


Monday, January 1, 2018

{NYE 2017} with the "She's Crafty Classic Kit"

Happy New Year 2018!!!!!  It's Meridy here, and I have my first layout with the "She's Crafty" Classic Kit.  It's (fittingly) a layout of NYE 2017.  The colors in this month's kit are so bright and fresh, and they went great with my pictures of last New Year's Eve, so I decided to make a double page layout.


I used an 8x10 collage so I could include 10 photos on the right hand side of the layout and then focus on my 2 favorite pictures on the left side of the layout.


I started with this amazing teal patterned paper as my background, then added a few layers of patterned paper, photos, and a couple of die cuts from the kit.  I journaled a little straight on the label die cut.  I used a date and time stamp I had in my stash, and drew attention to it with the arrow stamp from the roller stamp in the "She's So Crafty" Classic Kit.


I wanted the page to really blend with the adjacent side of the layout, so I added the gold rub on "chains & beads" from the amazing rub ons from the kit.  I mixed the black Thickers with a die cut label and an acrylic word to create my title.


I loved this beautiful patterned paper that I used on the right hand side of the layout and KNEW it needed to be used for a celebration layout---what better than NYE!!?!


I added a few simple scraps, die cuts, and rub ons to this side of the layout in order to make the 2 pages coherent.  I sketched around the tab and sketched a little around some of the layers in black thin pen, and with that, I decided the layout looked complete.


Thank you for stopping by today.  Have a wonderful 2018!!!