Showing posts with label Pack Your Bags Kit. Show all posts

Friday, May 20, 2016

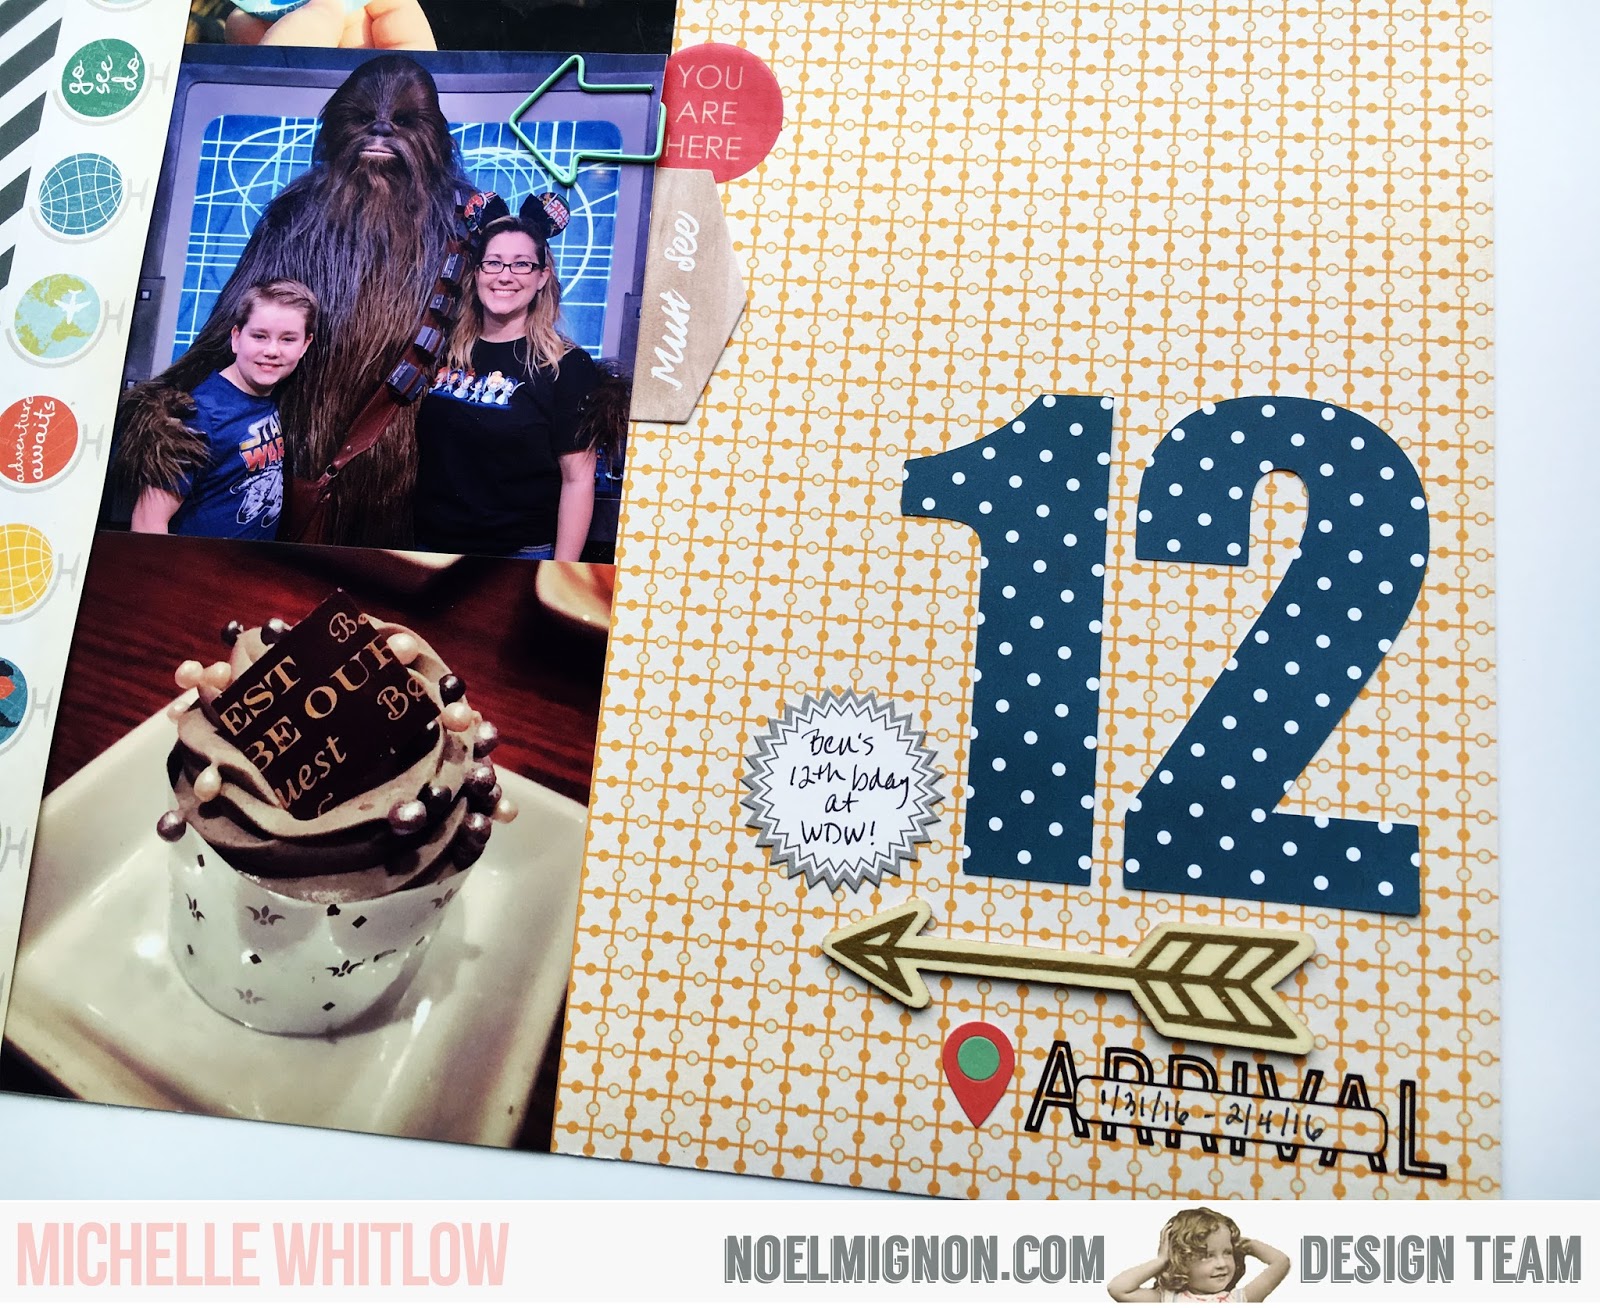
12

Hey all, Michelle here! This week the Noel Mignon design team is playing with numbers on their layouts so I decided to do a page about my son's 12th birthday. Seems like the obvious choice, right?

I pulled out the Pack Your Bags classic kit for this one since I still had a few items left from the kit that I had kept together. Usually when I use up most of a kit I will then put the remaining items in my scrap stash. But with this kit I loved the theme and so I kept the items together for any travel pages that might come up. (The striped paper along the side is from the Pure Bliss Classic Kit.)

***The Pack Your Bags kit is obviously sold out but the Trailblazer Classic Kit would be great for travel pages!***
Last February my son turned 12 and I surprised him with a quick birthday trip to Disneyworld, just him and I. It was the first time we've ever done something like that and I have to say it was a lot of fun. We could do whatever we want whenever we wanted - like ride Expedition Everest 6x (soooo fun!!). 

If you have the chance to take a trip with each one of your kids individually I would highly recommend it! I'm often reminded just how little time I have left of my kids being kids so I'm taking every opportunity I can to make special moments with them!
So for this page I didn't add any journaling because I will probably add a pocket page with some journaling and highlights and these pages will go in my son's scrapbook. And then I'll be creating a mini-album for our entire trip. 

I cut the number '12' with my Silhouette (my favorite font for numbers is Impact - it gives nice chunky numbers)
By the way, if you head to Disneyworld and you love Star Wars you must go see Chewbacca!! Oh man, what an experience!

Monday, June 22, 2015

Happy Father's Day!

Well, Happy Day After Father's Day! I hope you all had a great day celebrating those guys in your life!

Here's a couple of cards I made up for the guys in our life, using the Happy Go Lucky and Pack Your Bags kits!

It was so fun to integrate some of our own art into this project! And I'm pretty sure Reed had a great time, too!


That's all for me today! Happy Monday!

Monday, June 15, 2015

Getting Busy!

Happy Monday!

I have a couple of projects for you today, using a mix of the Happy Go Lucky and Pack Your Bags kits. I am loving how well they go together!

The first is this layout of my little big boy, Reed. We had such a great, random morning, and I am always so grateful to get those recorded.


I love building up clusters of small embellies - those Simple Stories Bradz and Jillibean wood buttons are perfect together, with layers of enamel hearts and puffy star stickers in there, too.


I carried the circles through the page, and here's a smaller cluster of them, layered over the little journaling spot I made.


There are so many different arrows between these two kits, so I grabbed a few and added them to the circle theme I had going, using some pop dots to give a little more dimension :)


The second project I have for you is a little one that I made to help myself out! I have so many different little pieces of fluff for my little Jamberry business, and I was in dire need of a place to organize them in a cute way. Enter the kits and my new We R Memory Keepers 1-2-3 Punch Board that makes awesome envelopes, boxes, and bows. AND File Folders!


These are the perfect solution for me - everything fits perfectly inside them!


Then I just used one of the adorable paper clips from the kits to secure the contents in place - like my extra Happy Go Lucky coordinating wraps! That feather paper makes me a happy woman...


So now that I'm all organized in that department, I'm off to get things ready for our next kit reveal party. Don't miss it! We'll be showing you the new Pool Party kit, as well as revealing the new and exclusive Jamberry wraps that coordinate with them! Join the group here : https://www.facebook.com/groups/NoelMignonRevealParty/

And did you know that Virginia is designing coordinating wraps to the limited edition Disney kit - Main Street Magic? The reveal party for that is this Thursday night : https://www.facebook.com/events/777701839018067/

Be sure to be at both parties for the first peek of these awesome new kits, and their super cute coordinating wraps! See you soon!


Thursday, May 28, 2015

Pack your bags for day to day life...

Hello, Agnus here with another another week to share using the fun Pack Your Bags Daily Diary Kit . I love that even though this kit is themed for travel pages, it is versatile enough to use for documenting the little moments of everyday life.


My album is quickly filling up with all the details from our day to day lives and I will need to start using a second album for the remainder of the year very soon.


While I don't necessarily need all my cards and photos to match, I do like to create a nice flow across the page this is where these kits makes things so much easier.  I used the colours in this 6 x 6" paper to help me determine which colors I wanted to use then simply selected a rang of complimentary pieces from the kit to tie all the pockets in together. I layered a few stickers and accents from the kit to create a title card for the week, backing the wood veneer piece with the cork patterned paper. 


I used a variety of different sized photos this week and even cut around one of the pics to create a fun card. A little bit of journaling and a few stickers were all that was needed to record a few little details from day to day life. 


I cut around a portion of the element on this journal card and tucked my photo underneath it to create more depth, adding a title and journaling in a vertical orientation for added interest.


 I continued with the same color scheme for the second part of the week, again using a mix of photo sizes and simple accents. 


A few simple stickers were all that was needed to dress up one of the filler cards from the kit. 


I used some of the bolder patterns to create a bright background for our movie tickets, adding another wood veneer piece and some small accents to the piece.


I matted all the photos with a white border to help break up the different colors and repeated this with one of the journal cards to help it stand out on the busy background paper.


And that was week 21 :) 
Thanks for stopping by  xx


Monday, May 25, 2015

A Whale of A Tale...


Happy Memorial Day! I hope you are all enjoying your day off, barbeques, picnics, fun in the sun, and time with family and friends. I also hope you take a minute to remember those who have fought for us to have the right to all of those amazing things.
 Seriously loving the new Happy Go Lucky kit! The color combo is so fun and well, HAPPY!
 

Secret journaling that isn't really secret so much as I just didn't have a place for it on the rest of the layout. LOVE the tags Noel included in the kit - they work perfect for this!


And can we talk about the combination of wood veneer and glitter that is the best thing on earth? Followed closely by the diecuts from the Pack Your Bags kit. Nommy, to be exact.


Just a peek of the layers. I love layers...


Friday, May 22, 2015

DCA // travel layout

Hey guys! I have another travel layout to share today using the Pack Your Bags kits. I am loving the fun colors, patterns and embellishments in these kits!!! P.S. I believe there's just a couple of the Daily Diary kits left so if you're thinking you want one you better hurry up!!
So for this layout I'm using another photo from our Disneyland trip last year. I'm making a mini-album of our trip and I have the travel journal I shared last week so I won't be creating too many 12x12 layouts. But I still wanted a couple to put in our family album (and I can't help myself but create layouts from such an awesome trip!!) I will probably just do one for Disneyland Park and one for California Adventure. 

Today's layout features the iconic Mickey's Fun Wheel in California Adventure. Of course it had to be the center of my layout!!

I took inspiration for this layout from one I found on Instagram:
You'll see I followed her basic design & then made it my own layering all of the fun embellishments from the kits (I used both the classic and daily diary kits for this layout).

I love scrapbooking trips because it makes me feel like I'm reliving some of my favorite moments...even if it's a year later!

I'll be using a lot of my kits for a travel journal that I'll be sharing soon once I've pulled it all together! Until then be sure and follow us on Facebook and Instagram!!

Oh, and don't forget, you just have a couple more days to secure your kit subscriptions for 2015. After Monday they'll be closed til January!!

Thursday, May 21, 2015

Let's be adventurous...

Hi again, I have gone back to one of my previous albums to document a fun camping adventure using the fabulous Pack Your Bags Daily Diary kit which is perfect for all your travel pages.


The photos from our camping trip mainly spoke for themselves which meant I didn't really need to add too much journaling to the pages, and instead I used a mix of the great filler cards from the kit to help tell the story.
 
 
I used one of the travel themed filler cards to set the mood for the layout, and have repeated the same color tones throughout both pages. I trimmed down the card and matted it onto cork patterned paper and finished it off with some colored stitching.
 
 
I used another filler card to record where we were, and clustered a group of different shaped elements together and really like the way the mix of wood, metal and enamel adds texture and interest to the card. I used more small clusters to add detail to some of the photos.
 
 
I have plenty more photos from our trip so will need to add an insert to document the rest of our adventures which won't be a problem because I still have plenty of great pieces from the kit.


Once again, I used one of the filler cards to help set the mood for the second page. I also repeated the use of small embellishment clusters and continued with the same colour tones to tie in with the first page.
 
 
I used simple stitching and a few enamel dots to add a bit more colour and interest to yet another filler card - I think this one might be my fave!
 
 
I cut out the suitcases from another filler card and added a few extra elements from the kit to create a custom journal card. 


Thanks for stopping by and I hope you will feel inspired to use all the great filler cards in your kits for your next layouts :)