Here I am again trying to catch up on my 2014 pocket page album. I am so glad that I am making HUGE progress. It is awesome to be able to get those stories, memories, and photos in the album before I forget everything completely.
Let's get to the sharing now shall we. Here is a look at both pages together. I went with a regular page on the left side and then one that I cut in half version for the right side. I really wanted to focus on the most important memories from these 2 weeks.
Sometimes I will combine weeks into one set of pages. This was the case with this set of pictures + stories.
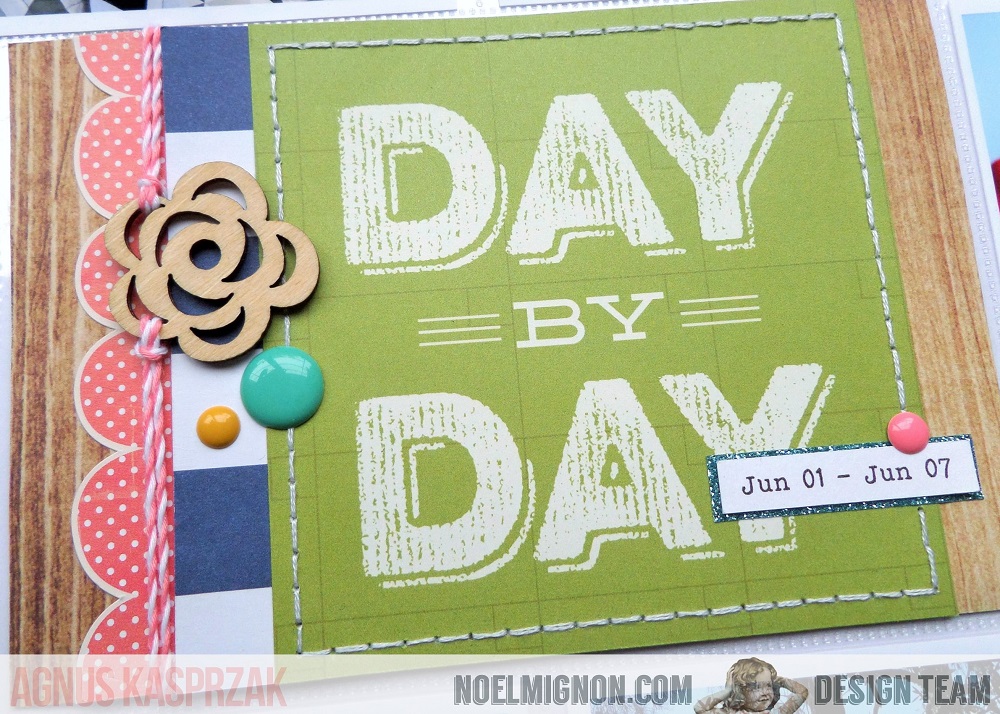
I went with a simple title card using the fun scalloped sticker that I cut down. The scallops draws your eye to the middle of the card and the dates.
These two pages has a mixture of the Simple Stories and my own custom journaling cards. But I made sure that the colors stayed cohesive through both sides.
I loved the far right journaling card, especially the strips of patterned paper made into arrows. I added one of the clear Heidi Swapp pieces along with some enamel dots.
The journaling card that has the black and white stripes was a perfect addition to this page. It breaks up the colors and photos perfectly. I cut out the & sign from one of the journaling cards and added it onto the black and white card.
Here is the photo that goes along with the far left side journaling card, which was a little adventure that me and the kids had.
One last close up to sum up the left side of my spread. This photo of Noah and me one was my favorite stories of these pages. These small little stories are the ones that I am going to cherish for years to come. Because looking back now, he has stopped doing this.
Here is a look at the left side by itself.
Let's move on the right side.
I used one of the clear photo overlays from Simple Stories. LOVE these.
I made a personalized journaling card starting with the great Heidi Swapp geotag. I wanted to spell out home on the bottom and I used the letters from the kit to do so.
As much as I love Instagram, sometimes it is a pain to work them into your pocket pages. What I usually do is print them out as a 4x4 photo and add them onto a big journaling card.
This technique is what I did on the bottom. I finished off this journaling card with a few embellishments here and there.
That is all for today everyone !! Thanks for coming.
Tuesday, June 16, 2015
Monday, June 15, 2015
Getting Busy!
Happy Monday!
I have a couple of projects for you today, using a mix of the Happy Go Lucky and Pack Your Bags kits. I am loving how well they go together!
The first is this layout of my little big boy, Reed. We had such a great, random morning, and I am always so grateful to get those recorded.
I love building up clusters of small embellies - those Simple Stories Bradz and Jillibean wood buttons are perfect together, with layers of enamel hearts and puffy star stickers in there, too.
I carried the circles through the page, and here's a smaller cluster of them, layered over the little journaling spot I made.
There are so many different arrows between these two kits, so I grabbed a few and added them to the circle theme I had going, using some pop dots to give a little more dimension :)
The second project I have for you is a little one that I made to help myself out! I have so many different little pieces of fluff for my little Jamberry business, and I was in dire need of a place to organize them in a cute way. Enter the kits and my new We R Memory Keepers 1-2-3 Punch Board that makes awesome envelopes, boxes, and bows. AND File Folders!
These are the perfect solution for me - everything fits perfectly inside them!
Then I just used one of the adorable paper clips from the kits to secure the contents in place - like my extra Happy Go Lucky coordinating wraps! That feather paper makes me a happy woman...
So now that I'm all organized in that department, I'm off to get things ready for our next kit reveal party. Don't miss it! We'll be showing you the new Pool Party kit, as well as revealing the new and exclusive Jamberry wraps that coordinate with them! Join the group here : https://www.facebook.com/groups/NoelMignonRevealParty/
And did you know that Virginia is designing coordinating wraps to the limited edition Disney kit - Main Street Magic? The reveal party for that is this Thursday night : https://www.facebook.com/events/777701839018067/
Be sure to be at both parties for the first peek of these awesome new kits, and their super cute coordinating wraps! See you soon!
I have a couple of projects for you today, using a mix of the Happy Go Lucky and Pack Your Bags kits. I am loving how well they go together!
The first is this layout of my little big boy, Reed. We had such a great, random morning, and I am always so grateful to get those recorded.
I love building up clusters of small embellies - those Simple Stories Bradz and Jillibean wood buttons are perfect together, with layers of enamel hearts and puffy star stickers in there, too.
I carried the circles through the page, and here's a smaller cluster of them, layered over the little journaling spot I made.
There are so many different arrows between these two kits, so I grabbed a few and added them to the circle theme I had going, using some pop dots to give a little more dimension :)
The second project I have for you is a little one that I made to help myself out! I have so many different little pieces of fluff for my little Jamberry business, and I was in dire need of a place to organize them in a cute way. Enter the kits and my new We R Memory Keepers 1-2-3 Punch Board that makes awesome envelopes, boxes, and bows. AND File Folders!
These are the perfect solution for me - everything fits perfectly inside them!
Then I just used one of the adorable paper clips from the kits to secure the contents in place - like my extra Happy Go Lucky coordinating wraps! That feather paper makes me a happy woman...
So now that I'm all organized in that department, I'm off to get things ready for our next kit reveal party. Don't miss it! We'll be showing you the new Pool Party kit, as well as revealing the new and exclusive Jamberry wraps that coordinate with them! Join the group here : https://www.facebook.com/groups/NoelMignonRevealParty/
And did you know that Virginia is designing coordinating wraps to the limited edition Disney kit - Main Street Magic? The reveal party for that is this Thursday night : https://www.facebook.com/events/777701839018067/
Be sure to be at both parties for the first peek of these awesome new kits, and their super cute coordinating wraps! See you soon!
Friday, June 12, 2015
Pocket Letter Try #2!
I've had a horrible headache today, but I wanted to go ahead and share something I'm working on with you guys (besides my top secret Main Street Magic class coming up! Eeek!)
A while back, I showed you guys a new thing I'd found called Pocket Letters. I want to try to make one every month for a friend, so here is June's with the lovely Happy Go Lucky kit!
The concept is to make a "letter" for a friend using a baseball card protector and send little odds and ends in the pockets! I wanted to personalize this one with a little doodle I made using a tutorial from the Craft-a-Doodle book. Her coloring comes from the Distress marker in the kit (and a few more that I have on hand) : I color a little on the drawing first, and then add some water with a brush. Use a light hand!
I also included a few stamped images for my friend that I thought she would like to use on her own crafty projects...
and I used one of those lovely popsicle boards from the kit as a carrier for some twine and some washi tape for her. Isn't it just happy looking?
Tonight is the last night of this sale! Take advantage of it!
Thursday, June 11, 2015
Daily Diary share with the Happy Go Lucky kit
Hi :) Agnus here again to share another week using the awesome 'Happy Go Lucky' Daily Diary kit.
This layout documents week 23 in my project life album and I really like the way it flows from the previous week using the same kit. It was a busy week, which meant that I had a lot of photos to fit onto the layout and I decided to use printed journal strips record the daily details directly onto my photos.
Carrying on from the previous week, I have used the W Design Project Life page protector and used the center pocket to hold my weekly title card which I pieced together by cutting up several cards from the kit. I used the twine to attach one of the wood veneer pieces to the card for extra detail and finished it off with a hand stitched border.
The die-cut frames are perfect for drawing attention to a particular photo and adding a few accents to one side of the frame helped to add a a pop of color to the pocket.
I used one of the scalloped stickers from the kit to help define the journal strips on the lighter area of the photo, and added a few wood veneer pieces to add depth to the pocket.
I used a simple strip of the glitter washi tape and bright enamel dots to dress up one of the filler cards - cutting around the bottom portion of the heart to slip the tape beneath it.
Thanks for stopping by xx
Wednesday, June 10, 2015
Documenting a Mini-Vacation with Happy Go Lucky
Good morning all! Today I wanted to share with you a pocket page spread I made using the Happy Go Lucky Daily Diary kit.

My husband and I went on a mini staycation of sorts in May when we went to a music festival without the kids. I took so many pictures that I had to dedicate a full 12x12 spread to it.
I wanted to make good use of all the cute 4x6 Simple Stories Life Documented cards that came in the kit so decided to use this page protector with all 4x6 slots. I started off by printing my full 4x6 photos of the sunset and of my husband talking with his friend.
I used Photoshop to make a photo collage with two 3x3 photos on a 4x6 canvas. Before printing, I wrote a small line of journaling all the way at the bottom and left blank space for this strip of paper from the 6x6 sheets from Jillibean Soup that came in the kit.
I usually have a compulsion to alternate cards and photos so that two photos never touch each other and two cards never touch each other. But I've slowly been working toward getting over that and I think this page turned out great.
I added a lot of machine stitching to give a little texture and did the journaling using my typewriter. I made more collages using Photoshop in order to maximize the amount of photos I could get on this page. I cut up some of the 4x6 Simple Stories cards and used them as patterned paper to decorate the plain spaces left in my collages.
Have you seen the sneak peeks of next month's kit, Pool Party? Make sure you are following NoelMignon on Facebook to see all the latest peeks of next month's kits in addition to what fellow members of the design team are creating with the gorgeous Happy Go Lucky.

My husband and I went on a mini staycation of sorts in May when we went to a music festival without the kids. I took so many pictures that I had to dedicate a full 12x12 spread to it.
I wanted to make good use of all the cute 4x6 Simple Stories Life Documented cards that came in the kit so decided to use this page protector with all 4x6 slots. I started off by printing my full 4x6 photos of the sunset and of my husband talking with his friend.
I used Photoshop to make a photo collage with two 3x3 photos on a 4x6 canvas. Before printing, I wrote a small line of journaling all the way at the bottom and left blank space for this strip of paper from the 6x6 sheets from Jillibean Soup that came in the kit.
I usually have a compulsion to alternate cards and photos so that two photos never touch each other and two cards never touch each other. But I've slowly been working toward getting over that and I think this page turned out great.
I added a lot of machine stitching to give a little texture and did the journaling using my typewriter. I made more collages using Photoshop in order to maximize the amount of photos I could get on this page. I cut up some of the 4x6 Simple Stories cards and used them as patterned paper to decorate the plain spaces left in my collages.
Have you seen the sneak peeks of next month's kit, Pool Party? Make sure you are following NoelMignon on Facebook to see all the latest peeks of next month's kits in addition to what fellow members of the design team are creating with the gorgeous Happy Go Lucky.
Tuesday, June 9, 2015
Week 18 Using Happy Go Lucky
Happy Tuesday to you all !
Can you believe it is June already ? Summer is here and I am so excited ! But before I get all mushy about Summer let's talk about Spring. Yes, Spring. I have some pages from April/May to share with you today.
Week 18 was a super fun week filled with lots of real life moments, and even National Scrapbook Day.
I have always been a fan of Simple Stories. Their cards are great, so detailed and fun. Most of them are already embellished or you. I chose this fun "Life Documented card for my title card. Since it was already embellished I didn't add much. I used the numbers from the sticker sheet in the kit and put 18 on the top to represent my week #, and then added the date as well.
Whenever I have photo that just is not quite right, the quality is bad, or the colors completely clash with the rest of my layout I will usually turn it black and white. That was the case with the photo of my husband and my son mowing the lawn. I still wanted to include the photo so I turned it black and white and printed it. It's not ideal but it will work.
When completing my spreads I often like to include smaller photos. That is what I did here with my out of focus sunrise photo. I took this shot while I was running one morning and like how it turned out. I added in a few embellishments and called it finished.
The other card I started out with cutting up the scalloped sticker and adding the dream clear label piece over top. I added the bird in the corner to go along with my story on the journaling card.
I added one of the clear photo overlays to the picture of Katelyn playing in her soccer game. I absolutely love photo overlays, they are such an easy way to embellish a photo fast.
Let's look at the right side of my layout now.
That Saturday was National Scrapbook Day and I had some friends over to scrapbook and hang out with me. I snapped a photo of me before everyone arrived. I decided to use some of the letter stickers to abbreviate NSD. I added some text underneath and then a wood veneer heart from the kit.
I added a strip of one of the 6x6 papers to a grid journaling card to start this look. Adding the arrow at the top draws your eye to it. Don't you just love arrows ?!!! I sure do.
Here is a close up of some journaling cards.
Both of these cards I added a few enamel dots and wood veneers for some fun embellishments.
Here is one last look at the right side. I added a digital brush to my photo and then put one of the white sticker phrases on top for a fun look.
I caught myself saying the same things over and over to the girls in the morning. I decided to write some of my morning phrases down that week. The "am" are letter stickers from the kit and I printed out my journaling onto one of the 4x6 cards. Thought it would be fun to read years from now.
Thanks for stopping by today everyone ! I hope you all are enjoying that school is out and summer is here !! Woohoo !! I for one am so excited and ready to make some graet summer memories. Don't forget to get the Happy Go Lucky kit now and get those memories scrapped.
Can you believe it is June already ? Summer is here and I am so excited ! But before I get all mushy about Summer let's talk about Spring. Yes, Spring. I have some pages from April/May to share with you today.
Week 18 was a super fun week filled with lots of real life moments, and even National Scrapbook Day.
I have always been a fan of Simple Stories. Their cards are great, so detailed and fun. Most of them are already embellished or you. I chose this fun "Life Documented card for my title card. Since it was already embellished I didn't add much. I used the numbers from the sticker sheet in the kit and put 18 on the top to represent my week #, and then added the date as well.
Whenever I have photo that just is not quite right, the quality is bad, or the colors completely clash with the rest of my layout I will usually turn it black and white. That was the case with the photo of my husband and my son mowing the lawn. I still wanted to include the photo so I turned it black and white and printed it. It's not ideal but it will work.
When completing my spreads I often like to include smaller photos. That is what I did here with my out of focus sunrise photo. I took this shot while I was running one morning and like how it turned out. I added in a few embellishments and called it finished.
The other card I started out with cutting up the scalloped sticker and adding the dream clear label piece over top. I added the bird in the corner to go along with my story on the journaling card.
I added one of the clear photo overlays to the picture of Katelyn playing in her soccer game. I absolutely love photo overlays, they are such an easy way to embellish a photo fast.
Let's look at the right side of my layout now.
That Saturday was National Scrapbook Day and I had some friends over to scrapbook and hang out with me. I snapped a photo of me before everyone arrived. I decided to use some of the letter stickers to abbreviate NSD. I added some text underneath and then a wood veneer heart from the kit.
I added a strip of one of the 6x6 papers to a grid journaling card to start this look. Adding the arrow at the top draws your eye to it. Don't you just love arrows ?!!! I sure do.
Here is a close up of some journaling cards.
Both of these cards I added a few enamel dots and wood veneers for some fun embellishments.
Here is one last look at the right side. I added a digital brush to my photo and then put one of the white sticker phrases on top for a fun look.
I caught myself saying the same things over and over to the girls in the morning. I decided to write some of my morning phrases down that week. The "am" are letter stickers from the kit and I printed out my journaling onto one of the 4x6 cards. Thought it would be fun to read years from now.
Thanks for stopping by today everyone ! I hope you all are enjoying that school is out and summer is here !! Woohoo !! I for one am so excited and ready to make some graet summer memories. Don't forget to get the Happy Go Lucky kit now and get those memories scrapped.
Subscribe to:
Posts (Atom)