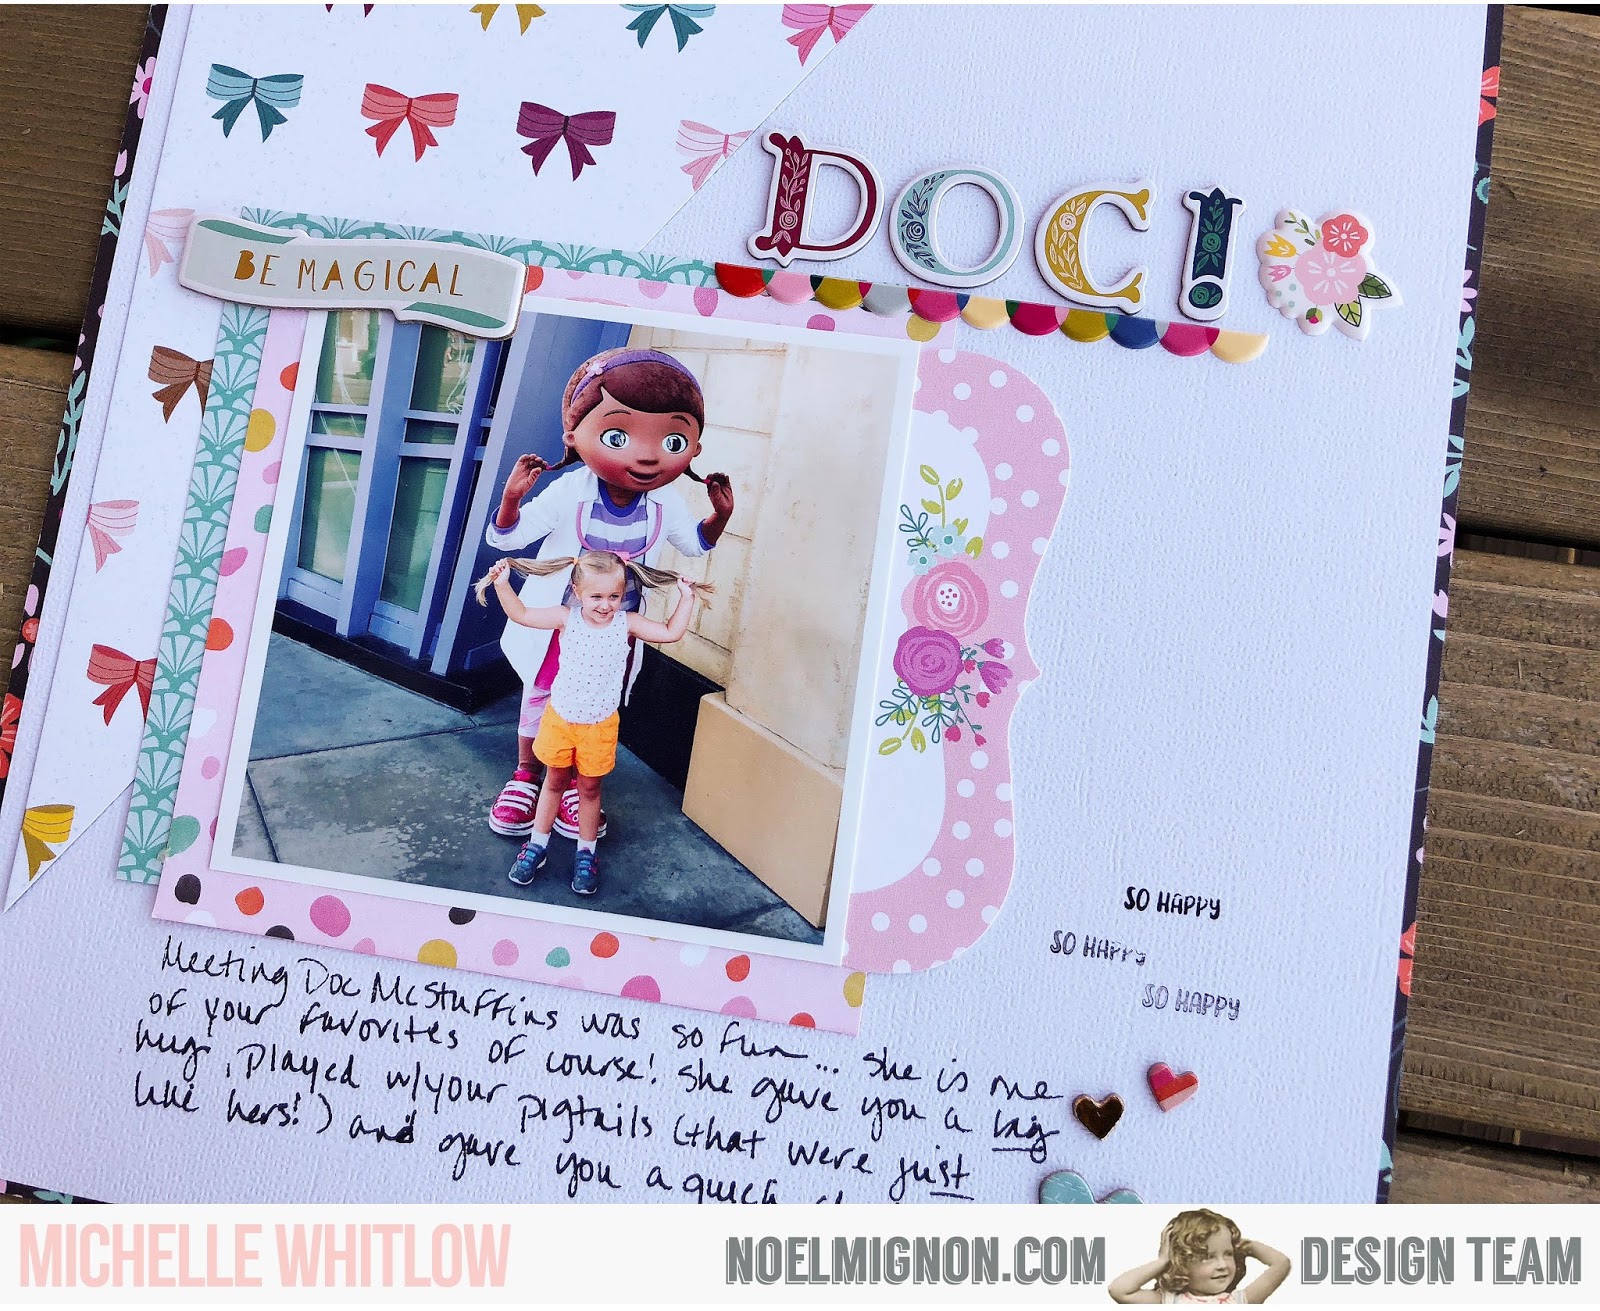
This week I was inspired to create some Disney pages after seeing what fellow DT member Meridy was creating with the You Go Girl kits. I have 2 pages to share today. The first is from my last trip to Disneyland last November. My son & I went for the 5k and even though we were only there for a few days we had so much fun. I mean, it's Disney! How could you not have fun, right?!
Most of my pages were created with the You Go Girl Classic Kit. Although I did use a few elements from the Daily Diary Kit. "The Best Thing" paper was actually the packaging from the Pretty Little Studio alphas. The "happiness" tag was from one of the 4x4 journaling cards that I cut down.
My second layout is actually 9x12 since that is the size album I'm using for that trip...I thought I'd mix things up a bit and deviate from the standard 12x12 size. I love this size when you're working with just 1 photo, it's much easier to manage.
Showing posts with label Disney. Show all posts
Wednesday, March 28, 2018
Monday, March 5, 2018
{Disney Day 4} layout with the "You Go Girl" Classic Kit
Hello friends, it's Monday with Meridy. Today I am sharing a layout I made with my new "You Go Girl" Classic Kit. Before I even received my kit in the mail, I could tell from the photos of it that it would go wonderfully with my Disneyland photos. And I was right! I have already pulled photos for 6 Disneyland layouts to make with this kit...perfection!
Today's layout was really inspired by a Stuck Sketches sketch, found here (the second sketch in this link). The layout is of our 4th day in Disneyland, our Alice in Wonderland outfit day.
I started by pulling bits and pieces from the kit that really coordinated with the colors in my photo. Then I went to the sketch to cut the banner background shape,the washi scallop across the top, and the small embellishment cluster placement on the upper left.
Next, it was time for me to start layering scraps of paper and washi strips under the photo, and pile on the embellishments.
My "day 4" title was a chipboard sticker that read "today", so I trimmed off the "to" part and it was perfect! Adding embellishments went pretty quickly on this layout because there were so many beautiful ones that really matched the colors in the photo so well.
The butterflies were cut from a patterned paper in the kit, and I popped the wings up with pop dots, to add a little dimension.
I have absolutely LOVED working with this kit and my Disneyland photos this past week, I can't wait to share more of my creations with you over the next few weeks.
Thanks for stopping by!
Wednesday, April 19, 2017
Goofy's Kitchen
Hey guys, Michelle here! This week I'm playing with "The Happiest" kit, the limited edition kit from last month (only ONE kit left!!). I love every bit of this kit & can't wait to create more layouts with it!
For now I've started on a Disney album from a trip we took to Disneyland in 2015. I decided to go with a 9x12 album for this trip since I knew I needed a bit more space than the 6x8 size that I typically like to use. And I'm planning on mixing in pocket pages with traditional layouts. I love using pocket pages for trip albums because I'm able to add lots of photos & don't feel like I need to leave some out because of limited space.
The first night we were there we went to Goofy's Kitchen for dinner. SO much fun and great food :) So first I created a traditional page. This is the first time I've played with the 9x12 size and I really liked it.
Then I used a pocket page for the rest of the photos from the dinner. I ended up grabbing a 4x6 card from the last Disney kit Noel Mignon had.
When you take photos at places like Disneyland where there are lots of people, it's nearly impossible to not have strangers in your background. But sometimes they're in a spot that is less than desirable like the photo below:
See that kid just to the right of Minnie? Well, rather than messing with Photoshop to try and crop him out I simply used some of my embellishments to cover him up. I do this a *lot* with my Disney photos!
Word phrase stickers to the rescue!!
And here are my 2 pages together as they'll look in my album:
For now I've started on a Disney album from a trip we took to Disneyland in 2015. I decided to go with a 9x12 album for this trip since I knew I needed a bit more space than the 6x8 size that I typically like to use. And I'm planning on mixing in pocket pages with traditional layouts. I love using pocket pages for trip albums because I'm able to add lots of photos & don't feel like I need to leave some out because of limited space.
The first night we were there we went to Goofy's Kitchen for dinner. SO much fun and great food :) So first I created a traditional page. This is the first time I've played with the 9x12 size and I really liked it.
Then I used a pocket page for the rest of the photos from the dinner. I ended up grabbing a 4x6 card from the last Disney kit Noel Mignon had.
When you take photos at places like Disneyland where there are lots of people, it's nearly impossible to not have strangers in your background. But sometimes they're in a spot that is less than desirable like the photo below:
See that kid just to the right of Minnie? Well, rather than messing with Photoshop to try and crop him out I simply used some of my embellishments to cover him up. I do this a *lot* with my Disney photos!
Word phrase stickers to the rescue!!
And here are my 2 pages together as they'll look in my album:
Monday, March 13, 2017
{Rapunzel, Rapunzel, Let Down Your Hair} layout with the "Delightful" Daily Diary Kit
Happy Monday!!! It's Meridy here today with another 12x12 layout using the "Delightful" Daily Diary Kit. I also used a patterned paper and a piece of cardstock from the Classic Kit Paper Pack for the base of the layout. Today's layout is yet another Disneyland layout. If you like scrapbooking Disney photos---keep your eye out for an EXTRA Noel Mignon Kit being released soon, it's exclusively Disney!!!
Onto today's layout, I really wanted the layout to feature the pinks and purples in Rapunzel's dress, so I choose papers and cards with these colors. The dark purple cardstock is from my stash.
Once I had the papers and photo adhered, I started embellishing. This was a BREEZE with the great embellishments in the Daily Diary kit. I misted the Prima flowers to make them the colors I wanted for the layout, blue and lavender. The "Magical Moment" card was PERFECT for a Disneyland photo, the cork butterfly and mini pink doily were great feminine additions to the page.
I stamped journaling lines onto the pink and white 4x6 card, punched the heart from a 3x4 card in the kit, and stamped the date with the stamp from the January Daily Diary Kit---I love that most of Noel's kits come with supplies that are reusable!
I balanced the left side of my layout with a trimmed off portion of the 4x6 card I used on the layout, added a few more punched hearts, and finished off the layout by outlining most of the layers.
Thanks for stopping by today!!!
Subscribe to:
Posts (Atom)