Hey there! Laura here with a new layout to share today using the Little Bird Daily Diary Kit. The design team was challenged to use a sketch this week, any one of our choosing! I opted for sketch #302 over at Creative Scrappers (see sketch below) and modified it slightly to make it work with the Daily Diary kit that I am playing with this month, which includes a lot of
pocket cards and 6 x 6 papers.
If you check out the sketch below, you will notice that it suggests that the design encompasses the entire page, however, since I am working with 6 x 6 papers I needed to shrink it down for my interpretation of it. So my focal area measures about 6 x 6 with a 3 x 3 photo. I have matted this onto some white cardstock that I added some inks, paint and mist to in pinks and teals. And then I matted that onto white cardstock and a large piece of patterned paper from the Maggie Holmes "Gather" collection that I had in my stash.
I swapped out the locations of both the photo and the title on my page as well. I felt that I could only really pull of a single photo for my compact focal area. I loved mixing up the stickers from both the Hazelwood and Echo Park "Just be You" collections to create my multi font title - which you know I love! I added a bit of machine stitching just for fun and texture.
I also had to shift the embellishment cluster on the lower right of my page over just a bit so that it didn't cover my photo. But I was still able to keep the embellishment triangle in tact! This cluster combines layers of stickers, flowers and pieces cut from pocket cards with some sequins and a button added in.
The embellishment cluster on the lower left is much more minimal as is suggested in the sketch; sequins, a sticker and a cut apart flag are just perfect here.
The cluster on the upper left also got shifted over slightly and tucked behind my focal area. This cluster also features layers of stickers, pocket cards, a hand cut tag and some sequins.
Here is a look at the sketch by Kristine at Creative Scrappers!
I had a lot of fun with it and knew that it could easily be modified to suit the products / kit that I am working with this month!
Supply List: (from the kit) Echo Park "Just be You" and American Crafts"Hazelwood" stickers; Fancy Pants "Joy Parade" pocket cards; Crate Paper's Maggie Holmes "Gather" 6 x6 papers; Pretty Little Studios "Hey Heather" pocket cards and cut apart flags; Jillibean Soup pink grapefruit sequins; May Arts Ribbon; Prima flower. (from my stash) American Crafts Texture cardstock; Staples cardstock; Hemptique twine; misc. button and crochet floss; Maggie Holmes "On Point" paper from the Gather collection; Tim Holtz Distress ink; Mr. Huey's mist.
Thanks so much for visiting!
Showing posts with label January 2017. Show all posts
Friday, January 27, 2017
Friday, January 20, 2017
Sweet Times | Little Bird Daily Diary Kit
He there! It's Laura here with a new layout to share today! The design team had an open week, so anything goes for us! Since I am playing with the Daily Diary kit this month, which includes a lot of pocket cards etc., I opted for a grid design for my page. I pulled in some 12 x 12 paper from my stash to act as my background.
The Pocket Cards from the Simple Stories Reset Girl collection have a fun vintage vibe, so I pulled out this photo of my oldest son, my mother in law and myself from way back in 1990. And as luck would have it I had a couple of 12x12 sheets of this collection left over from my Simple Stories design team kit, so they were perfect for my background!
I trimmed down my photo to 3 x 3 and matted it with some cream cardstock. Then I trimmed down three 3 x 4 pocket cards to 3 x 3, as well.
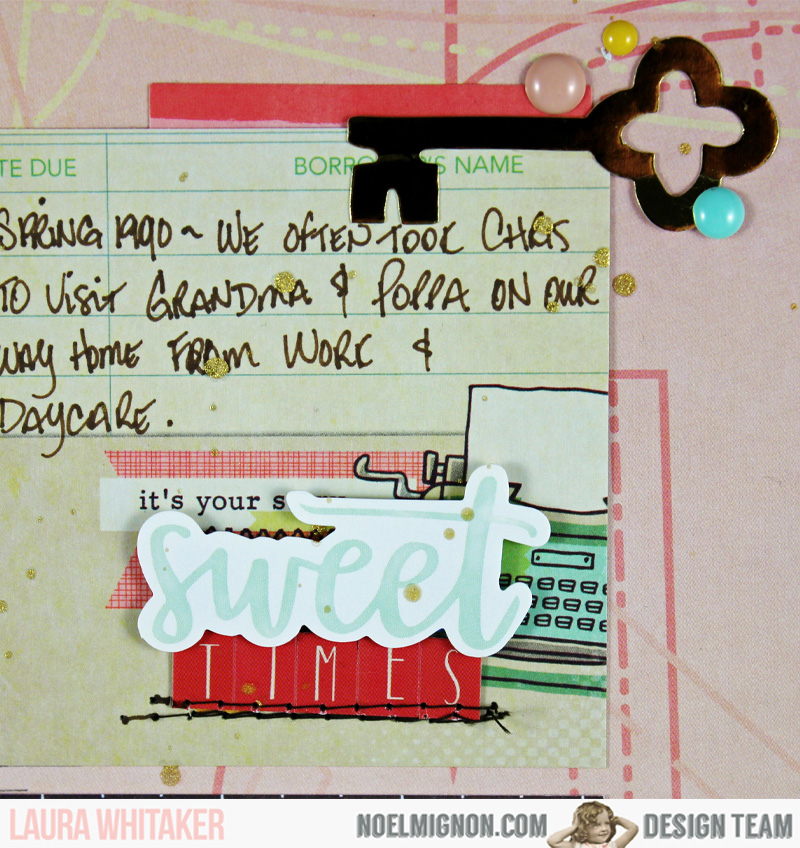
I kept one card fairly plain so that I could add my title and journalling to it. Of course, I added in an embellishment or two, too!
This photo was challenging because there are so many different colours going on in it. This was taken long before I thought about scrapbooking! But I think I made it work. You can see I pulled in the twine and the Heidi Swapp gold color shine from a previous Noel Mignon kit.
Each quadrant got fancied up, in some small or not so small way. This one got layers and layers of stickers!
I cut this large ampersand from another pocket card and popped it up on this pretty floral card. I love the way it looks and it was a fun way to use it!
Supply List: (from the kit) May Arts ribbon; American Crafts Hazelwood stickers; Simple Stories "The Reset Girl" pocket cards, enamel shapes and phrase stickers; Echo Park Just Be You stickers; (from my stash) Simple Stories "The Reset Girl"patterned papers (6819, 6810); The Twinery gold and cream bakers twine; Heidi Swapp gold Color Shine; Staples card stock.
Thanks for visiting today!
I trimmed down my photo to 3 x 3 and matted it with some cream cardstock. Then I trimmed down three 3 x 4 pocket cards to 3 x 3, as well.
I kept one card fairly plain so that I could add my title and journalling to it. Of course, I added in an embellishment or two, too!
This photo was challenging because there are so many different colours going on in it. This was taken long before I thought about scrapbooking! But I think I made it work. You can see I pulled in the twine and the Heidi Swapp gold color shine from a previous Noel Mignon kit.
Each quadrant got fancied up, in some small or not so small way. This one got layers and layers of stickers!
I cut this large ampersand from another pocket card and popped it up on this pretty floral card. I love the way it looks and it was a fun way to use it!
Supply List: (from the kit) May Arts ribbon; American Crafts Hazelwood stickers; Simple Stories "The Reset Girl" pocket cards, enamel shapes and phrase stickers; Echo Park Just Be You stickers; (from my stash) Simple Stories "The Reset Girl"patterned papers (6819, 6810); The Twinery gold and cream bakers twine; Heidi Swapp gold Color Shine; Staples card stock.
Thanks for visiting today!
Saturday, January 14, 2017
Squad Goals * Little Bird Classic Kit *
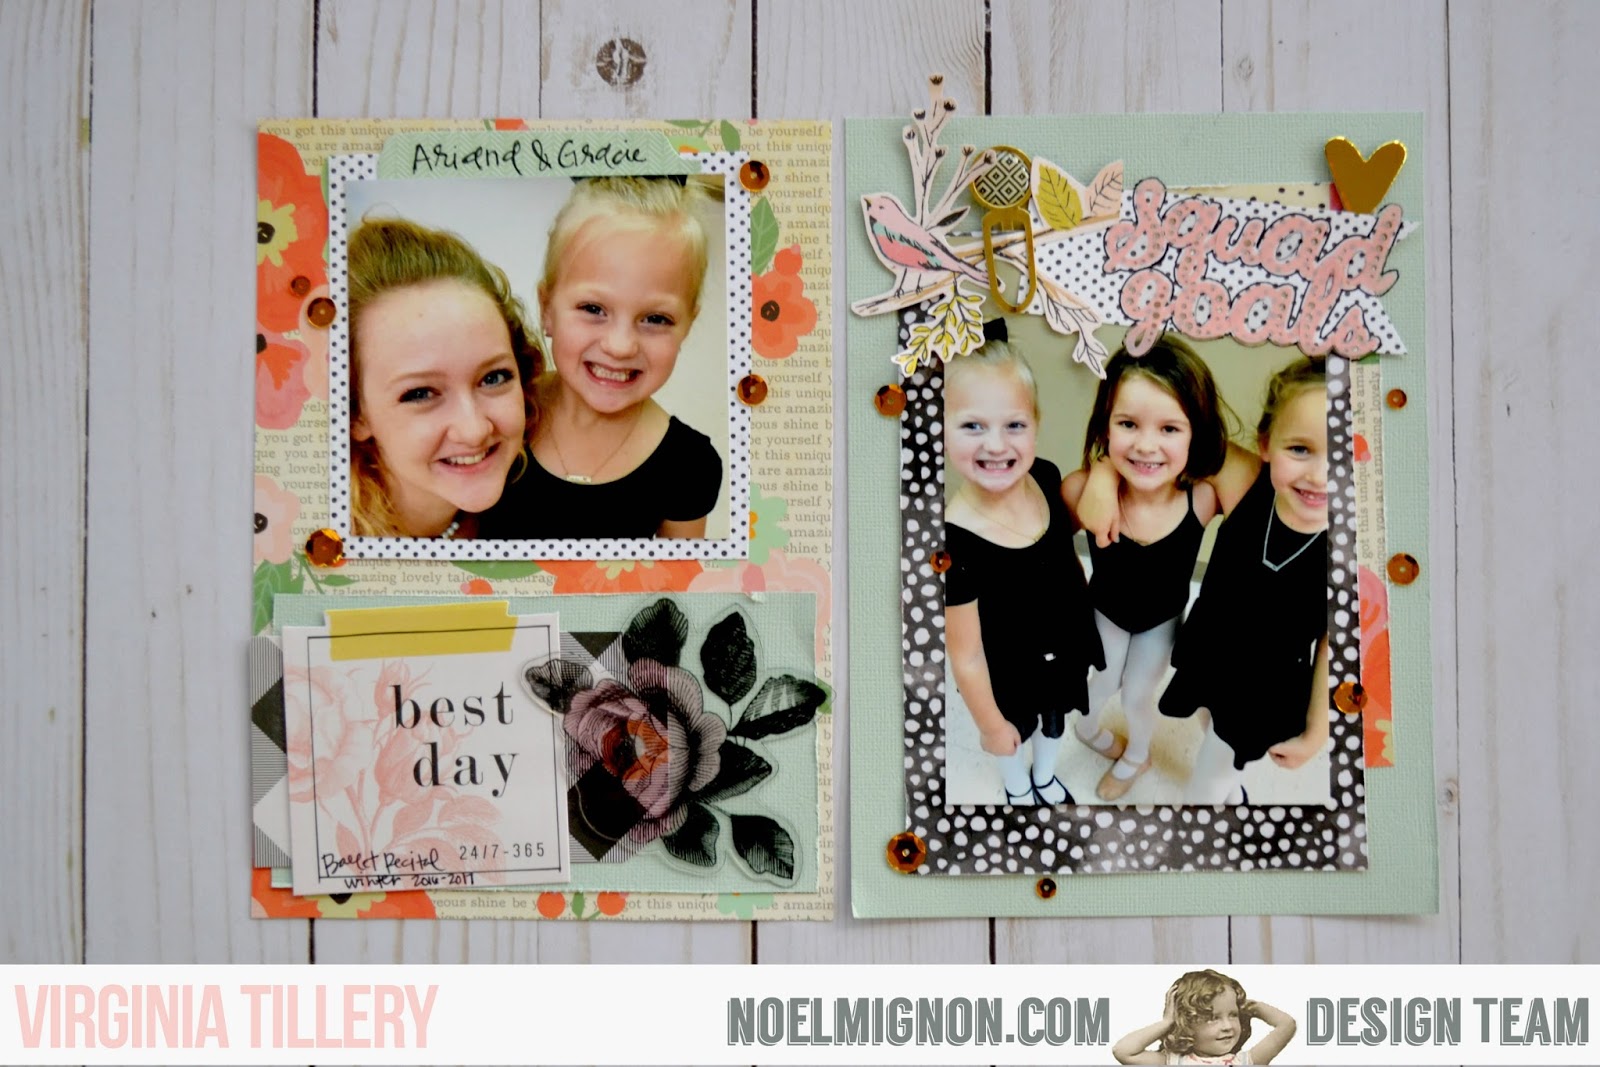
Hey guys! This week is all about "goals" and I thought I'd make a lighthearted twist on the topic... with a pic of my 7 year old and some of her best buddies.
How darling are those little pink letter stickers from the Little Bird kit? I love them.
I recently have been trying to figure out what a family album looks like for us (after taking some time away from scrapbooking). I wanted something that was a little easier to hold and interact with than a 12x12 album, so I settled on a 6x8 album. So what you see here are my first pages for that album!
Friday, January 13, 2017
Adventure Awaits | Little Bird Daily Diary Kit
Hey friends! This week the design team is challenged to create a layout that reflects our goals, resolutions, one little word or the like for the new year. Since I am not much of one to make resolutions and I do not really do much with my one little word, I opted to document a goal I have for 2017 - which is to have more adventure in my life. Now I am not speaking of far away exotic adventures, but more taking time to get out and enjoy life a little more! And I really hope I remember the camera!
After giving some thought to the theme of my page, I struggled a bit as to how to document it. Then as I was sifting through my kit I was inspired by the 6 x 6 paper in the Gather collection that a grid of little rectangles. I found this photo of it in 12x12 format on the Scrapbook.com site. (Forgot to snap a picture of my piece.)
Anyway, I cut up the paper into the little rectangular pieces and started playing with them, spreading them around on my desk and laying out a grid design. Grid designs are a little out of my comfort zone, so I challenged myself to go with it!
There were 12 little rectangles on the page, so I figured if I added 4 photos I could do a 4 up, 4 across grid. The next step was to sift through my massive amount of photos to find a few that spoke to my theme. I didn't really pay much attention to the date they were taken as that isn't really important to my story. Instead I focused on what was going on in the photos and picked ones where I was on an adventure, whether is was near or far, or photos of people or scenery didn't really matter.
After printing the photos, and integrating them into my grid design by placing one photo into each row, my design felt a little too structured, so I pulled one little rectangle from each row, varying the position that I pulled it from. This created a blank space, which to me felt like a little resting spot in the design.
Once these main elements were adhered to my page, I stitched around their perimeter with my sewing machine.
Next, I gave some thought to embellishing, I knew that I could tuck small embellishments anywhere on my page. But what about larger ones? I pulled 3 large-ish stickers from the Hazelwood stickers sheet and removed one more rectangle from my spread and added in an extra column, for each sticker I would add.
After adding my journalling which I hand wrote on a scrap of paper and taped it to a little rectangle with some of the washi from the kit, I then proceeded to add in small embellishments.
I splattered on some gold and navy Heidi Swapp color shine to finish off my layout.
My layout was feeling a little blah and lost so I mounted in onto the pretty polka dot patterned paper from Echo Park (the back of the cut apart cards) that came in the kit. All in all, I kind of like the way it turned out, and I only used 1 partial sheet of the 12 x 12 paper (as I gutted it) and 3/4 of the 6x6 paper - kind of fun when you think about it!
Supply List: From the Kit - Echo Park just be you 4x6 journalling card paper and sticker sheet; Hazelwood 6x6 paper, washi tape and sticker sheet; Pretty Little Studio Hello Heather cut apart flags and Belle pocket cards; Simple Stories The Reset Girl enamel shapes and phrase stickers. From my stash - Tim Holtz Kraft Core cardstock; Heidi Swapp gold and navy color shine; Fancy Pants Flair.
Thanks so much for visiting!
After giving some thought to the theme of my page, I struggled a bit as to how to document it. Then as I was sifting through my kit I was inspired by the 6 x 6 paper in the Gather collection that a grid of little rectangles. I found this photo of it in 12x12 format on the Scrapbook.com site. (Forgot to snap a picture of my piece.)
Anyway, I cut up the paper into the little rectangular pieces and started playing with them, spreading them around on my desk and laying out a grid design. Grid designs are a little out of my comfort zone, so I challenged myself to go with it!
There were 12 little rectangles on the page, so I figured if I added 4 photos I could do a 4 up, 4 across grid. The next step was to sift through my massive amount of photos to find a few that spoke to my theme. I didn't really pay much attention to the date they were taken as that isn't really important to my story. Instead I focused on what was going on in the photos and picked ones where I was on an adventure, whether is was near or far, or photos of people or scenery didn't really matter.
After printing the photos, and integrating them into my grid design by placing one photo into each row, my design felt a little too structured, so I pulled one little rectangle from each row, varying the position that I pulled it from. This created a blank space, which to me felt like a little resting spot in the design.
Once these main elements were adhered to my page, I stitched around their perimeter with my sewing machine.
Next, I gave some thought to embellishing, I knew that I could tuck small embellishments anywhere on my page. But what about larger ones? I pulled 3 large-ish stickers from the Hazelwood stickers sheet and removed one more rectangle from my spread and added in an extra column, for each sticker I would add.
After adding my journalling which I hand wrote on a scrap of paper and taped it to a little rectangle with some of the washi from the kit, I then proceeded to add in small embellishments.
I splattered on some gold and navy Heidi Swapp color shine to finish off my layout.
My layout was feeling a little blah and lost so I mounted in onto the pretty polka dot patterned paper from Echo Park (the back of the cut apart cards) that came in the kit. All in all, I kind of like the way it turned out, and I only used 1 partial sheet of the 12 x 12 paper (as I gutted it) and 3/4 of the 6x6 paper - kind of fun when you think about it!
Supply List: From the Kit - Echo Park just be you 4x6 journalling card paper and sticker sheet; Hazelwood 6x6 paper, washi tape and sticker sheet; Pretty Little Studio Hello Heather cut apart flags and Belle pocket cards; Simple Stories The Reset Girl enamel shapes and phrase stickers. From my stash - Tim Holtz Kraft Core cardstock; Heidi Swapp gold and navy color shine; Fancy Pants Flair.
Thanks so much for visiting!
Friday, January 6, 2017
Hello 2015 | Little Bird Daily Diary Kit
Hi there! Laura here today sharing my first layout using the January Little Bird kit. This month I am playing with the Daily Diary kit, typically put together for pocket style scrapbooking. Because I am not a pocket scrapper and do not wish to start this style of scrapping at this time, I challenged myself to create 12 x 12 layouts with my kit.
For my first share I did have to add in some cardstock to the kit, one piece to act as a base, and a second piece to create a die cut for my page.
Since we have started a new month and a new year, I decided to scrapbook about New's Eve a couple of years ago. My husband and I went out to a dance with some friends and had a great evening!
I started my page by creating this cut file, after that I added some water colour paint to my background. I created a sort of colour blocking look using three colours. Then I added some machine stitching. I wish my stitching was a little more straight but it is what it is!
I layered up some pocket and journalling cards under my photo to create a focal point, cutting one into a tag shape to create a bit of interest.
I knew I wanted to use this "hello" sticker as part of my title so I paired it with some number stickers to create "hello 2015".
I punched out the "enjoy this" from a pocket card, using a circle punch. Then cut the "beautiful moment" phrase from another card. I kept my embellishing to a minimum using only a few stickers and enamel dots, plus a couple of buttons form my stash.
I hand wrote my journalling and added a couple of hearts to accent it.
Then I decided my page needed just a bit more, so I cut another pocket card into a square, and then into two triangles, and added one each to two of my corners. Afterward, I stitched on some ribbon as a final touch.
I definitely had to be creative to use the kit for a 12 x 12 page, but I love the end result!
I also have a new process video today, you can watch the video for this layout below or here on my You-Tube channel.
Supply List: From the kit - Pretty Little Studios Belle and Mon Ami pocket cards; Fancy Pants Joy Parade journalling cards; Echo Park Just Be You alpha stickers; Simple Stories enamel shapes; Hazelwood shape stickers, date stamp and washi tape; May Arts pink silk ribbon. From my stash - American Crafts cardstock; my cut file; Leow's water colour paints; Sargent gesso; Heidi Swapp gold color shine; misc buttons; Annie's crochet thread.
Thanks for visiting today!
For my first share I did have to add in some cardstock to the kit, one piece to act as a base, and a second piece to create a die cut for my page.
Since we have started a new month and a new year, I decided to scrapbook about New's Eve a couple of years ago. My husband and I went out to a dance with some friends and had a great evening!
I started my page by creating this cut file, after that I added some water colour paint to my background. I created a sort of colour blocking look using three colours. Then I added some machine stitching. I wish my stitching was a little more straight but it is what it is!
I layered up some pocket and journalling cards under my photo to create a focal point, cutting one into a tag shape to create a bit of interest.
I knew I wanted to use this "hello" sticker as part of my title so I paired it with some number stickers to create "hello 2015".
I punched out the "enjoy this" from a pocket card, using a circle punch. Then cut the "beautiful moment" phrase from another card. I kept my embellishing to a minimum using only a few stickers and enamel dots, plus a couple of buttons form my stash.
I hand wrote my journalling and added a couple of hearts to accent it.
Then I decided my page needed just a bit more, so I cut another pocket card into a square, and then into two triangles, and added one each to two of my corners. Afterward, I stitched on some ribbon as a final touch.
I definitely had to be creative to use the kit for a 12 x 12 page, but I love the end result!
I also have a new process video today, you can watch the video for this layout below or here on my You-Tube channel.
Thanks for visiting today!
Subscribe to:
Posts (Atom)