Showing posts with label boys. Show all posts

Saturday, August 29, 2015

4x4 Pockets & Daily Diary


Welcome back everyone! Wow...I cannot believe August will soon be over and this is my last official pocket page for August to share.  This month sure did whizz by.  I hope your month was filled with many memories and moments so you will have tons of photos to scrapbook with this incredible kit! ;)


I always let my Noel Mignon Daily Diary kits take the lead when I am creating.  By this, I mean I usually allow the products to guide the types and styles of pages I am going to create with the kit.  This month, I noticed a lot of the products were really fun and different square sizes of products.  There were fabulous little 2x2 die cuts, awesome 3x4 cards and these really cool 4x4 die cut frames.  They all inspired me to create something different with the kit, yet I ended up with all pocket pages...just very unique from one another.  I love when that happens! :)


So for this layout, I allowed myself to be inspired and drawn to creating a 12x12 pocket page, with 4x4 squares.  The gorgeous die cut frames were my total inspiration for this page.  I love the size, the style, the colours and how cute they adorn my photos.  They are truly the funnest overlays and really make your photos pop!


I hate wasting product, so I am always looking for alternate ways to use up remainders of my kit and stash.  So because I did not have enough of certain papers to fill the large 4x4 pockets I simply created these fun triangles and alternated patterned paper.  I then used my Fuse tool to secure them in the page nicely.  The 'hello' card was actually a 4x6 which I trimmed down accordingly.  I then used the awesome Project Life alpha stickers to add the 'sunshine' below.  I love how alphas can be used to customize cards for whatever layout one is doing.  This kit came with so many alphas, I loved it!


In keeping with using up my stash, I created the "days like this are the best" card by simply trimming down a 3x4 card and adhering it on top of a 4x4 card.  The centre card, with all of the word strips I love!  I simply took these wonderful strips, and using my sewing machine stitched them onto just a white piece of 4x4 card stock.  The super cute camera clip I clipped onto the top.  I just loved this piece from the kit!


I added my journaling this month directly onto a 4x4 card that I initially trimmed down from a 4x6.  I knew I wanted to add in my thoughts onto the pennant so I made sure to trim so that I would have enough room, yet fit my pocket.  I simply jotted down my thoughts and I love how it all turned out and helped to complete my page.


I hope that I have inspired you to get out the remainder of your August kits and use up that stash!  These kits go such a long way and there is always a way to make something work for you when you need it!  Happy creating everyone...I am ready for September's phenomenal kit, aren't you?

Tuesday, May 26, 2015

Happy Go Lucky Soccer Boys

So, the Happy Go Lucky kit is NOW UP FOR SALE! And it is CUH-UTE! 

Seriously, it's the cutest little summery kit I've laid my eyes on. It's got a lot of "girly" elements to it, but I wanted to show y'all today how I made it into a more rugged look to document my son's soccer season. 


I used a border strip found in the sticker sheet from the Happy Go Lucky Daily Diary kit, while the rest comes from the Classic Kit. I've found that a more simple/streamlined look just tends to fit my son's personality, so I try to stay consistent with my layouts of him like that. The straight lines with a little bit of quirkiness with splatters of ink say just as much about his personality as does my journaling and photos. Never forget about reflecting personality through design as well as those things! 


Friday, May 8, 2015

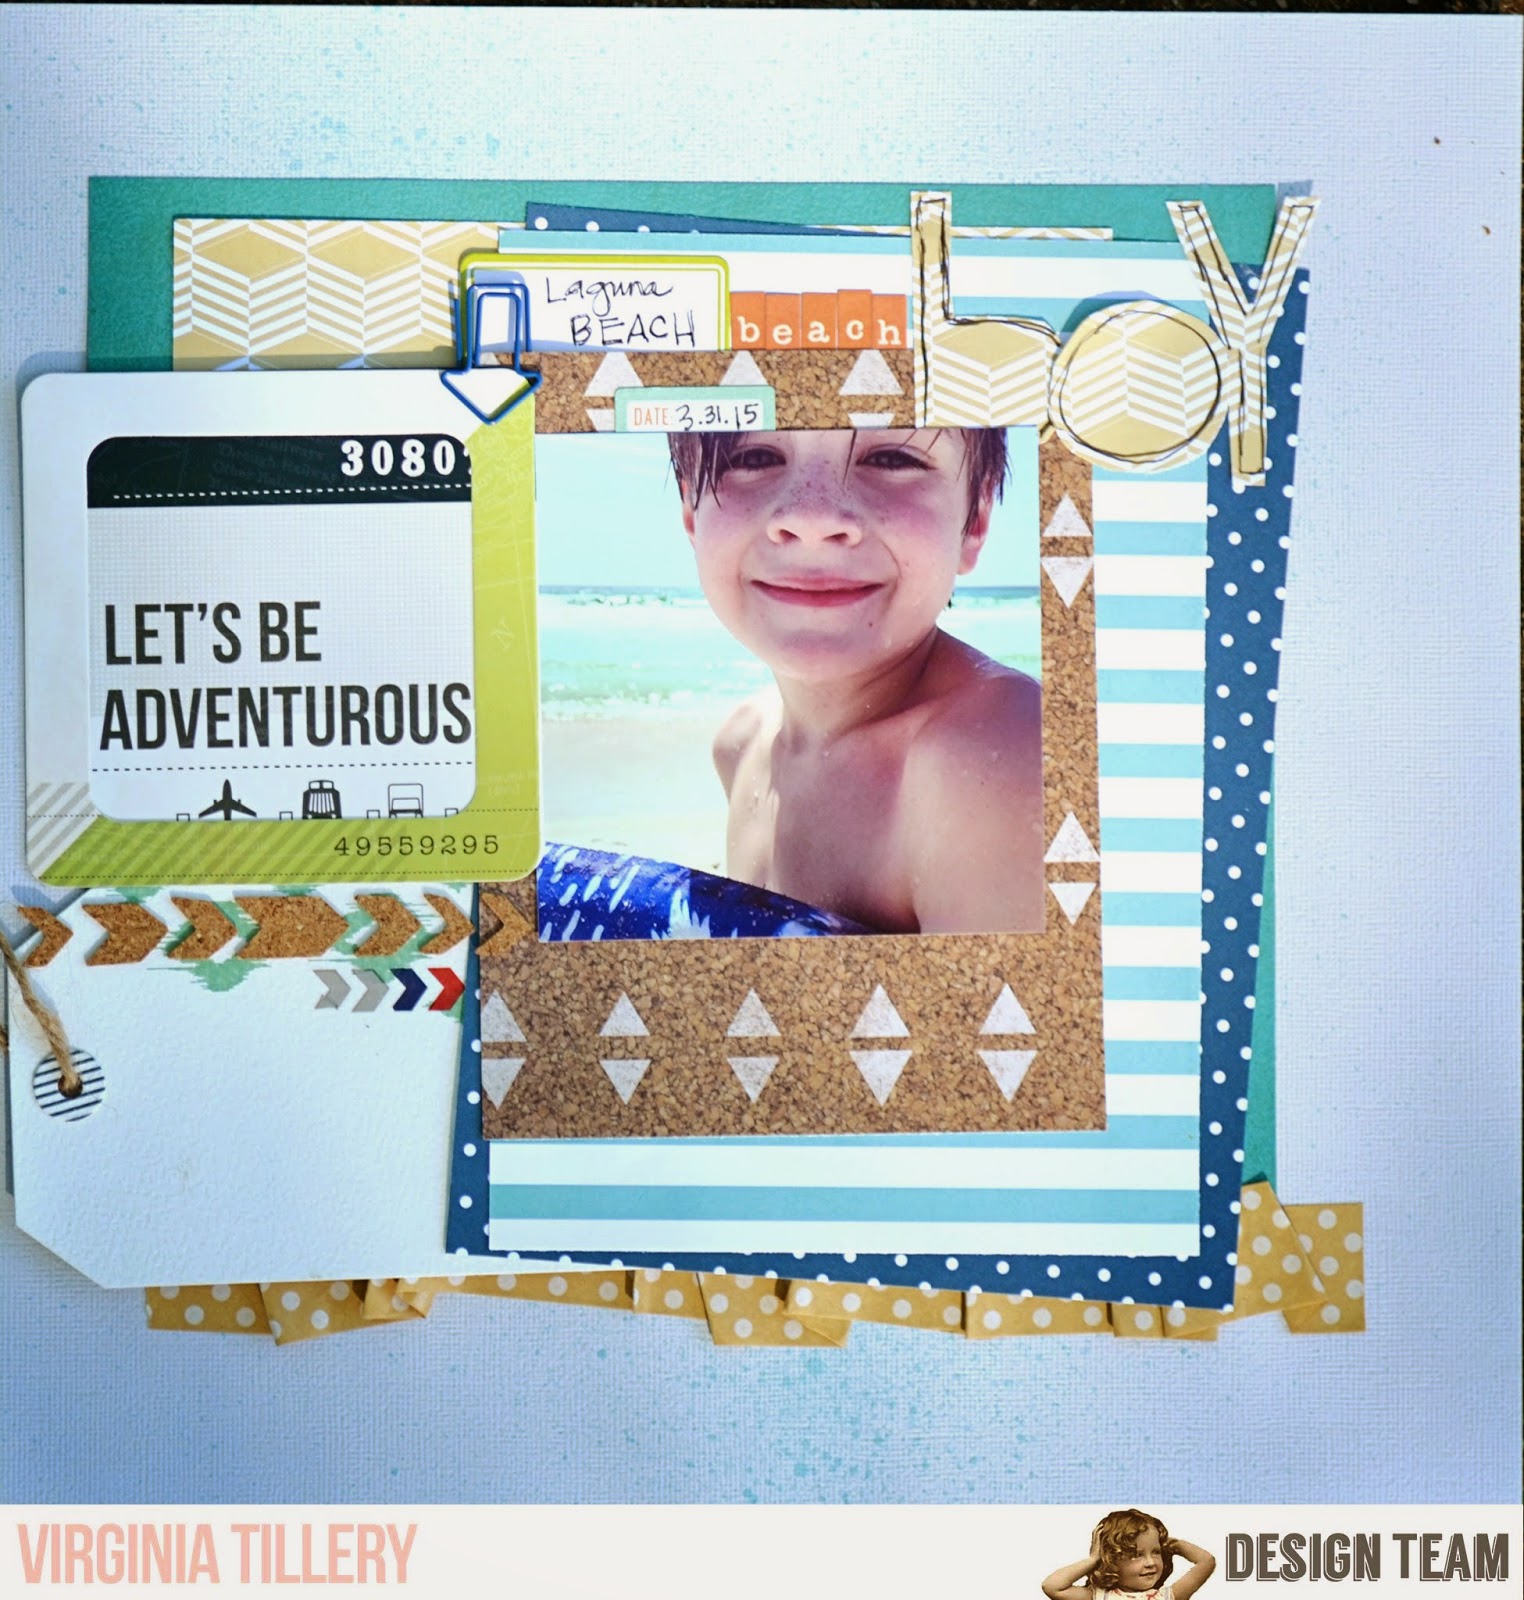
Beach Boy

I have been WAITING for this kit so I could scrap this pic of my boy from our spring break trip! I just thought the whole "adventure" theme of this kit fit him so well. 


Those square cards and frames from the kit fit each other perfectly for layering. 


I love me a handcut letter. Something about the whimsy of it fits this page to me, too. (P.S. Can we all appreciate those freckles? I love them so!) 


The kraft tape in the kit is so fun for adding texture. I like how it's peeking out from under the edge of these papers and adding some extra dimension. 


Thanks for stopping by today! Happy Friday! 


Tuesday, August 19, 2014

Happy Campers


As I mentioned on our facebook chat group the other day, I was sorting through my layouts for 2014 and realized I had done none of my son!! I feel like such a bad mom! He doesn't love to have his picture taken, and I try not to invade his privacy, but at the same time... there are still plenty of things I can scrap about him. I made it my goal to go ahead and scrap a memory of him and some of his friends from his "Great Outdoors" birthday party from earlier this year. 


The Sweet and Simple kit (now sold out) had so many perfect additions for this outdoorsy themed layout. I went ahead and made a custom embellishment too with this cute Silhouette cut file.


One of the things that I just love about Noel: she's always so thoughtful in her kit packing. I know that it was not an accident that I ended up with this adorable tiny "Alabama" license plate embellishment! 


Monday, March 11, 2013

Lucky, Lucky Me!

Happy Monday friends!

I'm here to share a Daffodil Hill project with you.
I'm the luckiest girl! I have 2 of the cutest, sweetest, most loving, funniest guys
in my life. I had to do a layout to showcase how they are my favorite guys ever:


Isn't the Daffodil Hill kit delicious? If you got yours, I hope you're enjoying
creating with it! If you weren't able to grab one - they are sold out :(
BUT Noel has a paper only kit for you to grab - do it, you'll be thankful you did!
Get it here:  Daffodil Hill Paper Only


I used the mist (October Afternoon) & the mask (Studio Calico) that came
in the kit on the right side of my project. For the top part - I sprayed, then quickly
turned it over and used it as a stamp on the bottom part.
Next I took some black chalkboard paint & painted a few spots of black down the page.
When the mist was still wet on the mask - I picked it up and let it drip all over my
cardstock. That was fun (and therapeutic!)


Thanks for checking out my project today.
I hope you have fun creating!

Leslie