Showing posts with label Watercoloring. Show all posts

Monday, December 11, 2017

{BRR, it's Cold} Layout with the "Gingerbread & Peppermint" Kits

Hello friends, it's Meridy here with you, sharing a layout I made this weekend with the "Gingerbread & Peppermint" Daily Diary and Paper Add-On kits.  There are still a couple of these beautiful kits in the store, they are great for documenting winter and Christmas.  Today, I used some of the supplies from the kit that are not typically "classic" Christmas colors.  The colors worked great with my photos though.  


I started with the black and white background paper, and knew I wanted to add a little water color to the design to brighten it up a bit.  First, I laid out the photos and a few of the paper embellishments to get my approximate placement.  Then I removed those items and started painting the background.  The faster I painted, the better it turned out.  So I tried not to overthink my brushstrokes or color blending. 

Next, I decided that I wanted to paint the "BRR" and "Cold" wood veneers white, so they would pop against the background of the layout.  I used white acrylic paint.


Then I adhered all of the photos and paper layers that I had so far.  It looked a little bare in places, so I dressed everything up with some of the adhesive chipboard from the kit.  


Last, I sketched a double line around each piece of paper and added my journaling.  I left a small bit of white cardstock empty, just to journal in.  I try to plan my journaling as I am creating the layout, so it fits in and looks like it belongs on the layout.


And that wraps up my layout for today!  Thank you so much for stopping by.


Monday, August 7, 2017

{Happy Birthday} Layout with the "Weekend in Paris" Classic Kit

Hello friends!!!  Hope you are having a great Monday.  It's Meridy here and I want to share the first layout I made with the "Weekend in Paris" Classic Kit.  This kit is PACKED with beautiful things.  The soft color scheme caught my eye and I decided I wanted to scrap a photo of my daughter from her 11th birthday last month.


When I saw the black and white floral paper in the kit I knew right away I wanted to fussy cut it and watercolor the flowers.  I love water coloring elements on my page, because I can make them match any color scheme I want.  Here are a few detail shots of my (very) beginner watercoloring skills. 


I use one of the water brushes to do the watercoloring, so I can quickly control the amount of water in my painting.  I try to do a combination of darker shading using very little water and lighter shading of the same color using lots of water.  I love the mottled look of the different shades of the same color.  


I try not to fuss too much with the watercolors on the paper, if I do, the paper gets too wet and the colors get muddy and blend into one flat color.  I know that my watercoloring isn't perfect, but I like that imperfect look, so it works for this technique.  

In case you are curious, I use a water color set from Michael's, it's $5, and looks like this...
I do a lot of mixing of colors to try to match the exact shades of color that are in the papers.

Ok, back to my layout.  I adore the Maggie Holmes puffy stickers that came in this month's kit, so I used the word "happy" and a few puffy hearts on this layout.  I added a banner sticker and spelled the word "birthday" with the mini alpha stickers from the kit.  The balloon sticker from the Maggie Holmes sticker sheet was the perfect addition to a birthday layout! 


Last, but not least, I added a few phrase stickers and stamped the date onto another Maggie Homes cardstock sticker.   And that wrapped up my layout.  


I can't wait to work with the kit some more this month.  I would love to see what you've created with it on Instagram #NoelMignon.

Have a great week!!!


Monday, April 10, 2017

Two "Adventurous" Layouts using the {Let's Get Lost} Classic Kit

Hello Noel Mignon Friends!!!  This week the design team is working with the "Let's Get Lost" kits and creating "adventurous" layouts.  I am working with the Classic Kit. 

Today I'm sharing 2 layouts of pictures of my son back from 2011.  We were playing and fishing in the mountains.  I have quite a few layouts from this day, and I have so many pictures, so I didn't need to include jounaling on every single layout.  But I did want to try to fit as many pictures as possible on a few pages.  The "Let's Get Lost Kit" was perfect for these photos, this is what I came up with...


For this first layout, I used the Fancy Pants "Teal Dot" paper as the background.  I only used one more scrap of patterned paper on this layout, the chevron patterned paper by Pink Paislee.

I used a combination of an arrow stamp with blue ink,  a "+" stencil with watercolors, and some of the Heidi Swap "Ocean" Color Shine splattered on the Teal Dot background paper to create an interesting canvas.  I also used a little white acrylic paing under my title and the date to allow those to pop and not get lost in the background.  

I created my title with a combination of the glitter Thickers and a few stamps from my stash.  I added a few cork stickers to the title as well. 


I used one of the flair pieces and a cork sticker from this month's kit to embellish the 4x6 photo on the page. 


I used the canvas banner, a date stamp, another cork piece, and one of the glitter Thickers to embellish the bottom corner of my layout.  


The second "adventurous" layout that I made with the Let's Get Lost Kit is also packed with photos.  I used a "We R Memory Keepers" patterned paper as my background, and matted the entire layout on another "We R Memory Keepers" paper.


Again, I had so many photos, that I didn't need to use much more than a few scraps of the patterned papers from the kit.  I did pull the green gingham scraps from an older Noel Mignon kit. I matted all of the photos with the Kraft paper that came in this month's kit.

I used a glitter Thicker's phrase for my title "Let's Go!".


I fussy cut a few shapes from some various patterned papers in this month's kit to create embellishmnets.  I loved the Bingo card that came in the kit, so I made sure to use it here too!  My favorite part of this layout was when I realized our city "Tucson" was on the map paper!!!  It was very close to the edge but I HAD to stitch a little red heart around it.  It still looked a little bit lost, so I added some blue ink all around the heart to bring a little more attention to it.  I absolutely love this little area of the page! You can see the heart in the photo below.


Thank you so much for visiting today!  Check back on the blog all week to see other "adventurous" layouts by the rest of our creative design team.  We would love to see your work on Instagram #NoelMignon


Monday, November 14, 2016

{Family Challenge} with the "All Fall" Classic Kit

Hello Noel Mignon friends, I can't believe Thanksgiving is next week already!!!  This week I'm working with the "All Fall" Classic Kit.  The design team is working with the {Family Challenge} this week, which is to use the word "FAMILY" as a title on our layout.  The pictures in my layout are from Thanksgiving 2015, so I thought it was fitting to scrapbook them while I am in the Thanksgiving mood.


I started with the Simple Stories background paper with the leaf image on it and decided where to place my 5x7 photo.  


Next, I pulled out my Silhouette, which I will admit, I have not used to it's full potential lately!!! To design my title, I downloaded a free font called "Brusher".  I had to change up the "y" ascender for "family" a little bit to make it look the way I wanted.  Then I cut the file 3 times, each time offset a little more.  


On the right hand side of the layout I added some of the brown ribbon from the kit and a few more embellishments at the bottom left of the collage.  I liked the way the gold rub ons added another layer to the embellishment cluster, so I added one peeking out from under the chipboard. 


Here is another close up of the embellishment cluster and journaling block.  The journaling block is actually some of the packaging from the "Petty Little Studio" Oakley Avenue embellishments.  I love when I am able to re-use packaging.  It's a great added bonus!!!


I have really been working my way through the "All Fall" kit these past 10 days, so I decided to share a few more layouts...

First, I was very inspired by a video by Eternally Inspired Mama where she showed a technique she calls Watercolor Through a Stencil.  After I watched that video, I decided to create the following page.  The background is very similar to what she showed in her process video, as a matter of fact, I think we are using the exact same stencil.  I thought she did a beautiful job and what a great way to use a stencil!!!


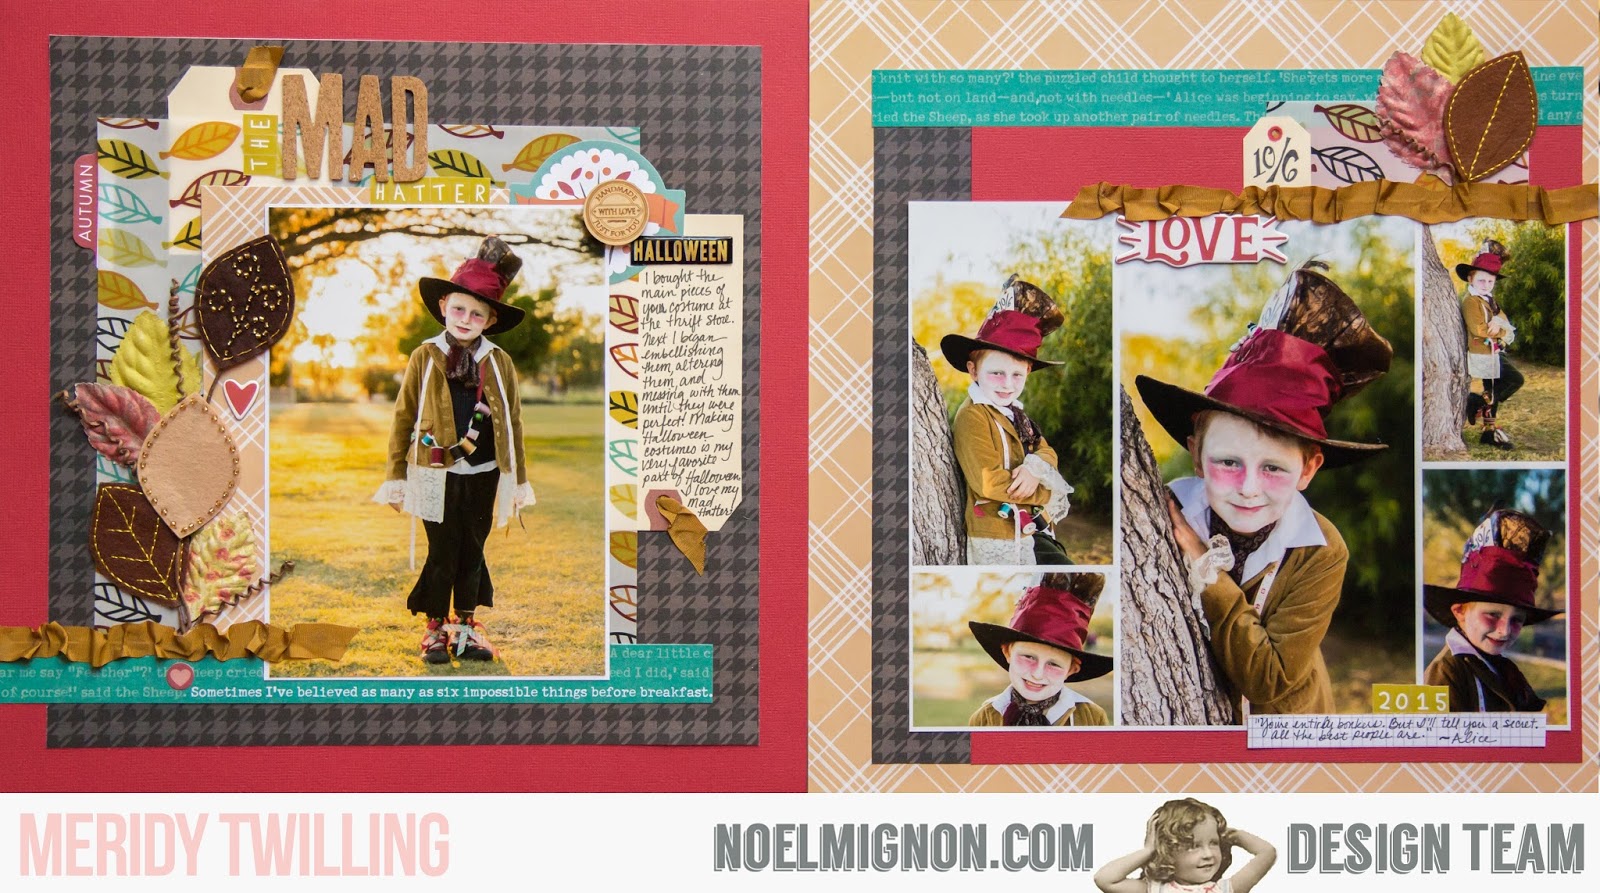
Next, I was itching to do some Halloween photos from last year.  I did grab a piece of patterned paper from my stash for the touch of teal in this layout.  I also used a piece of seam binding and a couple of leaves from my stash.  I loved the way I was able to mix the felt leaves in this month's kit with the paper leaves in my stash.  I cut the stems off of the felt leaves and twisted them around a toothpick to create the curly vine type texture.


Thanks for stopping by today and checking out all of the layouts I have created so far.  I think there are still a few more "All Fall" Classic Kits in the store.  It's the perfect time to pick one up just in time to scrapbook some of your upcoming Thanksgiving pictures!!!


Monday, September 12, 2016

"Buttons & Bows" Classic Kit

It's Meridy here!  I've got a double page layout to share with you today using the "Buttons & Bows" Classic Kit.  This week the design team is basing their layouts on...buttons & bows.  So we were challenged to use any combination of buttons, bows, and stitching on our layout.  I decided to use all three!!!


This layout is also my very first attempt at adding water color paint.  I started by loosely laying out where I wanted to place my photos.  Since all I have left of most of these beautiful Fancy Pants "Millie & June" papers are a few tiny scraps, I placed them where I wanted them to go as well.  Then I could tell where the three areas were that I wanted to add a little watercoloring and just went for it.  I just wanted the watercolors to peek out from under the photos.  I am happy with it, especially for my first attempt at using them.


After the watercoloring dried, I began adhering my layers.


After everything was in place I began grabbing embellishments from the kit that coordinated with the colors in the photos.  I love clustering the embellishments on my layouts.  I try to keep a variety of shapes, sizes, and textures in each cluster so they all coordinate and balance one another out.


Finally, I decided to do some zig zag stitching to finish off my layout.  I decided to put the stitching across the top and again at each place where I used the eyelet trim.  I used light blue-green thread to pick up that same color in my photos.


Thank you so much for visiting today!  Come back all week to see how the rest of the design team use buttons, bows, and stitching on their layouts!