Showing posts with label Bees Knees. Show all posts

Wednesday, January 25, 2012

A couple things to share...

Good morning good people!
*****
I have a couple fun things to share with you today.

First up, here is my first layout with the all new Charm School kit!


This is a great kit!
Of course I am a sucker for hearts and just about all things red so I love this kit!
BUT it is not so theme-y that it can't be used for things not so lovey-dovey!
You can check out the kit and everything in it (here).
Get yours while you can!!
*****
OK here is another layout for ya!
I made this one as part of the winter layout tag game we did here at Noel Mignon.
{Sign ups for the newest tag game are going on now! Check out this thread on the message board.}

I used the Bees Knees kit to make this layout.
But I did steal the alphas from the Study Hall kit to make the title!

OK that's all I've got!
Have a great day!!
*****
P.S.
Did you see that Noel is going to start offering subscriptions??!
You can save money on kits, get a lower free shipping minimum, and have your kits shipped first!
More details are coming but check out this thread to learn more!
:)

Thursday, December 29, 2011

Favorite Layouts of 2011


Hello friends! I've had such a wonderful time since I became a member of the design team here but sadly, this will be my last post and inspiration on the layout blog. I'm so thankful to Noel for the opportunity to create with her beautiful kits each month and I certainly won't be a stranger around the message board. I'm a Noel Mignon kit club fan for life! :)

Towards the end of the year I always reflect back on the work I have created and decided that for my last post here I would share some of my favorite layouts I have created with Noel Mignon kits in 2011.

1) January's "Very Virginia" kit -


2) February's "Truly Scrumptious" kit -


3) March's "Delightfully Domestic" kit -


4) April's "Jump & Jive" kit -


5) May's "Mary Ellen" kit -


6) June's "The Bee's Knees" kit -


7) August's "Salt Water Taffy" kit -


8) September's "Study Hall" kit -


9) October's "Sleepy Hollow" kit -


10) November's "Dear Diary" kit -


I'm still working on my December Memories album with the "Mistletoe & Holly" kit so if you would like to see my pages, please keep an eye on my blog. Thanks so much for your friendship and mutual inspiration this past year!

All the best!
Jill

Thursday, September 1, 2011

Little Swimmin' Fish


Good morning! Today I have a new layout for the challenge blog using "The Bee's Knees" kit. I have about a million photos from this summer so I decided to just focus on one activity that we did a lot of - swimming! My girls love the water and Nora surprised the heck out of us a couple weeks ago when she took off "swimming" across the splash pool. She was on her belly moving her arms and legs traveling across the pool...maybe it's time for lessons!? I created a polaroid effect just by simple cropping of my photos and ran a 70s vintage action on them in Photoshop to better match the colors of my patterned papers. 

'

I love mixing and matching alphabet stickers to create fun titles. 


This was a fun section to piece together...lots of patterned paper and an Elle's Studio die-cut.


Here I layered together a couple Sassafras stickers and a punched scalloped circle from patterned paper by GCD Studios. 


See you next week!
Jill

Wednesday, August 31, 2011

Summer Fun 2011


Happy Wednesday everyone! Today I wanted to show you a quick trick you can do to create faux paper strips! I used the BasicGrey paper found in the Bee's Knees kit and cut out small little faux banner strips. I did not have to cut the strips apart. I just cut out a small section in between each banner piece. I love this trick because it allows all your papers to stay in a nice neat row!


Here is my finished layout using my faux banner strips!


I hope you give this fun little technique a try!

Happy creating!
-Diana

Thursday, July 14, 2011

Two-Page Layouts: Let's Party!


Happy Thursday! Today I have a new two-page layout to share to continue my weekly blog series in July. Today's layout uses the "Mary Ellen" kit to highlight some detail photos of the party decor I made for the girls' 2nd birthday. I printed most of the photos in wallet size so that I could fit quite a few across the two pages. One of the ways I try to make a two-page layout work for me is to enlarge the design elements. On this layout, I carried out the banners with the large pennant pieces on the left side and then on the bottom of one of the photos on the right page. 


I ran out of "T's" so I cut out the "T" from the chipboard frame to use instead.


I love the little Maya Road star pins and stuck one out of a Girls' Paperie rosette. 


If two-page layouts intimidate you (like they often do for me), try simplifying your design and it might come together easier. Also, try an 8.5 x 11 two-page layout if filling 12 x 24 inches seems like too much!

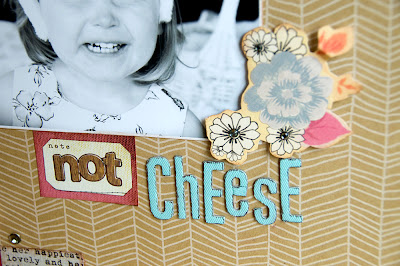
I also have a "bonus" layout for you today using the "Bee's Knees" kit. My little Lily thinks we ask her to say "cheese" when we ask her to say "please." This photo is actually in the moment. It's just one of those little things I want to remember...her sweet, "cheesy" smile. I love the printed kraft cardstock from American Crafts. It adds just a subtle texture to a layout. 


I also LOVE the foldies from Sassafrass Lass in the kit. 


The Elle's Studio tags are perfect for housing part of my title. 


And here, I layered a Glitz sticker, GCD Studios and Cosmo Cricket patterned paper, Maya Road paper posies, My Mind's Eye twine and a Cosmo Cricket rhinestone. 


Finally, I have a sneak peek for you of a new layout with the August kit, "Salt Water Taffy." The kit goes up for sale tomorrow morning! I'll reveal my layout in full tomorrow on my blog.


See you next week!
Jill

Monday, July 11, 2011

Monday, Monday

Happy Monday morning good people!!
Anybody scrapbook over the weekend?
me! me! me! me!
While I am waiting anxiously to get my hands on the new Salt Water Taffy kit (you can see great sneaks here), I am still going strong with my Bees Knees kit!
I made this layout about an author I met recently at a local library.
I thought the wordy GCD piece of patterned paper in the kit was perfect for the theme of this page!

I actually inked the light blue canvas Thickers that come in the kit with brown ink to distress them a bit.
I wasn't so sure how that was going to turn out...but it worked!
And I couldn't make my journaling work on the front of the layout.
It just didn't look right no matter how I tried it.
So I did all my journaling on the back of the page instead!

I made a card with the Bees Knees too!

It was a scrapping frenzy for me this weekend!
{ha!}
*****
Have a great week!
:)

Friday, July 8, 2011

Summer Series- Crafting with Your Kids- Week 1!


For the next six weeks, I'm going to host a little craft each week that you can do with the kiddos in your life!

Last week, my kids were really getting into that summer "I'm booooooooOOOOOOOOOoored" mode. They were antsy to go somewhere, but it wasn't in our plans for the day.

I started brainstorming, and came up with this fun activity for them.

Grab your materials:
-a file folder for each kid
-scrapbook papers & cardstock
-magazines
-glue stick
-scissorsStart by adhering paper to the front of a file folder, and trim off the excess
.
Then cut two handles out of cardstock and glue/staple them to the inside edges.
We made three of them!Then, tell your kids to "pack their suitcases" for an imaginary trip on a plane, train, spaceship, submarine, or time machine. :)This is great practice for the little ones' cutting skills!


Now all you have to do is line up some chairs and away they go! They played with these for easily an hour! :)

***********************************

I also wanted to share with you all a layout I did this week with the Bees Knees kit.

I'm hosting a challenge on the message board about "freedom" this week.... it's not to late to come join in!
Photobucket

The sparkly letters were made by just putting some silver Stickles on the thickers in the kit, and rubbing the glitter in with my finger.
Photobucket

Photobucket

Photobucket

Photobucket

Make sure to keep up with the peeks of the newest kit, Salt Water Taffy, on the message board!

Thursday, July 7, 2011

Two-Page Layouts: Out for a Stroll


Good morning! Today I'm starting a new blog series on two-page layouts so every Thursday in July look for a new post from me on this very subject! I mostly like to create two-page layouts when I have a bunch of photos from an event but for this layout I used three similar photos and several larger design elements. My family recently bought a double jogging stroller and this was the girls' first time in it. I had been wanting one for a LOOOONG time so I was very excited to try it out. 


To create the large star, I hand drew it first on my cardstock and then cut it out. It's not perfect but that's the look I was going for. You could also use a die-cut as a template. I gathered five patterned papers that I liked together and cut them in strips to fit behind the star. I machine stitched around the star and between the layers of paper. 


On the right-hand page, I pieced together more patterned paper (love that Sassafras calendar paper). And further on the right, I punched patterned paper and used a strip of text paper to create a third large design element. 


If you have any questions about anything, please let me know! 

See you next week!
Jill