Showing posts with label Lasting Love Kit. Show all posts

Thursday, February 28, 2013

Thinking of You

Hello, everyone.  I have a quick, simple card to share with you today.  I'm always in need of more cards to have on hand when needed.    I used the Lasting Love kit to make this one.  
 On top of the cardstock base of the card, I added two layers of pattern paper.  On top of the second layer, I used the cut apart My Mind's Eye embellishments to place all around the edges.  Using the stamp that came with the kit, I added some stamping to the canvas heart, added a little more messy stitching around the heart.  Then cut the title with the Silhouette, and added a few embellishments.
Hope you are having a great week!

Wednesday, February 27, 2013

I think I've fallen . . .

for 8 1/2" by 11" sized layouts :)  Don't get me wrong, I love my 12 x 12's, but there is something about creating within that smaller space that I really enjoy.  I received my Daffodil Hill kit Monday & was so ready to dive right into it, but decided to wait & create one more with that fabulous Lasting Love kit.  I headed over to the member gallery & found this adorable design from Cathy Harper to get me started . . .

Photobucket

I loved the single photo shifted to the right of the page and her clustering of embellishments around it.  I also loved the diagonal scattering of bits from left to right, on either side of the photo.  Here is what I came up with . . .

Photobucket

I found this simple title on (where else) Pinterest - love it!!!  You can also see a close-up of how I used splatters of mist, the twinkle, and tiny punched hearts to create a similar "scattering" of bits, as Cathy did.

Photobucket

Below you'll see a close-up of my own clustering of embellishments around the photo & of course I had to add in a bit of machine stitching :)  You might notice that gorgeous doily border . . . created with the stamp from the Lasting Love kit :)  I just drew a line on the white cardstock showing me where the pattern paper would line up.  Then, before I glued the pattern paper down, I stamped the image down the line, top to bottom :)

Photobucket

Have a great Wednesday & thanks for the inspiration Cathy!!

Tuesday, February 26, 2013

Heartbeat Gala


Hello everyone and welcome to "Lift a Member" week here on the blog. 

I must admit I had a lot of fun looking through the member gallery over on the message board for a layout to lift. Since I had two smaller photos I wanted to work with I chose to lift the "Day Out" layout by Caz Hancock.  I also liked how Caz had the doily tucked between two layers of patterned paper.

Using the Lasting Love kit and Caz's layout for inspiration, here is what I made.

This layout appears to be about Valentine's but it was actually a benefit/fundraiser that we had the privilege to attend a couple weekends ago. The foundation that hosts the event was started four years ago and raises money to provide free heart screenings and AED's in schools across the state of Texas. It was really a fun night with friends and for a great cause.

Here are a few close-ups...
For my title I layered the tiny letter stickers, included in the kit, over the arrow sticker embellishment. It fit perfectly!
Along the bottom I included a strip of the glitter tape. Have you used the glitter tape yet? It is a great way to add sparkle without the mess of loose glitter.
 I added my journaling to one of the die-cut journal cards and clipped it to the back of the layout. I made the clip by cutting the prongs off a brad and then blued a small paper clip in its place.
Thanks for the inspiration Caz! This came together in a snap and I love how it turned out!

Monday, February 25, 2013

My Favorite Nook


Good Monday morning everyone!
Have a good weekend? I sure did! Went by too fast though....::sigh::

Today I'm stopping by to share my last project using February's Lasting Love kit:


this is a corner in my scraproom & I just LOVE it. It's one of my favorite
places to be. It's so colorful, full of alot of my tools & soothing. 


I can't get ENOUGH of layering. I constantly layer and layer and layer.
Be it patterned papers, embellishments or letter stickers. I'm just a layer girl.
 
 
I wrinkled alot of the patterned papers by squeezing them in my hands
after I cut the sizes I wanted to go under my photo. I did the same thing
with the doily piece. 
 
 
Thanks for letting me share with you today!
Have a fabulous week!


Friday, February 22, 2013

Sweet As Can Be


I'm trying to re-ignite my passion for the artistic side of scrapbooking, and am taking an online class to boost that. It's been wonderful and really excites my desire to play with paper and mists and all the lovely things we all love! 

For this sweet layout, I wanted to play with watercolors because they matched the soft, romantic feel I wanted to have complement this pics of my daughter. I borrowed some from my three year old and got to painting! 

I dabbled some watercolors on the punched out butterflies and on the paper underneath (through the negative space). I made sure to make the paint go on unevenly because I wanted there to be different levels of opacity on the painted areas.


I so love the pre-stitched banners and embellishments in this kit! They made it super easy to add more texture and dimension to this layout without the extra time. 

I also pulled up part of the My Mind's Eye sticker that says "I love to see you smile," and replaced it with the stitched vellum sticker... I didn't want the boldness of the red glitter on this particular page, so I just took it off and saved it for another page. 


What sort of creative techniques are you enjoying lately?


Thursday, February 21, 2013

Favorite Ride


Hello Everyone!  I know I have posted on the blog, but I had them scheduled, because the family and I were in Disney World all last week.  I am getting back into the groove of things.

Like most of us, I have over 1,000 photos from our trip.  When I came across these photos to edit, I had to pick these to scrap first...and the Dumbo ride was actually the first ride my daughter said she wanted to do at Magic Kingdom...we rode about 4 times total!  Still her number one favorite at Disney World.  We like it too...just our speed!  :)

Okay...so I wanted to use Lasting Love to make the layout, but I also had some very strong orange coming from Dumbo's hat.  So I pulled some orange and orange/yellow...some things from my stash and some things from the Soda Shoppe kit.  For the design, I wanted to use Julie Bonner's sketch from last week.  The photos I picked though have lots of detail and were getting lost with the sketch as is...I kept with the inspiration of the sketch, but changed it to fit the photos.

 The first paper I picked was the red and white My Mind's Eye paper.  Then I remembered about these Maya Road circle and star chipboard sets I had...I thought the paper and the stars went really well with the circus feel of the ride.  I loved the My Mind's Eye paper for the background...the layout was really starting to come together with the circus feel.  I pulled out some washi and buttons to help pull the layout together even more.  I used a couple of the aqua stickers from the Soda Shoppe kit from Dear Lizzy too.
 That floral card I cut from the Crate Paper pattern paper was my favorite and really reminded of that area of the park with the Pinnochio, Fantasyland feel.  I love creating a certain "feel" to a layout without too much of a theme.  I pulled out some die cuts from October Afternoon from my stash to bring the layout together even more.  I also used the My Mind's Eye dimensional stickers from Lasting Love, but didn't use them as is.  I took them apart and then used them.  That grey doily under the photo is from the large embellishment! 
 Circus, Pinnochio, Fantasyland feel was going great...and that finishing touch to that feel for me was to add some hand stitching to the heart and then add another heart on top.
I love these photos!  They just make me so happy.  And I love when that feeling comes across in a layout...definitely one of my favorites!  Hope everyone is having a great week!

Tuesday, February 19, 2013

Do you like me?


Circle one...yes or no! Lol! Do you remember passing notes like that back in your middle school days? I'm pretty sure I didn't pass a note like that to the "cute boy" in this layout, but I received some of those before. Why did we think that having the answer indicated on a piece of paper and passed back to us would hurt any less if it wasn't a "yes" than if we asked the person face to face?

I've known my husband since the 6th grade. That's a long time! And you know what? I've liked him since the 6th grade too. This layout tells a fun little story about me all those years ago. I used Julie's February sketch for the design inspiration.


All supplies are from the Lasting Love kit, except the flair which is by {a flair for buttons}. The Lasting  Love kit is sold out but you can pick up the paper only kit along with some flair in the shop.

Have a great week everyone!

Monday, February 18, 2013

You Are Sooooo CUTE!


Hi everyone!

It's Leslie here, stopping by with a "cute" little layout about our
Lilly pup girl - using the February Lasting Love kit.
It happens to be sold out - but Noel's still got some Lasting Love Papers Only
kits for sale! Grab yourself one - you'll be happy you did!

You Are SooooOOoooo Cute!:


I absolutely LOVE that flower from the kit! It's perfect. PERFECT!
I punched 2 hearts and made them leaves for my flower.


I loved combining both sheets of the Pink Paislee papers and adding lots and lots
of clustering details to the entire page


Our puppy's given name is Lilly Pulitzer. She's named after my daughter's favorite designer.
That's why you see several "LP's" down the side of my photo.
I love how it looks!
I also love her writing her name so I put in in several of the hearts on the Pink Paislee papers.

Hope you've enjoyed my little bit of inspiration today.
Have a great one!


Friday, February 15, 2013

Valentine's Love


I think it must be every scrapbooker's curse to at least once have something spill all over one of their projects. I had a lovely layout all created with Julie's awesome sketch, but as luck would have it, my trusty cup of water was toppled over by one of my smaller companions all over my desk, and the main victim was my layout. :( Wahhh wahh! I'm in the process of re-creating it, and I'll be posting it later this weekend.

In the meantime, I do just happen to have another project I can show you today (thank goodness!). A friend of mine asked if I could make a gift for her to give to her husband for Valentine's day, using old photos of them. I was so excited to be able to help her out! 

She gave me several school photographs to choose from, and I converted them to black & white to give them a more "timeless" feel (and so I wouldn't have to work to compete with the colors).

I covered a canvas in text wrapping paper I picked up in the Target dollar spot a while back, and then added a layer of burlap on top of that. A cardstock frame cut out with my Silhouette machine added an elegant contrast to the rugged edges of the burlap. 


The burlap heart from the Lasting Love kit made a fun focal point, and an accent cut from corrugated cardboard added the right texture to complete the simple design.

I used cool office clips attached with two brads (and some hot glue for security) to clip  up mini collages made from papers & labels from the Lasting Love kit and the photos on top. I wanted to keep the whole piece simple, shabby, and elegant, and I think I accomplished it. And now I want to make myself a piece just like it! Ha! 


Thursday, February 14, 2013

My World

 ~ HAPPY VALENTINE'S DAY ~

Hearts, candy, red, pink...however you celebrate, I hope you don't forget to treat yourself good too!

My family is "My World," day in and day out, we are together all the time.  We are a bunch of goofballs, but that's the way we like it.  This photo of us says it all.
My first idea to scrap about my family was to cut a lot of hearts, and stitch them into a heart shape.  It didn't turn out the way I expected.  I let the cut hearts just fall on the paper, hoping to spark something, and it did...so I glued them onto a piece of pattern paper, layering them one on top of another.  

Then pop dotted the frame to put on top, trimming the excess hearts.  So it looks like a shaker, but they don't shake.  I added the banner on top with more pop dots.  I picked a few more pieces of paper and embellishments, and I needed to find a photo or photos before I went on.  

This is from one of those photo booths at the mall, and was perfect.  I added a border punch to the Basic Grey paper, and started to layer.  Decided to add some swirls and drops of mist, and a little bit of masking with dye ink, so did that before I glued everything down.  For a little more color, I fussy cut the banner from Crate Paper to layer at the top.
That flower is just gorgeous, and even though I had the large embellished frame and hearts, the flower was a nice touch to add some sweetness to the quirky photos of us.
Love to you all, and hope you have a wonderful {Heart} day!
XOXO

Tuesday, February 12, 2013

P.S. I Love You

Hello everyone! I'm back with another layout using the fabulous February kit, Lasting Love.

I want to give you a little peek into one of the easiest (and my favorite) way to make a beautifully layered layout. Are you ready for it? Here it is...
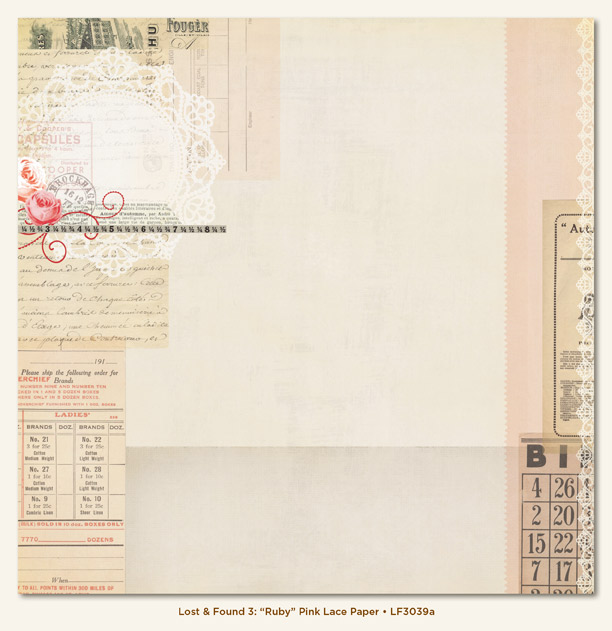
Patterned paper that is designed and printed with a layered look straight out of the kit. Really! This one is from My Mind's Eye and they couldn't make it any easier. The design already includes a beautiful doily layered with embellishments in the top left corner and a variety of layered papers around the corners. The good news...they are often included in your monthly kit!

Here is a breakdown of how I add my own touches to create a layout with the pre-designed papers for bases.
Add some mist splatters (the dark pink/red is included in your Lasting Love kit) along with another doily to the background for your focal point (tip: fold the doily, if necessary, to get the desired size).
A photo matted on a couple pieces of coordinating papers, tied together with twine..

Next add clusters of embellishments around the photo. The contrast of the burlap heart and soft pink flower in the Lasting Love kit is gorgeous. I also added a couple drops of mist to the burlap heart for a more distressed look.
A fabulous title over the pre-printed doily and you can call it done.
Simple as that!

Everything on the layout is in the Lasting Love kit, which is unfortunately sold out. If you missed it you can pick up the Lasting Love Paper Only kit.

I thought the vintage flair was a nice touch to my layout. It was made by A Flair for Buttons and there is a great selection of flair in the shop, right here!

Have you used this sheet of paper from the kit yet? I challenge you to get it out this week and make a layout with it. Post it on the message board and I'll swing by after the weekend to see all your creations with this beautiful paper!

Have a fabulous week!