Showing posts with label Meridy Twilling. Show all posts

Monday, June 18, 2018

{Lazy River} with "The Big Splash" Classic Kit

I hope everyone is having an AMAZING summer, enjoying the sun, the heat, the outdoors, all of it.  Today I'm sharing another layout with "The Big Splash" Classic Kit.  This kit is a fun one, and it put me right into the "summer scrapping" mood.  

I wanted today's layout to feature some of the beautiful stamps that came in the kit.  So with that in mind, I began arranging the background layers and placing my photos.  I used fairly monochromatic papers and ink for this layout, with just a few pops of the complimentary color, orange, which I took directly from the photos.


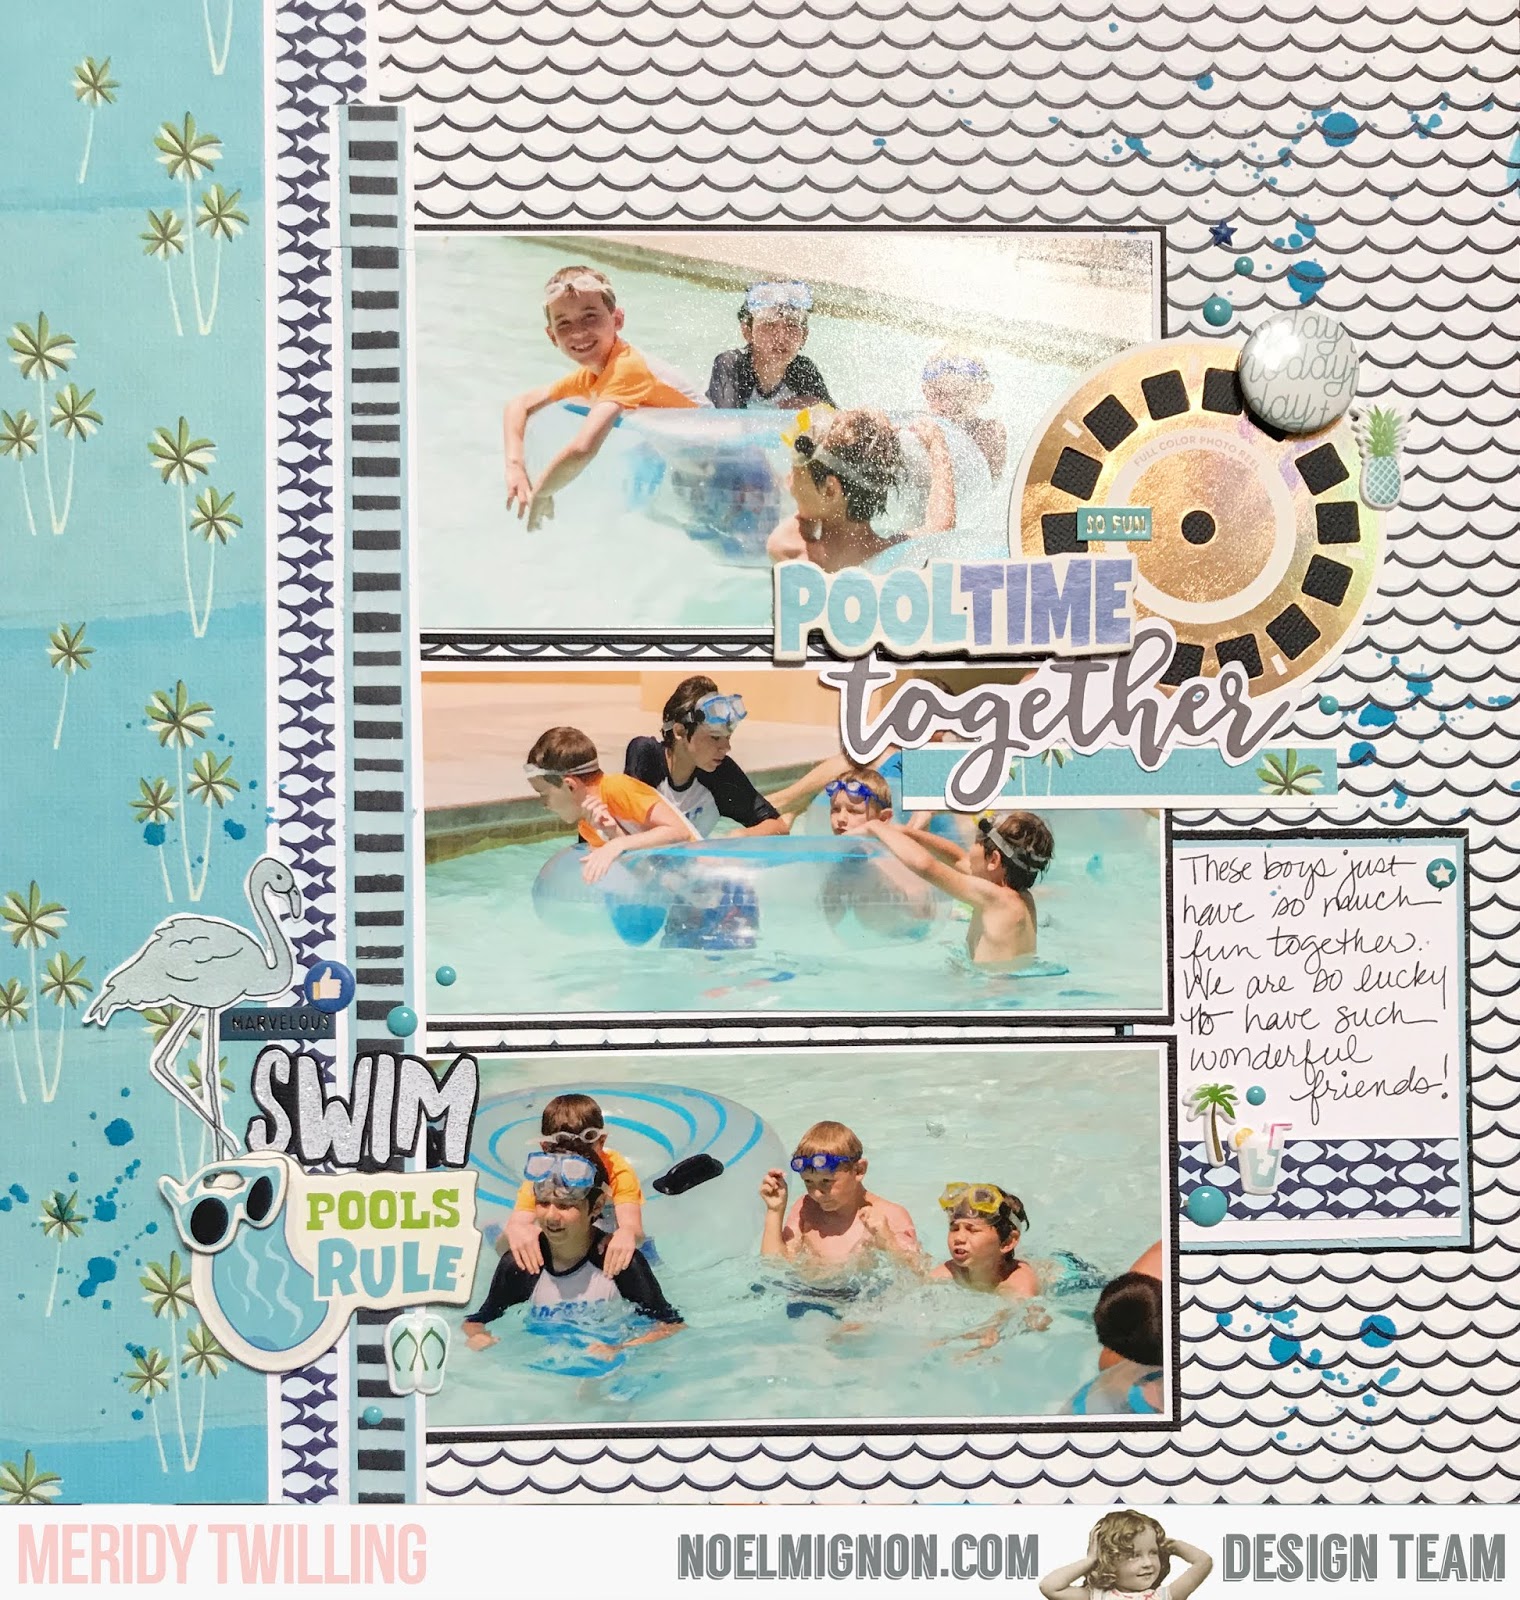
Now that I knew where my papers were going to be, I went to work with a few of the palm frond stamps and 3 different colors of green/teal ink.  I randomly stamped the 2 different size palm frond and mixed that with the 2 different sized smaller leaves from the Heidi Swapp stamp set in the kit on the upper right and lower left corners of the layout.

I used the white glitter alphabet stickers, matted them on black paper, and fussy cut around them to create my title.  I added a chipboard sticker, a couple of puffy stickers, and a cardstock sticker to finish off the title area. 


Next, I mimicked the same types of embellishments on the bottom left hand corner of the layout, using chipboard stickers, puffy stickers, and a couple of cardstock stickers.  I kept the page balanced by using the same types of embellishments in both clusters.  I also made sure to add a couple of pops of orange in each cluster.


The last thing I did was splatter some of the blue mist that came in the kit on both embellished corners of the layout.  And with that, the layout is complete.  Thank you for stopping by today!!!


Monday, June 11, 2018

{Pooltime Together} Layout with "The Big Splash" Classic Kit

I am LOVING working with my "The Big Splash" Classic Kit this month!!!  I have another swimming pool layout to share today.  I went with a fairly monochromatic look today to mimic the colors in my photos.

I started with the wave patterned paper as my background and added a strip of the palm tree paper down the right hand side.  I wanted to seperate the 2 patterns in a bold way, so I matted a strip of fish patterned paper and a strip of washi to run down that seam. 


I made my own journaling block with a few scraps of paper, a few puffy stickers, and some enamel dots.


My title area is actually covering up some "photobombers" that invaded my pictures.  I placed the viewmaster slide, chipboard, and sticker so that it covered up the strangers in the background.  I embellished this little cluster with a flair button, some stickers, and a couple of enamel dots as well.


My last embellishment cluster consists of some more chipboard stickers, a couple of enamel dots, some stickers, and a stamped image of a flamingo---with BLUE ink, so it matches the layout. I outlined the stamped image with a blue pen. I used the white glitter alphabet stickers to spell out "swim" on black cardstock, then fussy cut around the word, so it popped against the busy background.


The final step was to splatter the layout with some Tim Holtz mist that came in the kit.  It is the perfect shade of blue for this monochromatic layout, and with that, the layout is complete. 

Thanks for stopping by today!!!


Monday, June 4, 2018

{Time for a Swim} Layout with the "Big Splash" Classic Kit

Hello friends!  Now that summer is in full swing, I am so excited to be working with "The Big Splash" Classic Kit.  I think there are still 2 more of these amazing kits available in the store.  I'm so sad that this will be Noel's final kit, but I'm going to make the most of it!!!


I absolutely loved the "Marco Polo" paper in this kit, and knew I wanted to use it right away!!!  So it became the background paper of the first layout I made with the kit.  I pulled the light blue from the water on the paper and matted it on light blue paper.  

I wanted to pull out the red, black, and gold color on the paper too.  So that's how I chose the papers to use in the layers behind the photos.  The ombre gold ribbon in the kit was so beautiful, I added a strip down the left hand side of the layout.  I layered the ribbon with a couple of border punch strips with inked edges to add a little more texture to the layout.


Next, it was time for me to add a title.  I really wanted to use the pink Thickers that came in the kit, but when I had the whole page completed, the pink looked a bit off to me.  So I colored right over the pink with a red sharpie for a perfectly matching title.


All 3 of the embellishment clusters contained a stamped phrase on yellow paper, some enamel dots, and a puffy sticker from the kit.  I also threw in some stickers, a chipboard sticker, and the date using the glitter alphabet stickers. 


I really loved working with these supplies from the kit and using a bit of an eclectic and unique color scheme for swimming photos.  Thanks for stopping by today!


Monday, May 28, 2018

{Explore} Layout with the "Enjoy the Journey" Classic Kit

Hi friends!  It's Meridy here today with you and I have my last layout with the "Enjoy the Journey" Classic Kit to share with you today.  I really love how this kit is so versatile and works with travel photos, outdoor photos, and in this case, hiking photos.  


I wanted to use lots of the patterned paper from this kit, so I decided to use strips of it as a background and built up the layers from there.

Next, I matted my photos on white cardstock and put them in place so I could start adding embellishments.  I did use a few brads that I had in my stash.  I also used a heart punch and some chipboard stickers from the kit.


The Thickers from this month's kit added texture to the embellishment clusters, and the mini blue alphabet stickers went really well with the Thickers to complete these subtitles.


I used the "Explore" chipboard sticker for the main title across the bottom of the layout.


The final touches of the layout were some journaling lines that I drew on the upper left hand side of the layout, and the brown trim from the kit added some texture to the upper right hand side of the layout.  Under the ribbon I used the mini roller stamp to stamp some "adventure" theme phrases.  And that finished off the layout.  Thank you for stopping by today!!!


Monday, May 14, 2018

{Sedona, Arizona} Layout with the "Enjoy the Journey" Classic Kit

Happy Monday!  It's Meridy here and I have another layout using the "Enjoy the Journey" Classic Kit to share with you today.  I loved the Simple Stories products that came in this month's kit, and really thought they would be perfect with some hiking photos that I had.


I wanted to use the starburst/graph patterned paper that came in this month's kit, but I wanted to make it look more like a "starburst".  So first, I cut strips of the coordinating patterned papers to cover every other "ray" and adhered those to each ray on the graph paper.

After I got the background of the layout completed, it was time to add the photos and embellishments. I made one embellishment cluster using the twill trim, a tag, flair, a die cut, and a chipboard sticker from the kit.  I finished that cluster off with a few stamped phrases from the roller stamp that came with this kit.


Next, it was time to work on the title.  I used the beautiful glitter Thickers and mini letter stickers that came in the kit, as the colors worked great with these papers, photos, and embellishments.  Next, I added in another piece of the twill trim, a heart die cut, a cork sticker,  and a couple of chipboard stickers.  I finished off this little cluster with a few more stamped sentiments.


I will do some journaling on the adjacent page in the album, as I still have some more photos of this hike.  I will share that layout next week.  Thank you for stopping by today!


Saturday, May 5, 2018

{San Diego} Layout with the "Enjoy the Journey" Classic Kit

Hello friends, it's Meridy here today, I have a layout to share using the "Enjoy the Journey" Classic Kit.  I had a fairly dark photo that I wanted to use on this layout, therefore, I knew I needed to brighten the page up by using some brighter papers. So I used this beautiful ticket paper from this month's kit as my background. 


I wanted to add some memorabilia from our hotel, so I made a little pocket envelope from the same paper that I matted the layout on.  I added an embellishment cluster on top of the pocket.  I used some of the puffy stickers, some washi tape, the "adventure" ephemera card, a car clip, and a few stamped sentiments to get a good variety of embellishments.


Next, it was time to add my title.  I used the pretty glittery Thickers from this month's kit and grounded them on a small map die cut.  I added a couple more black puffy stickers, and a few more stamps, and my title area was complete.


That wraps up my layout for today, thank you so much for stopping by!!!


Monday, April 30, 2018

{Wander} Layout with the "Enjoy the Journey" Classic Kit

Good morning, it's Meridy with you today, sharing my first layout using the May "Enjoy the Journey" Classic Kit.  There are so many great pieces in this month's kit, lots of colors to work with, and fun embellishments.  I decided to go somewhat monochromatic with this layout, using wood grains, black, white, and blue. 


I used the "B" side of one of the Jillibean Soup papers to mat my whole layout.  Next, the wood grain paper in this kit was to die for, so I wanted it to be the background of this layout.  Then I added layers, starting with the vellum paper, my photos, and lots of embellishments.


I mixed a few pieces from my stash in with the embellishments from this month's kit to create this embellishment cluster.  I started with a wooden frame to frame the "tourist" ephemera, then I layered that up with the blue polka dot heart, the palm tree rub ons, and black enamel heart from the kit.


I really liked mixing up embellishments, phrases, and stamping to make this cluster.  Everything seemed to nestle right together along side of my photo.  Finally, I added a strip of the woodgrain paper down the left side of the layout, I added a little color to it with the mini pom pom trim I had in my stash.  I added my journaling to the framed area on the lower right of the layout, and with that the layout was complete.


Thank you for stopping by today!!!


Monday, April 23, 2018

{Splash Pad} with the "Vintage Spring" Kits

Happy Monday, it's Meridy here today.  I have a layout to share using a combination of the "Vintage Spring" Daily Diary and the "Vintage Spring" Classic Kits.  The beautiful watercolor paper from the classic kit made the perfect background for a page about the splash pad.


I added a few of the Daily Diary cards, some small strips of paper, the packaging from the gold leaf trim, and a few labels to create the layers behind the photos.  But I thought it still needed a little textrue and detail, so I mixed in a couple of pieces of washi tape and outlined each layer with black pen.  I added my journaling, a few phrase stickers, a couple of bug stickers, and some gold heart stickers to dress up the layers.


Next, it was time to work on the title of the layout.  At first I just had the small title that read "Splash Pad" on the bottom left hand side of the layout, but it still looked too plain for my taste.  


So that's when I decided to add a bunch of phrases and stickers describing the experience.  Ultimately, this is what I came up with, and I love the look of the different fonts, stamps, Thickers, and stickers.


Once I added all of these textures and words, my layout finally looked complete.  I love the way it turned out.  Thank you so much for stopping by today!!!  Happy Spring!  I hope you are putting your "Vintage Spring" Kits to good use, I would love to see what you are creating on our Facebook page or Instagram #NoelMignon


Monday, April 16, 2018

{5th Grade Promotion} with the "Vintage Spring" Kits

Hello!  It's Meridy here today, and I have a layout to share with you using the "Vintage Spring" Daily Diary and Classic kits.  Since this layout is about my daughter, I was able to use lots of the feminine elements from the kits.

I started with the background 12x12 patterned paper, added a strip of patterened paper down the left hand side of the layout, and embellished that seam with some of the gold glitter washi tape.  Next, I added 6x6 layers from the Daily Diary kit.  I even used one of the journal cards as a layer under the smaller photo.


After placing the photos where I wanted them, it was time to add embellishments.  I just loved the pack of floral embellishments that came in this month's kit.  So I pulled a few roses in various colors and started placing them to frame the main photo.  There were a few distractions in the original photo that I didn't want to show up on the layout, so that is why I placed the flowers in this configuration.  


Next, I added the paper rosette with the gold heart, a phrase sticker, and the label sticker stamped with the date.  Finally, it was time for me to go back in and add the greenery and leaves to the flowers.  I just adore the gold leaf trim in the Daily Diary kit, I used it in longer pieces and cut individual leaves from it as well.  It is so beautiful, I can't help using it over and over again.


Finally, I was able to use the beautiful rose gold Thickers and the mini gold letter stickers to create my title, and with that, the layout is complete.  


Thank you for stopping by today!!!  Have a great week!