Monday, March 20, 2017

{Easter Egg Time} with the "Delightful" Daily Diary Kit

Hello everyone!  It's Meridy here.  In honor of the first day of spring today, the design team will be sharing "springtime" layouts all week! I'd like to start us off with an Easter layout using the "Delightful" Daily Diary kit.  I also used a paper pack from the "Delightful" Classic Kit. 

I started with a collage of photos printed on an 8x10.  I like using collages when I have multiple photos I want to use.  All of the cropping, matting, and sizing is already done for me when I create and print a collage to use!


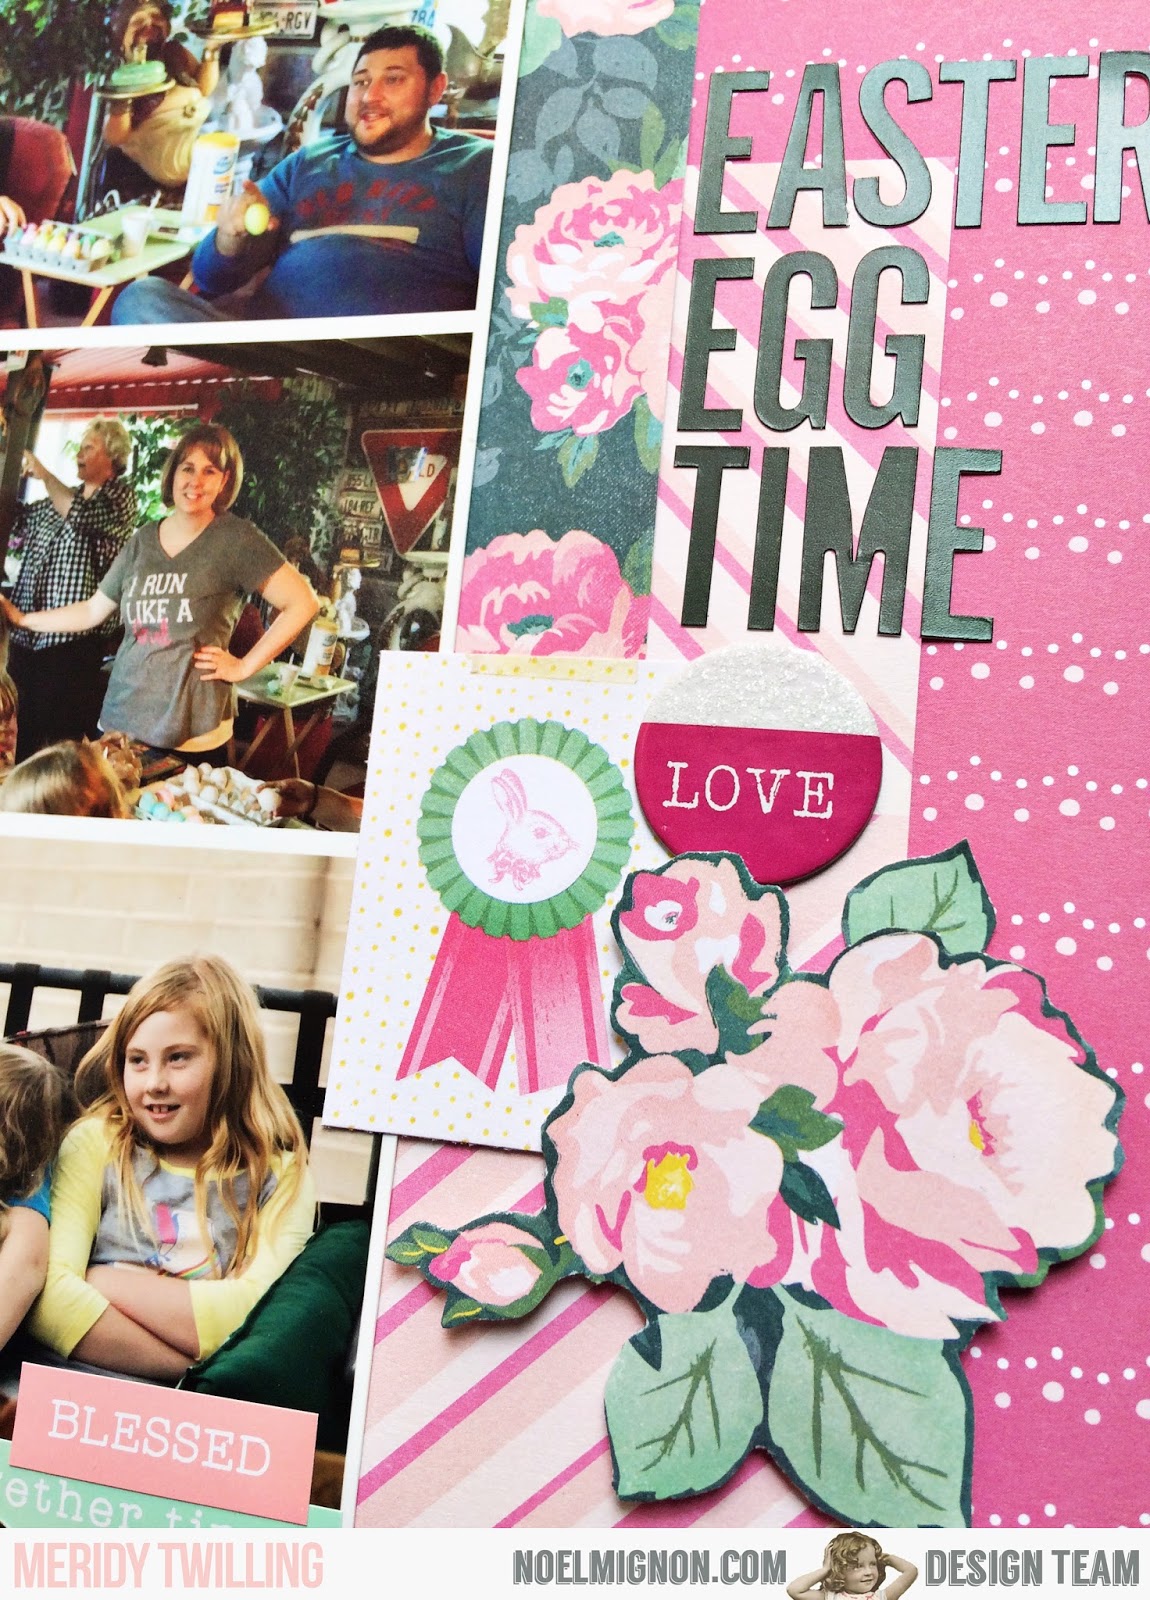
I used some of the 6x6 Maggie Holmes papers from the Daily Diary Kit to layer up the background and add some dimension.  Next, I fussy cut some of the floral design from the 12x12 and the 6x6 floral papers in both the Daily Diary kit and the paper add on.  I arranged some fussy cut flowers, chipboard sticker, and the bunny paper from the 6x6 cut apart paper in the "Daily Diary" Kit to make a little embellishment cluster under my title.


On the top left of the layout I adhered the notched chipboard banner stickers, a few fussy cut flowers, the date (using the alphabet stickers from the Daily Diary Kit), and a few word phrases.


My third embellishment cluster was also made with some fussy cut flowers, and a word sticker from the sheet of alphabet stickers in the Daily Diary Kit.  I journaled across the bottom strip of patterned paper.


I added one more final touch, a subtitle, the word "COUSINS", towards the bottom of the layout to keep your eye moving evenly around the entire page.  With that, the layout is complete!


Thank you for stopping by today, the design team will be sharing Springtime layouts all week, come on over for more inspiration all week long!


Saturday, March 18, 2017

Delightful Classic Kit- February Memories


Even though I have the Classic Style kit this month, I thought I'd use some of it in my Project Life/Daily Diary style album. I love mixing things up like this, especially by playing with proportions! 

I'm not doing pocket style pages all the way... it's more of a mini album, loosely done in a pocket style fashion. I like the flexibility of this a lot and I do not do weekly spreads, but more of a loose flow to our days. 


By working in this style, I can make a lot of "mini layouts," which makes room for the type of layering I like to do. 


Are you in the kit reveal group? We'll be having some fun surprises tomorrow night... make sure you join! 

Friday, March 17, 2017

January 2017 Project Life


Hi!  Sarah here with a project life spread for 2017.  I used up some of the pretty aquas in the kit, which was perfect because it was still cold and even snowed one day.  


For the title card, I used a fun stamped 3x4 card that a friend stamped for me.  I will be using these every month for this year's PL album.  I put it on top of a 4x6 cut of the Pebbles paper.  I also added the wood veneer label with the month.


For the center, I included some fun photos from the month.  On the far left, a picture of two of my favorite things: coffee and books!  That was the book I was reading in the beginning of January.  The second photo is my weight at the time, with a transparent circle that says "GOALS" from Freckled Fawn (not included in the kit).  Next, is a business card and photo (it's very dark, I'm sorry...) of LulaRoe, which I have recently discovered.


On the bottom, my daughters both had their first dentist appointments.  They both had cavities and had to get them filled (poor babies!).  Caylan's photo here is after hers was done and half of her mouth was numb and she was trying to smile.  I cut out the sentiment "Your smile makes me smile" from a 3x4 card and added it on the paper, along with Carta Bella alphas.  On the right, I used the beautiful gold foil card and added a Carta Bella sticker on top of the tea cup.


On the top right, my favorite thing on this spread was this picture of the snow day and I added a circle with January (Freckled Fawn, not in the kit) and used some Carta Bella alphas to spell SNOW directly onto the photo.


On the right side of the spread, I started with my husband, who was in Las Vegas for a few weeks for some work training.  He got to meet up with some friends who we have been stationed with previously.


In the center, I journaled on the floral card about his trip and added VEGAS with the Carta Bella alpha stickers.  Next, a picture of Layla sitting on the couch with our dog, Brody.  He laid across her lap and sat there for a while (that's RARE!).  I used the "I Love Your Soul" die cut.  It was pretty big, so I cut it apart and made it work for me.  Then, I used the beautiful floral card and added a Carta Bella sticker across the center and outlined it with pen.


On the bottom, documented my husband's work party that I went to.  It was a Speakeasy theme and so much fun!  The bottom two cards and the picture in the center right is from the party.


Thanks so much for stopping by today!  I can't wait to see what projects you are making with this month's kits!


Thursday, March 16, 2017

Happy Heart

Hello!

It's Becky with you again today to share another project that I created with the Delightful Classic Kit. 

For this week I wanted to go with a green color scheme because of the upcoming St. Patrick's Day holiday. Not that my page is St. Pat's Day-themed, but I went with a combo of shades of green and gold with some blue thrown in.

Here is my page:


I started with a cardstock base. I cut 1/4" from all edges of the white cardstock and adhered that to the green cardstock from this month's kit. After that I added some Heidi Swapp spray mist in gold and Citron. Because I was originally going with a "Lucky" theme I added some green spray mist to the shamrock I cut out. I traced inside the edge to help the paper stand out better from the background paper. 


I layered lots of patterned paper, ribbon and tape, along with some of the Freckled Fawn puffy border stickers and a strip of the blue and white ribbon. The gold washi is from my personal craft supply. The green floral patterned piece is the tear strip from one of the Pebbles papers in the kit. 


To finish off the page I added lots of chipboard pieces, stickeres and diecuts, along with title words from the Maggie Holmes chipboard package. 

Here is one more detail shot from my page: 


Thanks for stopping by Noel Mignon today. 

Don't forget to join us Sunday night for the reveal of our April kit. That will take place in the Noel Mignon Kit Reveal group on Facebook. We hope to see you there!


Wednesday, March 15, 2017

A Year of Addie

Do you ever open up your Noel Mignon kit and see a paper/embellishment/etc and you instantly know what you want to create with it? I felt that way when I opened up my Delightful Daily Diary Kit and saw that Maggie Holmes paper with the 3x4 calendar cards on it. I instantly had an idea to do a 'year in review' (sort of) with photos of my youngest daughter's 1st year. I would love to do this with my older kids as well but that's going to be a bit more tricky since they were born in the pre-digital era!
I created my 3x4 photos using Photoshop but there are several free photo editing sites out there. I used Design U pocket pages (Project Life) and kept my embellishing to a minimum since I didn't want my page to be overly busy. I also grabbed a few embellishments I had leftover from the Happy Together Classic Kit. I used the yellow doilies cut in half to help balance out the yellow on the page.
I only added the year to the first and last 3x4 card. The last card is my favorite :) I love how this page turned out...it's a nice little snapshot of Addie's first year!

Tuesday, March 14, 2017

Happy Together with the Delightful Classic Kit

Hello everyone!  Nicole here today to share a layout using the Delightful Classic Kit.  I just love the bright spring colors Noel choice for this months kits.  I chose to highlight a friendship that my youngest has had since almost the day he was born.  A family friend that is three years older than him and his best friend.


I started with the outside frame and cut strips of pattern paper and cut it the corners to fit into place.  Once they were all glued down I used some of the liquid pearls at the corners to mimic nails.  


Once the liquid pearls were dry I played with the placement of my photos.  Highlighting the main photo with colored mats and the title placement.  


I then placed embellishments among the pictures:  washi tape, chipboard, puffy sticker, buttons. As a finishing touch I placed more of the liquid pearls along the top of the focal photo and photo.  

 There are so many fun embellishments in the kit this month.  I'm excited to play more in the weeks to come.  Have you had time to scrap?  Be sure to share with all of us on the Noel Mignon Facebook Group.  Happy Scrapping!


Monday, March 13, 2017

{Rapunzel, Rapunzel, Let Down Your Hair} layout with the "Delightful" Daily Diary Kit

Happy Monday!!!  It's Meridy here today with another 12x12 layout using the "Delightful" Daily Diary Kit.  I also used a patterned paper and a piece of cardstock from the Classic Kit Paper Pack for the base of the layout.   Today's layout is yet another Disneyland layout.  If you like scrapbooking Disney photos---keep your eye out for an EXTRA Noel Mignon Kit being released soon, it's exclusively Disney!!!

Onto today's layout, I really wanted the layout to feature the pinks and purples in Rapunzel's dress, so I choose papers and cards with these colors.  The dark purple cardstock is from my stash.


Once I had the papers and photo adhered, I started embellishing.  This was a BREEZE with the great embellishments in the Daily Diary kit.  I misted the Prima flowers to make them the colors I wanted for the layout, blue and lavender.  The "Magical Moment" card was PERFECT for a Disneyland photo, the cork butterfly and mini pink doily were great feminine additions to the page.


I stamped journaling lines onto the pink and white 4x6 card, punched the heart from a 3x4 card in the kit, and stamped the date with the stamp from the January Daily Diary Kit---I love that most of Noel's kits come with supplies that are reusable!


I balanced the left side of my layout with a trimmed off portion of the 4x6 card I used on the layout, added a few more punched hearts, and finished off the layout by outlining most of the layers.


Thanks for stopping by today!!!