Showing posts with label Picture Perfect Classic Kit. Show all posts

Tuesday, April 12, 2016

Let's Get Sketchy with the Trailblazer Classic Kit

Hello Tuesday and Welcome Bloggers. All this month the Noel Mignon Design Team is teaming up with Let's Get Sketchy, a fun sketch site with TONS of inspiration. I am a huge fan of sketches and have been on several sketch Design Teams. Sketches are a great foundation to build a page on. We are designing with two of Let's Get Sketchy sketches this month and here's the sketch I worked with.
Isn't this a fun sketch?! I can see myself using this one again! I used the last bits of my Picture Perfect Classic Kit for my page. I stayed true to the sketch except I substituted the sequins for the ink blotches. Here's my version of the sketch.
I filled the Maya Road Resin Frame with sequins and used it as a large embellishment.
I die cut two vellum circles and tucked them under the photo and patterned papers. I love the soft look of vellum and how the papers still show through.
Noel Mignon is the sponsor this month on the Lets Get Sketchy site. Noel is offering the "Trailblazer" Classic Kit as a prize ...
 ...so head on over to the Let's Get Sketchy blog for details on how to win this gorgeous kit!!
Thanks for stopping by today and I hope I've inspired you to try this sketch and enter in for a chance to win!!! Have a great week!!!! 

Monday, April 4, 2016

Let's Get Sketchy!!!!--Featuring the Picture Perfect Classic Kit

Who doesn't love a good sketch!?!  This month Noel Mignon and our design team are teaming up with Let's Get Sketchy and we will be using their sketches throughout the month of April.  And what's better than using a good sketch to get your page started???!?  A chance to win a free Trailblazer Classic Kit!  Yep- Noel is giving away one of the "Trailblazer" Classic Kits this month at Let's Get Sketchy.  But you can't win if you don't play, so hop on over to their awesome site and see how you can win, you can follow this link for details. 

In the meantime, I used the sketch on their blog today to create my layout.  Here is the sketch...

Let's Get Sketchy
And here is what I created using up some of the last bits and pieces I had from March's "Picture Perfect" Classic Kit.

I followed the sketch pretty close, except for the circles and ink splatters.  Sometimes when I use sketches I follow them closely, like I did today.  But more often I really use them as a jumping off point, to get my creativity going.  That's the beauty of using sketches, you can go wherever direction they take you!  


Here is a close up detail of my layout, I fussy cut the last flower bunch from one of the scraps of paper I had left from the kit and used a cut apart sentiment to ground the title.  I didn't include too many embellishments on this layout, since the background paper is so busy.  I wanted the photos to be the main focus of this layout.  Once I layered all of the papers behind the photos, I felt like the page was complete!  


I did outline each piece of paper, to help them stand out from the background paper.  I used a red pen that was included in one of the Noel Mignon kits from last year.  I love the fact that Noel puts a item (or 2) in each kit that is more of a staple supply, the supplies that last for a long time and can be used over and over.  Sometimes it's a pen, sometimes a stamp, or an ink pad, or a mist, these get used over and over again, and I really like that they are included in the kits.

I think I will use this same sketch on a few other layouts this month, and see where it leads me.  I will post them here for you to see!!!  Let's Get Sketchy would love to have to join them this month and use their sketches!!!

There are still a couple of "Trailblazer" Classic Kits available as well.  Get one while you can!!!
"Trailblazer" Classic Kit

And speaking of getting things while you can, Noel has just opened up the sign ups for July-December Term Subscription.  If you are interested in subbing to Noel Mignon Kits, you need to sign up soon!


See you next week!

Saturday, April 2, 2016

flair and the Picture Perfect Classic kit

It's Saturday again.

It's so hard for me to believe how quickly the weeks pass by.

I am grateful for this scrapbooking hobby that helps me to document the fun times so that I can always remember them.

Today I have another project to share using the March kit, Picture Perfect.

As with other projects this week, I used a piece of flair that was included in the kit.


I really liked this piece of patterned paper from the kit, though it was a little busy for what I wanted to do so I simply started by trimming it down, adhering it to blue cardstock and then used white spray mist to help soften the background just a bit. I think it worked well since my title fit in the space where most of the white mist was concentrated.


I loved the variety of alphas and other stickers and adhesive embellishments in the kit. I used quite a few on this page. 


Here's a piece of flair and that cute little kitty ♥


I love to combine different patterns in my projects so while I added lots of multi-colored hearts and stars, I thought this polka-dotted heart would be a fun addition. 

Stay tuned to next week for more scrappy challenges and projects using our new April kit. 

Friday, April 1, 2016

Almost 5

Hey guys, can you believe it's April already?? I sure can't but I'm loving the signs of spring all around - birds chirping, flowers blooming, everyone emerging from their homes after the cold winter & getting outside!

This week the design team is using flair in their projects so I pulled out my Picture Perfect kit and used some Easter pics to create a layout about my little one...kind of like a snapshot in time of what she's like right now. I love doing that with my kids periodically because they change so much over the years that it's nice to go back and see what they were into at any particular time, like what their favorite foods are, favorite shows, etc.
Side note - I often take more pics than I need on a holiday or birthday so these 'extra' photos are great to use for pages like this!
 
I used the flair inside the circles of the patterned paper. One of the flair pieces was from the Heart of Gold kit along with those alphas that I love so much (I am getting a lot of mileage out of those alphas)!  
By the way, the Picture Perfect Classic kit is sold out but there is still 2 left of the Heart of Gold Classic kit
I also created a pocket behind my photos so that I could tuck some journaling cards behind with my journaling. 

Aaaaand....the new Trailblazer kit is up for sale!! Guys, mine just arrived yesterday and I can't WAIT to play with it!!!! This kit is so much fun :) The Daily Diary kit is already sold out but there's still a few of the classic kit so go check it out!!

Wednesday, March 30, 2016

Picture Perfect Classic Kit: Wood Buttons and Metal Charms

Happy Wednesday! 
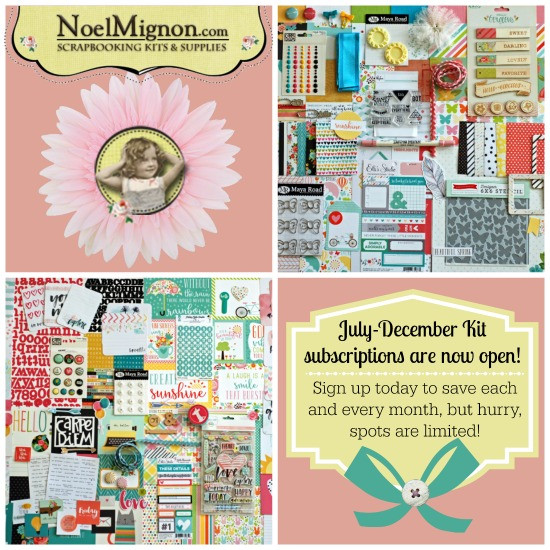
Jana Eubank here. This week as a design team we are featuring the flair that was included in this month's "Picture Perfect" kits; however, I already used my flair up on previous pages! So ... I decided that I would create a couple of layouts featuring other dimensional embellishments included with the kit.

My first page features the My Mind's Eye wood circles, and the second page uses the Simple Stories metal charms. Let's take a look!

DRIVING MISS JENSIE

When my daughter was learning how to drive she had to log a certain amount of hours of driving. My husband and I would pick her during her lunch break at school and drive around with her through the local neighborhoods. I love this picture I snapped of her concentrating on the road with my husband giving her tips as she drove along. I used the Picture Perfect Classic kit to document this fun memory.


I sometimes struggle knowing how to fill the space of a large 12x12 page when I only have one photo to scrap, so for this page I used a sketch by Laura Whitaker to get me going. I love the band going across the center with the stitched circles. I added a sprinkling of mist, wood circles and stickers to give it a playful feel.


I created a cluster of embellishments on the left bottom corner of my photo by starting with the darling feather die cut from the kit. I then tucked in several other stickers, a wood circle, die cuts, a phrase sticker, and then stitched on one of the bow paper clips.


On the right side of the page, I used more wood circles with a bird resting on one of them. I also stepped down my design diagonally by using die cuts and stickers layered over one another. My title is a play on the movie title "Driving Miss Daisy."  A few droplets of Heidi Swapp Blush Color Shine and a few hand-stitched circles finishes it off!
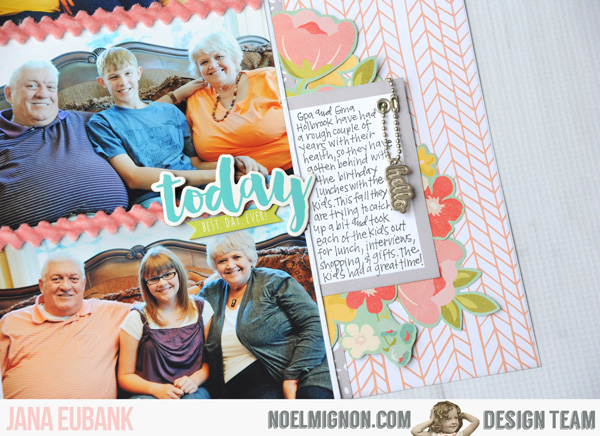

TODAY

For this next page, I decided to incorporate the Simple Stories charms included with the Picture Perfect Classic Kit.

I had three similar photos from three different occasions of my parents taking my kids on a birthday lunch date. I decided to scrap them all together on one page by stacking them vertically on the page.


The colors of the clothing in these photos inspired me to use a color scheme of coral, aqua, gray, and yellow. I fussy-cut the flowers from the My Mind's Eye paper to frame out my photos and add a downward diagonal design to this page across the vertical line of photos.


I separated the photos with a length of Maya Road velvet ric rac. I layered a few Simple Stories chipboard circles over the flowers on the left. I added a rhinestone to the center of each one to add a bit of shine to tie them in to the shiny charms in other places on the page.


I tucked a journal block under the right side of the photos and decided that this would be a fun place to hang one of the charms. I got out my trusty eyelets from years past to create a hole for the charm's ball chain to go through. I adhered the charm with a foam dot to keep it in place. It's so cute!


I took the other charm off of the ball chain and placed it at the bottom of the page to accent a label with the date for my page. I secured it in place with a couple of mini staples.

So there ya go! Two pages featuring two different types of dimensional embellishments: wood circles and metal charms. I hope that it has helped you with a few ideas in how to use the items in *your* Picture Perfect kit this month.

See you again soon!


Tuesday, March 29, 2016

A Picture Perfect Page with a Bit of Flair

Hello Everyone and Happy Tuesday! Hope you all had a lovely Easter with family and friends. 
Lynn here today with another layout using this month's Picture Perfect Classic Kit. This kit is gorgeous and there's still a few left in the shop so head on over and grab one quick!!! Our challenge this week is "A Bit of Flair". In both the Classic and Daily Diary kits there are flair buttons. Our challenge is simply to show how we included them in our projects!! I created a 12 x 12 layout this week and used a photo from my Crop on the Cape event a few weekends ago. We had a blast and took lots of Instax pics. I love this photo of the girls using photo props. Here's my page 
I combined several busy patterned papers but the scale of the patterns vary enough that they go well together. I clustered some chipboard elements around my photo.
Here's a close up the the flair that I used as the center of the chipboard camera.
I highlighted the sentiment with a few chipboard hearts. 
We would love to see how you add flair to your pages. Be sure to upload your projects to the Noel Mignon Members page on Facebook so we can see how creative you are.
Thanks for stopping by and have a great week!

Saturday, March 26, 2016

Special Someones

When you think about the term "special someone" you might think about your spouse or boyfriend/girlfriend.

When I think of that term this week I think of any of my loved ones.

My father-in-law passed away this week and it has been hard but I am grateful that we were close enough that I am able to feel sad at his passing because I love him so much.

My layout this week (since I created it last week with some extra time that I definitely didn't have this week) is not about him, however, though I do feel the need to scrap a page about him soon. My page is about two of my kids and how I love when they show love and kindness to each other.

I used the Picture Perfect Classic kit as well as some shop items.


I thought that it would be fun to mix some shop items with this beautiful kit. For this page I used the American Crafts rub-on rollers, Crate Paper cardstock and puffy stickers and Pink Paislee cork hearts. 


Here you can see how I layered lots of the Crate Paper stickers by sticking some under my photo and using dimensional adhesive on others. 


I thought this little Crate deer was so cute and I love the touches of gold in the sticker pack. You can see also how I layered the tags and added the floral rub-on tape. I was skeptical about this roller but it actually goes on so smoothly. I would love to add more of these to my collection. 


I especially enjoyed adding lots of these little phrase stickers to my page to accentuate points of my journaling. 

Thanks for stopping by today. 

I hope this week's posts will inspire you to document your feelings about loved ones and more than that I hope you will TELL them you love them. We just never know how much time we will have with them. 

♥♥

Friday, March 25, 2016

Bubbles!

Hey guys, Michelle here with another layout using the Picture Perfect classic kit! I'm getting lots of mileage out of this kit and I love how I can use bits and pieces of the Heart of Gold kit to accent my pages! And that's exactly what I did with this layout.
We had a gorgeous spring day earlier this week (which quickly turned into cold & windy rain) so we took advantage of the weather by playing out side with bubbles and sidewalk chalk :) 

For my page I created a sort of grid with my photos and elements from the kit (one of my favorite things to do), cutting those washi tape strips into arrows & also using the circle washi 'strips'. 
Originally I had planned on using the yellow puffy alphas on my page but I quickly realized there was only 2 'b's in the set and I needed 3. So I grabbed those white & gold alphas from the Heart of Gold kit along with some gold puffy hearts. 

I don't know about anyone else but I can't wait to have more spring and summer photos to scrap for sure!!!

Thursday, March 24, 2016

{American Girl} Layout using "Picture Perfect" Classic Kit

I'm back today sharing a 2 page layout using the "Picture Perfect" Classic Kit again.  For this layout I used some papers from last month's "Heart of Gold" as well.

 
I started by using the large floral print by My Mind's Eye for the base page on the left side of my layout.  Before adhering the layers, I cut one of the floral elements from the paper in an area that was going be covered up with the pink polka dot paper. I also used the packaging from the Hello Gorgeous wood shapes by My Mind's Eye.  The packaging is the layer of paper with the pink lace print on the bottom left of the layout.  It was such cute packaging, I could not resist using it on the page!


Below is a close up of the flower element that I fussy cut and used as a die cut on the layout.


As I have said before, I really like mixing fonts on my titles, so I used some Thickers and mini alphabets from my stash for the words "Super" and "shoppers".  I then used the My Mind's Eye wooden "SWEET" tag to pull the title together and ground it.

The second page of my layout is fairly simple, since it contains such busy photos.


 The tulle flower embellishment from Maya Road was the perfect large embellishment to use on this side of the layout.  I added another wood tag, a couple of enamel dots, a puffy sticker, and a cut apart tag to round out this embellishment cluster. And that wraps up my layout for today!


Thanks for stopping by, I hope I inspired you today!!!