Showing posts with label color scheme. Show all posts

Saturday, February 6, 2016

Perfectly Paired with Pink, Blue and Gold

What do you think of the projects from this week?

Our designers have done a great job sharing 'perfect pairings' with the new 'Heart of Gold" February kit.

Today I have a layout to share where I have paired pink, blue and gold, a color combination that I love!

♥♥


I started off my page with a patterned paper background. Oftentimes we cut off the tear strip on the bottom of the page. Instead of doing that, I cut the extra from the top of the page so that I could have the grey triangle border on the bottom of the page. I added droplets of white and gold spray mist and then hand-cut some flowers from the gorgeous My Mind's Eye Hello Gorgeous "Ashley" paper and used them as embellishments around my page. This brought in the pink part of the pink, blue and gold combo. Some of the flowers I glued directly to the page, others I raised up with foam adhesive. 

I used two shades of blue My Mind's Eye enamel dots for the blue accent to go with the blue flowers from the patterned paper. I brought in some more texture with the layered Crate Paper tag and wooden heart. 


For the gold elements I had gold spray mist, a gold frame, gold striped sticker, little hearts and a Pink Paislee enamel heart. I used some bits of washi tape (the washi booklet was one of my favorite parts of this kit!) and journaled directly onto my page. 


What is your favorite color combination or product combo? 

Please share with us!

Have a fantastic weekend!


Wednesday, November 11, 2015

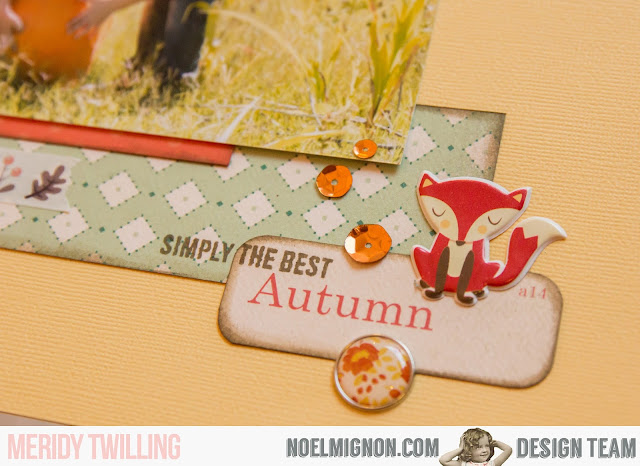
"At the Patch" a Golden Delicious "Classic Kit" Layout

Today I would like to share a layout with you using the Golden Delicious Classic Kit.   


Each year, I want to document our annual trip to our favorite pumpkin patch, and this month's kit had the perfect combination of colors for my photos from our 2014 trip...


 I have a confession here...I may (or may not) have been known to dress my kids/family in coordinating outfits, or colors that I think with coordinate with our activity----just so they are a little easier to scrapbook.  Sometimes it's really helpful when I sit down to scrapbook the photos, because the colors don't clash!!!  For example, although these photos were taken a year ago, they match this month's "Golden Delicious" kit colors.


 I adore this Maya Road fabric trim that came in this month's kit as well as the Echo Park washi.  When I used them together they have a nice contrast and balance one another out.


The variety of embellishments in this month's kit rocks (as usual) everything from cut aparts, puffy stickers, sequins, brads, and even coordinating ink!!!  It all works together for a balanced embellishment cluster with variety and texture.


I used a strip from the Carta Bella "Fall Blessings" border strip and cut it into pieces for my journaling.  Super simple and cute!


Thank you for visiting the Noel Mignon Blog today.  Subscriptions for January-June of 2015 are open for another 4 days (until Nov 15, 2015).  If you want a spot, hurry and sign up before it's too late---you will love the kits every month!!!


See you next week!!!

Friday, March 13, 2015

Monthly pages with the Shine Bright Daily Diary Kit

 Hey guys! I'm here to share a couple pocket pages with the Shine Bright Daily Diary kit. I love, love, love the colors in this kit!!! And they go perfectly with the color board inspiration the DT team has been using this week. Hmmm...almost like it was planned that way or something ;)

The colors in this kit are so versatile and I can't wait to make some spring layouts with it! But first, I have a few pages that are for my 3 yr daughter's albums. I like to mix in traditional layouts with these pocket pages that give more of a 'snapshot in time'. 


When I create these pocket pages for my Project Life albums I'll make a left and right side spread. But when they're for a specific even or for my kids' albums I usually do front and back of a pocket page so that I can add traditional layouts in between those in their albums (if that makes sense!)


So for these pages I just stuck to using a few photos for February and March to highlight a few things just about Addie that I wouldn't normally make an entire layout about but are still part of her story. I think that's why I just love the idea of pocket scrapbooking so much...the little stuff doesn't get missed!

If you play with the color board inspiration this month be sure to share your creations on the Noel Mignon facebook group!

Thursday, March 12, 2015

Documenting March with this week's colour palette...

Hi, I've got another project life layout to share using the Shine Bright Daily Diary kit.


My layout was inspired by this week's gorgeous color palette, and I used a mix of coral and mint with a hint of sparkly gold to document week ten.


It was a relatively quiet week and I didn't have many photos, so I made use of some of the fun filler cards from the kit to not only help me fill in some of the pockets but also to add color to my page.


I cut apart a 3x4" gold foiled card and joined it to either side of the cute globe card to create a custom title card to mark the beginning of a new month. 


I continued the striped theme with several of the filler cards and used metallic embroidery thread to add hand stitched detail to some of the images.  


Facing the dilemma of not having enough photos for the second part of the week, I decided to enlarge a photo my son took of a sunset at his favorite fishing spot. I achieved this by cropping my photo into four 6x4" sections using photo editing software, then cutting down the two bottom sections to fit inside the smaller pockets.  


I added a journal strip and embellishments directly over the photo to help create a focal point on the large photo and once again added gold stitching to highlight some of the pieces. 


See you next week xx


Wednesday, March 11, 2015

My oldest girl and another take on the color challenge

Good afternoon!

We swapped posting times today so I am here this afternoon to share a new layout with you that I made with the beautiful Shine Bright Classic Kit.

Here, once again, is the color scheme inspired by this month's kit:


Isn't that a beautiful color scheme? 

Here is the page that I created for this challenge: 


I started out as I often do with a white cardstock base mounted on one of the patterned papers in the kit. I added mist in gold and mint tones and once that was dry I added the glitter and more mist. The scalloped border was cut from one of the patterned paper tear strips. To do the glitter I used my Tombow liquid adhesive, added the glitter on top in generous amounts and then shook off the extra. It's a quick and easy way to add some sparkle to a project. For the hearts I used the same liquid adhesive and drew a heart shape on my page and added glitter. Quick and easy! This would be a fun thing to do with a title, too. 


I wanted to make the gold shine with the colors in this palette so I used some of the chunky gold glitter in a couple of different spots (the heart and the line under my photo). I added gold stickers and chipboard hearts, too.


I added lots of chipboard accents and cut a journaling spot from patterned paper. Below my journaling block I used the backing from the pretty aqua scalloped trim in the kit. 


I hope that this has helped to inspire you to create something today. 

As always, we appreciate you so much at Noel Mignon. 


Have a wonderful day!


Friday, October 15, 2010

Mixing Sleepy Hollow & Sweet Sue


I knew that I wanted to use turquoise/teal & orange to complement these sweet photos of my daughter on her first birthday, and when I went to scrap them, I realized that I had everything I needed at my fingertips in the Sweet Sue (3 left!) & Sleepy Hollow kits.
The orange background, orange scalloped-punched strip of paper, felt trim, glitter alphas, corrugated alphas, die cut journaling spot, buttons, paper tab, "thankful" sticker, and embroidery floss are from the Sleepy Hollow kit.
The teal wood grain paper, the fussy cut flowers & stems, Prima flower, Sassafrass sticker strip, and lined patterned paper are all from the Sweet Sue kit (3 left).

I think they make the perfect combination!

What two Noel Mignon kits do you like to combine together?

Friday, August 13, 2010

Color Scheme!


Good morning!!! I have a fun color scheme I found on the Better Homes & Gardens Web Page! I love all the crisp clean white of this room with pops of orange, green, and pink!

For my LO, I used it as a starting point, but since my pics were of my daughter swimming, I went a tad brighter! My green, orange, and pink are flaming hot! : ) I used the Sun-Kissed kit along with my Cricut H20 cartridge to cut the sun. I kept the LO clean and simple and just added subtle details like hand stitching the sun, adding clear buttons tied with brightly colored twine, and clear Dew Drops from my stash.

I love the subtle look of stitching! : )

.......and my "water droplets!"
Have you seen Noel's latest kit, Sweet Sue? Can you say, AWESOME??? It goes on sale August 20th!!! Click HERE to see peeks!
Have a great weekend my friends!!!

Monday, July 26, 2010

Color Scheme


Putting together color schemes is a fun way to create a layout! I used this combination of colors: white, dark pink, kraft, light pink and cream to create a sweet baby layout about my daughters and their great-grandma. The colors in the "Seaside Cottage" kit were perfect along with a few items from my stash. 


This layout was also created for the no patterned paper challenge over on the challenge blog


I cut a Hambly doily rub-on in half to frame the larger photo and a sticker from The Girls' Paperie was a perfect border along the bottom of my layout.


I used a Jenni Bowlin label sticker, Melissa Frances rhinestones, Making Memories chipboard alphabet, The Girls' Paperie sticker and some tulle to create my title. 


I also used a Jenni Bowlin bingo card above the smaller photos. I used my trusty Uniball Signo pen to create journaling lines.


Try using a color scheme when creating your next layout! 

Until next time,
Jill