

Happy Tuesday!! Lisa here today!
I love the fabric in the Cabin Fever kit. They both have such a beautiful pattern and are so soft.
I decided to make a little throw pillow so I could enjoy the softness. And the burlap!! Oh, I love burlap. I want to get burlap pillows for my couch, but for now this will do!
I have to tell you upfront I suck at measuring things. I just wing it so there are no dimensions on my instructions for the pillows. If you want to measure you can and still follow these steps below!
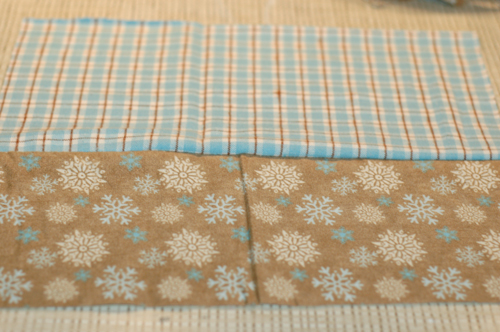
Make sure both pieces of your fabric are the same length. I left the blue one wider than the brown so there was more blue pattern since I left the back of the pillow all brown.
Put your fabric together so the outsides face each other. Then sew a 1/4" seam along the inside of the 2 pieces.

Then once your 2 pieces are stitched together you can open them up and you'll see the front of your pillow starting to take shape. You could iron the material at this point, but with this type of material I didn't worry about it since the wrinkles will settle on their own!
Then cut a piece of the burlap (yum) to the same length of your two pieces and stitch it to the top of your pillow piece. I stitched right along the inside hem of the burlap on the top and the bottom. I used a neutral thread, but it would probably look really pretty with a contrasting color like red too!

Once your burlap is stitched on sew 5 of these beautiful buttons on to the burlap!

Ok, now this next step is very important. If you don't follow it exactly you might get all done sewing and find out you stitched it together inside out and have to take it all apart and start over...I'm just saying...it's not like I'd do that or anything ;)
So now cut a piece of the material you want to use for your back that is the same size as your finished piece for the front.
Then (and this is the step you need to follow!) put your 2 pieces together so the pieces you want facing out on your pillow are facing each other on the inside. Basically it's like putting a shirt on inside out. This step allows you to hide the stitching and create your pillow!

Now stitch a 1/4" seam along all the edges leaving about a 5" opening on the bottom of the pillow. If you don't leave an opening you won't be able to turn your pillow right side our or stuff it! To get a nice corner make sure your needle is down when you turn your fabric 90 degrees.

Then turn your pillow right side out and it should look like this. You'll need to poke all the corners out.

Then stuff a generous amount of pillow stuff into your pillow, making sure you get the corners good!

Once all the stuff is hand stitch shut the open seam. This is why you want to keep the open section the bottom of your pillow. It's easier to hide the hand stitching that way!

Now display it some place proudly! I put it on the couch and when my husband came home he asked me where I bought it from...I was just happy he didn't instantly think I made it!

My son quickly took it and thought it looked better on my bed! I have to agree!

Please let me know if my instructions aren't clear or anything!!
Happy Tuesday!
Lisa
1 comment:
I so LOVE this pillow! What a clever idea...PERFECT! xx :)
Post a Comment