Thursday, November 30, 2017

Remember Happy

Hello again!

I have one final project to share using the Home Sweet Home Classic kit before moving on to our December kit, Gingerbread and Peppermint. There are still some of each of these kits left in the Noel Mignon shop.


This picture to me exudes happiness. This is my youngest daughter and she is very happy most of the time. She's a sweet girl who loves life and loves to smile and do things to cheer others. I love this picture of her with a pumpkin on her head ☺

Here is a closer look at my page: 


I love how the blues and greens of the Elle's Studio products work so well with the autumn tones of the Echo Park collection. I used a mix of both on this layout. 


These felt flowers from Jillibean Soup were the perfect way to finish off my page. 

Have a wonderful rest of your week!

Wednesday, November 29, 2017

Pinners Conference

Hey all! We are almost into December and that means tons of holiday projects which I am so excited for!!! So I'm wrapping this month off with a pocket page using the Home Sweet Home Daily Diary kit along with some elements from the Apple Crisp Classic Kit. These 2 kits pair up so nicely it just makes sense to use them both on my projects!
I started off with a Design K Project Life pocket page. I love these because they have 4x4 squares which was perfect for including some of my instagram photos from my trip. Then I supplemented with other photos for the 3x4 spots. 
Funny - not so funny at the time - story: on our way home we had a cancelled flight, changed flight, delayed flight, almost missed flight, you name it it happened while trying to get home. Then on the 2nd flight (after a 6+ hr layover and delayed flight and issues with our boarding passes) we get on the plane and they tell us that because of the delay they were not able to service the plane so they only had water...no snacks, no drinks. So I had a little fun with my 'NOPE' card since I was really hoping for a glass of wine on that flight!

There were several cards that, while I liked the card, the saying wasn't applicable for my page. So I simply covered those up with various embellishments from the kits to personalize it to my needs.

This green striped card had a heart on it so I covered it up with a chipboard leaf:

This card originally said 'so very blessed' and I covered the 'blessed' with a banner from the Pretty Little Studio cut aparts, then added the 'fun' thickers. 

And the house card had a saying on it that I covered up with part of a journaling card so that I could add my own writing. 

Tuesday, November 28, 2017

Two layouts for the price of one with the Home Sweet Home Classic Kit

Hello everyone!  I hope you are having a wonderful Tuesday.  Nicole here on the blog today to share another look at the Home Sweet Home Classic kit before I start breaking into the new Chrimast kit that arrived yesterday. 

As most of you know we have been in our new/old house for a little over a month.  During this time I have taken snapshots with my phone and posted them on social media.  They have included things that we have had to get use to, new experiences, as well as our new views.  I decided they would make a great layout that would give a good glimpse of out first month here and so I printed out a hand full of the pictures. 


I started with a few pictures and just started adhering them to the woodgrain pattern paper.  I wanted a messy grid so overlapped and tilted them.  I then decided the best way to include a little snippet about each photo would be to number them and so I used the Jenni Bowlin numbers to mark each photo.

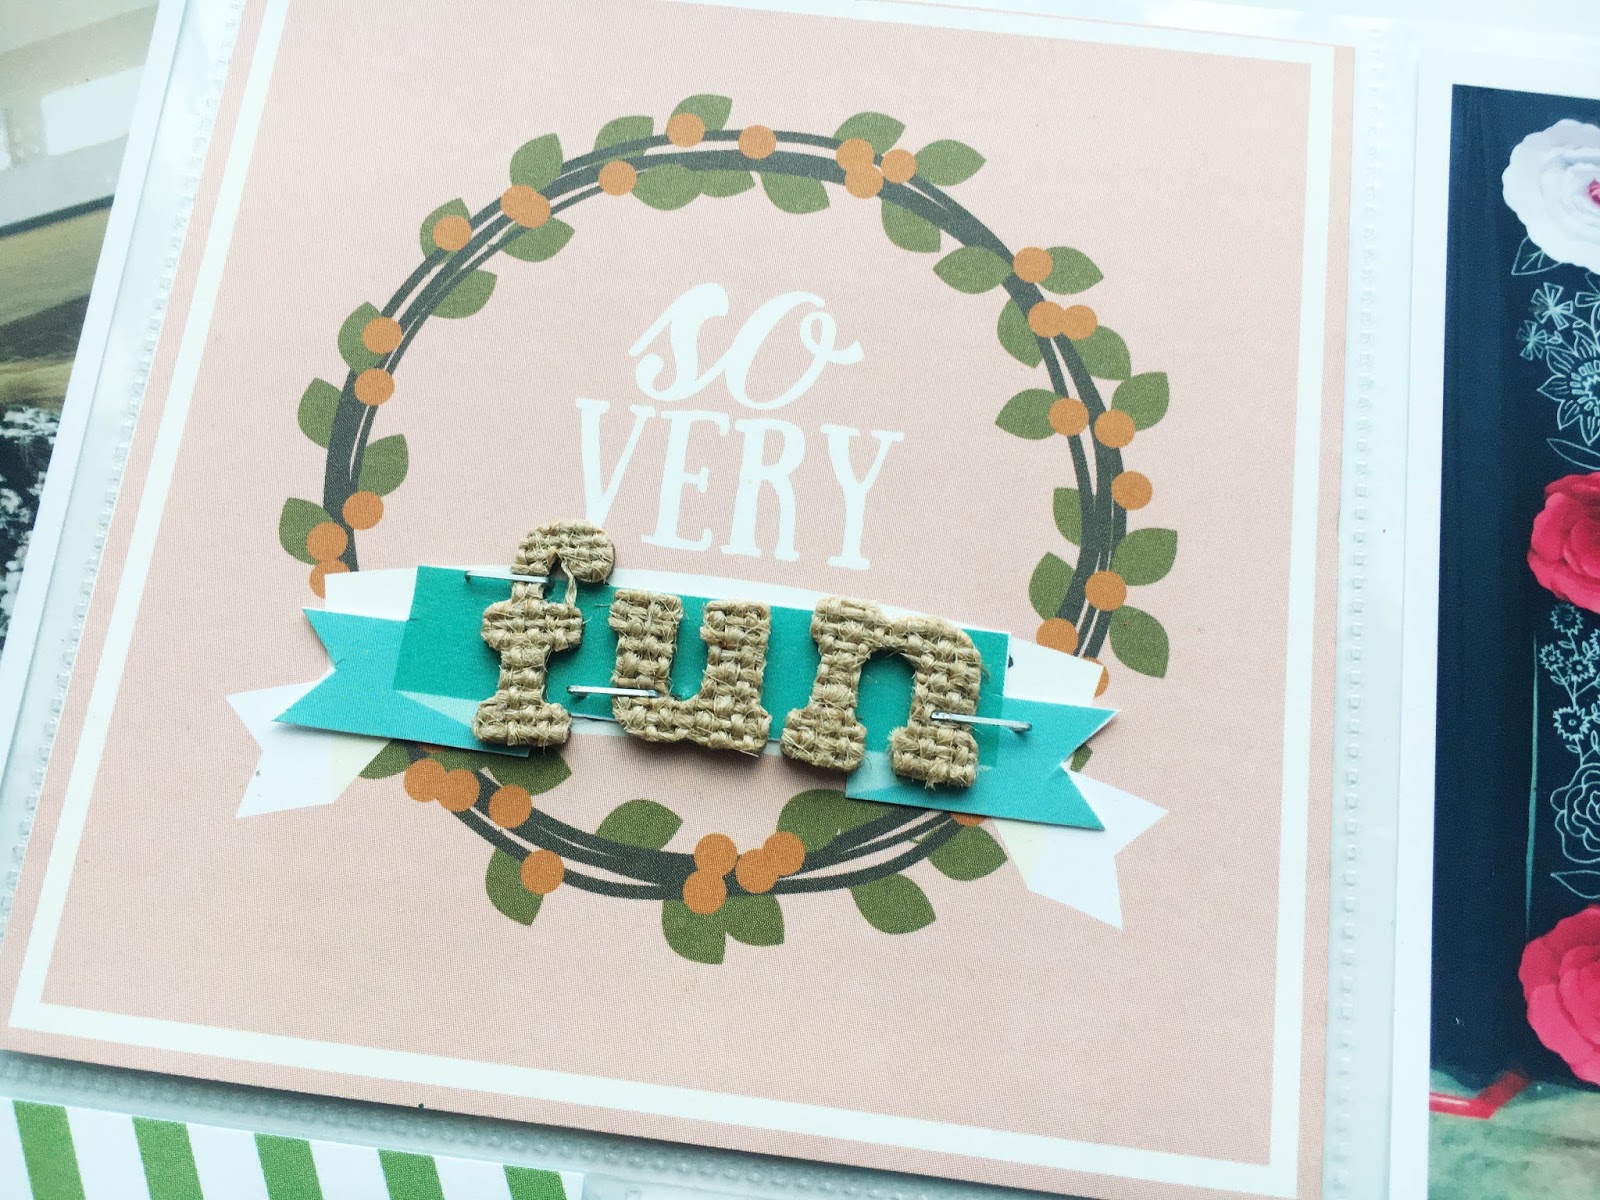
My favorite part of this layout was the rubons.  I love the Carta Bella rubons!  I used the wreath and twigs in my title as well as a few leaves scattered among the photos.


To finish off the embellishing I used a few Elle's Studio stickers and word strips through my photos and journaling.


Once this layout was complete I decided to do another with pictures of my sons last field trip at his old school.  The Carta Bella chipboard stickers were perfect for the accents and so I let them be the center of attention around my title.


  I used the Jenni Bowlin stickers for my title.  I cut a few strips of pattern paper to tuck under the main section of my title and then started placing down photos.  I used a few odds and ends left from the sticker sheets and then added a few of the die cut leaves I had left from my layout from a few weeks ago.


I finished off with the pattern paper strips along the top and bottom and the chipboard embellishments from the Carta Bella chipboard/brad set.


I still have a few more ideas to put together with the rest of this kit.  So it's not going away quite yet.  I really love how Noel mixed in some traditional fall colors with non traditional elements.  This kit is so versatile.  As of this morning there are still three kits left in the store.  Be sure to stop by and snag one before they are gone. 

How are you using the kit this month?  We would love to see what you are creating.  Be sure to share over on the Noel Mignon Facebook Members page. 

Happy Scrapping!


Monday, November 27, 2017

Christmas Ornaments with the "Gingerbread and Peppermint" Daily Diary Kit

Hello friends!!!  It's Meridy today.  I couldn't wait to break into my "Gingerbread and Peppermint" Daily Diary Kit this week.  Inspired by all of the pretty homemade ornaments on Pinterest, I decided to try making some of my own with my Noel Mignon kit this past weekend.


I started off with some vintage fluted Christmas cookie cutters and lined the inside of them with some of the paper from this month's kit, adhered with Eileen's Tacky Glue.  The smaller print on the 6x6 papers is the perfect scale for these tiny ornaments.  Next, I hot glued the trim that came in the kit on the edge of the diamond cookie cutter.  I dipped the edges of the star into tacky glue then red glitter.  

I added the little bows that came in the kit to the ornaments with hot glue.  I placed some jingle bells on the tops to give me a place to string baker's twine to hang the ornaments from.  

I fussy cut the word "Joyful" from the little cards in the "Gingerbread and Peppermint" Daily Diary Kit.


Finally, I filled them with little bits and pieces I have collected.  The deer came from a pack of small ornaments I found at Wal Mart this weekend.  The mini tree and holly came from Hobby Lobby.  I added a few beads to the tree to create ornaments.  You can find little bits and pieces of Christmas goodness in lots of places.  


I had a great time mixing this month's kit in with some craft supplies to create one of a kind ornaments! 

Thanks for stopping by!  See you next week.


Friday, November 24, 2017

Thankful for Ten: Home Sweet Home Daily Diary Kit

Hi!  And Happy Thanksgiving to all of our American readers!!!  Today I am coming at you with a layout about how thankful I am for our rescue boxer, Annabelle.  We adopted her when she was about a year old and stray on the streets of San Antonio, TX.  We met her at a rescue center and it was love at first sight for both of us.  She is the perfect dog for us.  She's sweet, gentle and brings us so much joy.  She has just turned 10 this month, and she has been with us for 9 years. 


This is an 8.5x11 layout that will go in Annabelle's album.  I used a brown plaid paper from my stash as the background and then used the 6x6 papers from the kit that I still had left.


The Simple Stories chipboard "Thankful" sticker was perfect for my title.  I used the Thickers from the kit to finish it off.  The red project life card was great for my journaling since we definitely felt like she completed our family when we brought her home.


I cut out a piece from the Simple Stories cut apart sheet to create the "so very blessed" collage and added the chipboard "together" to help it round out.  The Elle's Studio cut aparts were great as a sentiment along the left-hand side as well.


The chipboard hearts really helped it come together and finish it off.

Thanks so much for joining us today.  Have you used this kit to document something you are thankful for?  Please share it in our FB group so we can see it!


Thursday, November 23, 2017

Happy Thanksgiving and the Home Sweet Home Classic Kit

Good morning and Happy Thanksgiving to y'all.

We sure are grateful for you here at Noel Mignon.

Today I have a quick fall project to share with you.

Before that, though, I just hope that your day is filled with happiness and that in between the food prep, the turkey and the pie (or whatever you choose to eat today), the parade and the football, and maybe even the naps, remember the truckload of blessings in your life.


For my project I used the Home Sweet Home classic kit. 

I simply started with a 5x7 piece of dotted patterned paper from the kit and kept it pretty simple since I wanted the cute little red truck to be the focus of the project. 

Here are a couple of detail shots: 


These little flowers from Jillibean Soup are adorable: 


Thank you for stopping by Noel Mignon and have a very Happy Thanksgiving. 

Wednesday, November 22, 2017

turkey day recipes

Well, it's the day before Thanksgiving! My family is casually watching tv while I'm prepping the desserts & Thanksgiving dinner for tomorrow. As I was going through all of my recipes, I realized I needed to get them into my recipe book. I have many recipes that I use year after year and yet have not made it to 'the official' book yet. And a bunch of printed recipes from the internet just isn't pretty!
A while back I shared the recipe book I started putting together for all of my favorite Christmas recipes and every year I add to it when I discover new favorites. So now it was time to get those turkey day favorites into a recipe book as well!

I pulled out the Apple Crisp Classic Kit along with the Home Sweet Home Daily Diary Kit to create my recipe cards.  I printed the longer recipes on 6x8 cardstock (because I'm using a 6x8 album for my recipes), the smaller recipes were printed on some of the 4x6 cards in the Home Sweet Home kit.
There! So much nicer having my recipes in an album that I can pull out when needed.

Happy Turkey Day everyone!!!

Tuesday, November 21, 2017

Turkey treat boxes with the Home Sweet Home Classic Kit

I can't believe Thanksgiving is two days away . . . crazy right?!

Well I thought I would make some cute little turkey treat bags this week for some of the gals I visit from my church.  They came together super quick and you can make two on one full 12x12 sheet of pattern paper.  I think they would be adorable as place settings for Thanksgiving dinner and something you can have the kidlets help put together.  My little guy loved helping me add their faces.

Here is the turkey bag I used in the Silhouette Store - Turkey treat bag

 Once I had them set up to cut I let my machine do all the work and then I assembled them.  I did decide to cut out the feathers twice from the same pattern paper so they would be the same print on both sides.

I love using the Tombo Mono Aqua glue to assemble 3d paper projects.  It has a little longer drying time so you can line things up before it dries.  Also this particular glue dries clear without too much warping.

For their eyes I used a some wiggly eyes I had in my craft stash and used the glue gun to glue them on.

Thanks for stopping by the blog today.  I wish you all in the US a wonderful holiday week and enjoy your time with friends and family.  Gobble gobble! ;)


Monday, November 20, 2017

{Love You} & {Daddy's Girl} Layouts with the "Home Sweet Home" Classic Kit

Hi friends!!!  If you are in the USA---Happy Thanksgiving Week!!!  It's Meridy here and I have a couple of 12x12 layouts that will face each other in my album, so the supplies coordinate across the 2 pages.  

The pictures are from 2015, and the colors in the "Home Sweet Home" Classic Kit match them so well! 

I started with my favorite papers in this month's kit and then added a few of the die cut pieces.  I decided I wanted to add a couple of flowers to the layout, so I pulled a few from my stash and added crystal gems from my October Noel Mignon kit.  


At this point I was ready to add my title, but the page still looked like it was missing something, I used one of the word stickers that said "love" and I used the Thickers to spell out "you".  I still wanted to add some texture to the layout, so I decided to pull out some embroidery floss and hand stitch around the word "love".  But the stitching kind of got lost with the sticker still attached, so I removed the original sticker and was left with the outline of "love".   This looked so much better to me, so I went with it!


I decided to create the facing layout in my album with the same supplies.  So I started with the same patterned papers and layering those up with my photos.


I wanted to mimic the title on this side of the layout too, but I didn't have any stickers that read "girl", so I made my own template.  After I cut the template from scratch paper, I used a pushpin to poke all of the stitching holes.  I removed the template, divided the 6 strand embroidery floss into 3-strand thickness and went to town stitching around the letters.  Once I began stitching, it took me about 15 minutes to stitch the entire word.   I was hesitant about hand stitching on a layout because of how time consuming I thought it would be, but 15 minutes wasn't bad!  


After this layout, I know I will be hand stitching on more layouts in the future.  I can sit and watch TV while I stitch.  It was relaxing to me!!!

Thank you for stopping by today!  Have a great week!!!


Friday, November 17, 2017

Roof Stomp: Nov Home Sweet Home DD Kit

Hi!  Sarah here with a layout using the November Home Sweet Home Daily Diary kit.  I had these great pictures of a fun roof stomp that my husband's squadron did recently.  A roof stomp is a tradition in the Air Force.  When a new commander comes into a squadron, the members usually organize a roof stomp, where we all meet secretly and travel over to the commander's house.  We quietly climb up on the roof and all at once, start stomping to create that noise in their house.  It usually freaks them out because they have no idea!  The spouse knows so that they can make sure they are home and it's a ton of fun!


I grabbed a piece of paper from my stash from Crate Paper (the green background) and used a block of Carta Bella paper that I felt echoed the shape of a roof.  I also used a few project life cards and layered my photos on the 4x6 cards and did my journaling on a 3x4 card.


I loved collecting some of the house elements in the kit and using them here.  One of the project life cards has a house and I didn't like the sentiment at the top of the card, so I covered it up with two green die cuts.  I also had a house on the chipboard sheet.


The tree chipboard pieces went really well with this layout since there are some trees in one of the pictures.  And I used a bow leftover from a previous kit to help finish off the title.


The "Home Sweet Home" die cut was so great for this layout and tied into the theme nicely.  To finish it off, I used a geotag sticker I had lying on my desk and some pearl beads from my stash as well. 

I hope you guys enjoyed that!  Please don't forget to upload your layouts to the FB group so we can see how you're using your kits this month!