Wednesday, August 31, 2011
Summer Fun 2011
Happy Wednesday everyone! Today I wanted to show you a quick trick you can do to create faux paper strips! I used the BasicGrey paper found in the Bee's Knees kit and cut out small little faux banner strips. I did not have to cut the strips apart. I just cut out a small section in between each banner piece. I love this trick because it allows all your papers to stay in a nice neat row!
Here is my finished layout using my faux banner strips!
I hope you give this fun little technique a try!
Happy creating!
-Diana
Tuesday, August 30, 2011
Summer at Home
Let's be honest. I don't always like what I make. I should - I mean, if you're going to go to the trouble of making something, you ought to love it, right? But, no, sometimes I'm crafting just for obligation sake.
But not this time. This time, though this was for a specific challenge, I used product that I loved, photos that I love, and I even mixed things up with a little bit of digital play.
The background is a piece of Crate Paper from one of my noelmignon.com kits (I can't remember which one, of course) that I punched with a Martha Stewart edge/corner punch. Then I dripped a little white ink onto the page just to give it a little more aged look.

All of the paper on the page is by Simple Stories - the 100 Days of Summer line. AND I AM IN LOVE WITH IT. Period. The end. My favorite line. At least for the next few days, until I've used it to death and am sick of it. And then I'll go right back to the usual suspects...

And then I grabbed one of the little wooded fences and inked it up. LOVE this simple little technique - and it works so well with this kind of paper.

It is at this point that I must confess that I made this page up with absolutely no idea of the photos that would be going on it. So, when I got to the point that I HAD to add photos to it, I realized that my printer was completely out of ink and I was, in fact, screwed. It is at this point that I must also confess to being in a sadly embarrassing state of general appearance and that no amount of money could have made me do anything about it in order to leave the house, drive the 12 miles to Staples and get ink.
So I improvised.
I photographed the layout, uploaded it to Photoshop (I use CS3) and put my photos into the layout. I just traced around the summer banner and made it a new layer via copy, and put it over the photo so that it looked like I actually had a photo under the banner "for reals." And not for fakes. Fakes are bad.
Then I typed in a bit of journaling and voila!

It was actually kind of a nice change of pace, this little hybrid venture of mine, and I love the outcome!
So that's it for me today!
Happy scrappin'!
But not this time. This time, though this was for a specific challenge, I used product that I loved, photos that I love, and I even mixed things up with a little bit of digital play.
The background is a piece of Crate Paper from one of my noelmignon.com kits (I can't remember which one, of course) that I punched with a Martha Stewart edge/corner punch. Then I dripped a little white ink onto the page just to give it a little more aged look.

All of the paper on the page is by Simple Stories - the 100 Days of Summer line. AND I AM IN LOVE WITH IT. Period. The end. My favorite line. At least for the next few days, until I've used it to death and am sick of it. And then I'll go right back to the usual suspects...

And then I grabbed one of the little wooded fences and inked it up. LOVE this simple little technique - and it works so well with this kind of paper.

It is at this point that I must confess that I made this page up with absolutely no idea of the photos that would be going on it. So, when I got to the point that I HAD to add photos to it, I realized that my printer was completely out of ink and I was, in fact, screwed. It is at this point that I must also confess to being in a sadly embarrassing state of general appearance and that no amount of money could have made me do anything about it in order to leave the house, drive the 12 miles to Staples and get ink.
So I improvised.
I photographed the layout, uploaded it to Photoshop (I use CS3) and put my photos into the layout. I just traced around the summer banner and made it a new layer via copy, and put it over the photo so that it looked like I actually had a photo under the banner "for reals." And not for fakes. Fakes are bad.
Then I typed in a bit of journaling and voila!

It was actually kind of a nice change of pace, this little hybrid venture of mine, and I love the outcome!
So that's it for me today!
Happy scrappin'!
Monday, August 29, 2011
New challenge!!

After a little summer hiatus, the challenge blog is back up & active!
And the new challenge is very appropriate:
What did you do on your summer vacation??
And the new challenge is very appropriate:
What did you do on your summer vacation??
Scrap it!
I did some fun stuff this summer,
but I also did a lot of running!
but I also did a lot of running!
So I scrapped about it...

(I grabbed the cardstock & brads from my stash but everything else is from the Salt Water Taffy kit!)
*****
I kept this layout pretty simple since the pictures are so busy & colorful.
*****
I kept this layout pretty simple since the pictures are so busy & colorful.
And that is a sun rub-on over the "summer" in my title & a cute watermelon border underneath!

I am still on a banner kick and I thought I would spice this one up a little bit by mixing the Lily Bee flag stickers in with the Sassafras border sticker.

*****
Join us and scrap about your summer!
Link up your layouts here.
Join us and scrap about your summer!
Link up your layouts here.
*****
And have a great week!
:)
:)
Friday, August 26, 2011
A "Book Friend"
 Have you managed to snag your "Study Hall" kit? I hear there are only 5 left!!! Trust me when I say, this will be your new favorite. :)
 I excitedly opened mine up to play with yesterday, and squealed like a school girl when I came across this great page out of an old school book that had the title "A Letter About A Book Friend." I don't know it was talking about, but I knew it would go PERFECTLY with this shot I have of my friend Laura that I took with Instagram last week.
 As you can see, this kit is not so "themey" that you have to do school layouts with it. While I'm planning on doing plenty of school days type layouts, I have several others in mind to make with this kit, completely un-school related!

 The burlap trim? Yes. To die for.
 I hope this layout has convinced you to go grab it! And while you're at it, check out this thread so that you can see the other items in the shop that go along with it. :)
 As you can see, this kit is not so "themey" that you have to do school layouts with it. While I'm planning on doing plenty of school days type layouts, I have several others in mind to make with this kit, completely un-school related!

 The burlap trim? Yes. To die for.
 I hope this layout has convinced you to go grab it! And while you're at it, check out this thread so that you can see the other items in the shop that go along with it. :)
Thursday, August 25, 2011
The Best Gift
I consider it a true gift that my girls have so much creative influence from both their daddy and grandpa - both are artists. My layout today recognizes that gift using the "Salt Water Taffy" kit and a photo from Father's Day this past summer. I kept my design fairly simple and utilized several banners - one I created myself from patterned paper and then stickers by Sassafras Lass and Lily Bee Designs.
Here is the banner I made from patterned paper and then a Sassafras Lass sticker on top. I strung twine by My Mind's Eye between two Maya Road wood buttons.
Make sure you stop by the store to pre-order the September kit "Study Hall"!
See you next week!
Jill
Study Hall Pre-order!
Good Morning Friends! I have the September kit up for pre-order this morning. Here is "Study Hall"!
The Study Hall Kit Includes:
Papers
LilyBee "Memorandum" (Double Sided)
-Boardroom
-Whiteboard
My Minds Eye "Lost and Found 2"(Double Sided)
-Precious
-Ordinary
-Everywhere
Basic Grey "Oxford"(Double Sided)
-Study Hall
-Midterm
-Dean's List
-Spring Formal
-Frat House
Fancy Pants "Off to School" (Double Sided)
-Favorite Teacher
-Measure Up
-ABC's
-Flashcards
-Journaling Cards
October Afternoon "Schoolhouse" (Double Sided)
-Number Two Pencil
-Pink Eraser
-Chalkboard
-Ruler (die cut)
Jenni Bowlin "Haven" (Double Sided)
-Common Objects
-Peeling Paper
-Dictionary
American Crafts Cardstock
-1 Kraft
-1 Cricket
-1 Black
-1 Sunflower
-1 Vanilla
Embellishments
-1 Package Foam Thickers "Hello"
-1 Sheet Basic Grey Oxford Sticker
-1 Package Pants "Off to School" Rub Ons
-2 Fancy Pants Filter Paper Embellishments
-1 Sheet Fancy Pants Chalkboard Stickers
-2 Lily Bee Memorandum Index Cards
-12 Basic Grey Oxford Brads
-1 Package My Minds Eye Burlap (2 yards)
-3 October Afternoon Schoolhouse Tin Pins
-1 Jenni Bowlin Paint Dauber (Fountain Pen)
-3 Maya Road Kraft Journaling Spots
-4 Jenni Bowlin Doily Flowers
-6 Maya Road Wooden Bingo Numbers
-3 or 4 Pieces Fancy Pants School Ephemera
-2 Vintage Children's Dictionary Pieces (1970's)
-1 Jenni Bowlin Ruler Acrylic Stamp
-1 Sheet Vintage School Science Book (1960's)
-1 Sheet Vintage School English Book (1950's)
-1 Piece Basic Grey Writer's Block
-1 Package My Minds Eye Blue Pearls
-1 Sheet My Minds Eye "Charmed" Alpha Stickers
-1 Sheet Elle's Studio Red Pennants
-1 Sheet Elle's Studio Lil' Snippets: Labeled
-1 Sheet Elle's Studio Lil' Snippets: Notes
CLICK HERE to order!

Wednesday, August 24, 2011
Study Hall Pre-Order is Tomorrow!
Be sure to pick up your Study Hall kit tomorrow! I will have it up for Pre-Order bright and early in the morning, and it will be shipping just as soon as my LilyBee box arrives! If you haven't checked out all the sneaks then be sure to hop on over to the message board or our facebook page to see all the closeup sneaks! This on is going to be great!

And I am offering free shipping** this month to all U.S. orders over $100, or if you purchase 2 kits. So get your orders in early as the demand for this offer is going to be high! :)
**Please use the "pickup" option if your order is within the U.S., and is over $100, for your free shipping. I am very sorry, but I can not apply it towards international orders.
One Manufacturer
Every now and then I have a stack of unloved scrapbooking items. I happened to be cleaning my scraproom and came across my stash of October Afternoon's 5 & Dime. I hardly even touched it yet! Gasp! The horror! So I challenged myself to create a layout using only this collection. The only extra items I allowed myself was one sheet of cardstock and some letters. This layout came together quickly and I was able to use bits and pieces of this awesome collection! Pick up your 5 & Dime items from the store today and see what fun items you can create!
Tuesday, August 23, 2011
Scrap Happy!
Heya!
So remember last week when I was trying to figure out how to use up all those scraps? Well, I figured out one really great way!
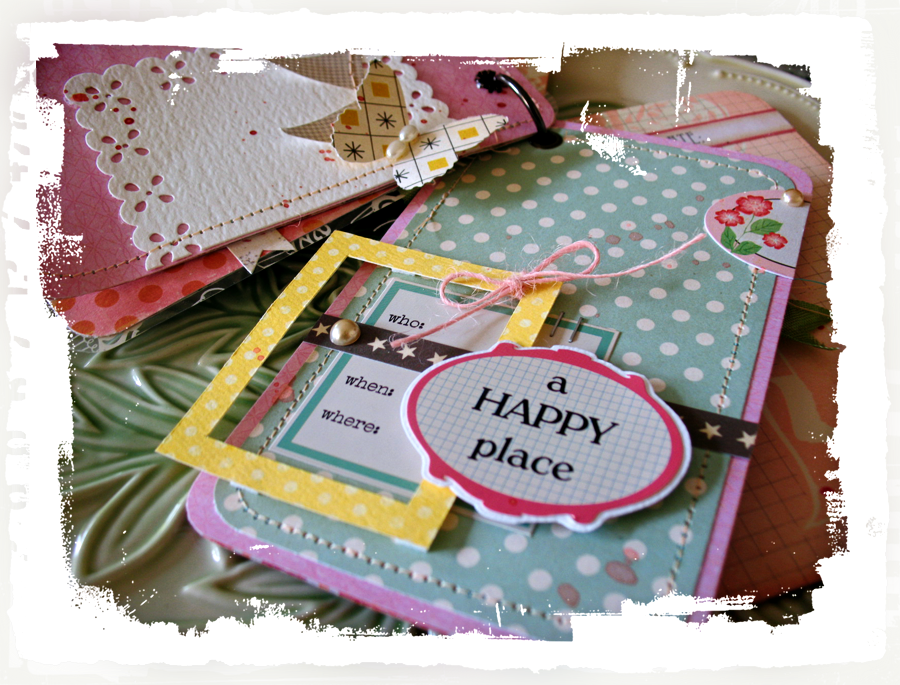
Make a mini album! This one is 3x5 - the perfect size to use up lots of little pieces. I used mostly the Salt Water Taffy and Mary Ellen kits for this one.
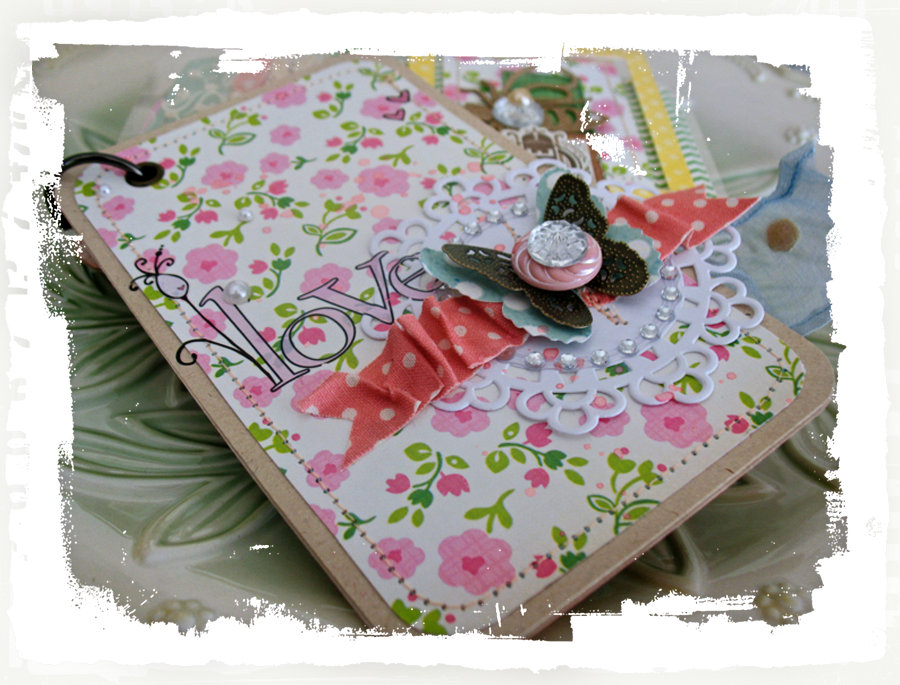
I started by making the bases for all the pages the same size, and stitched most of them so that they would have a feeling of continuity that is really important, especially when working with something small.
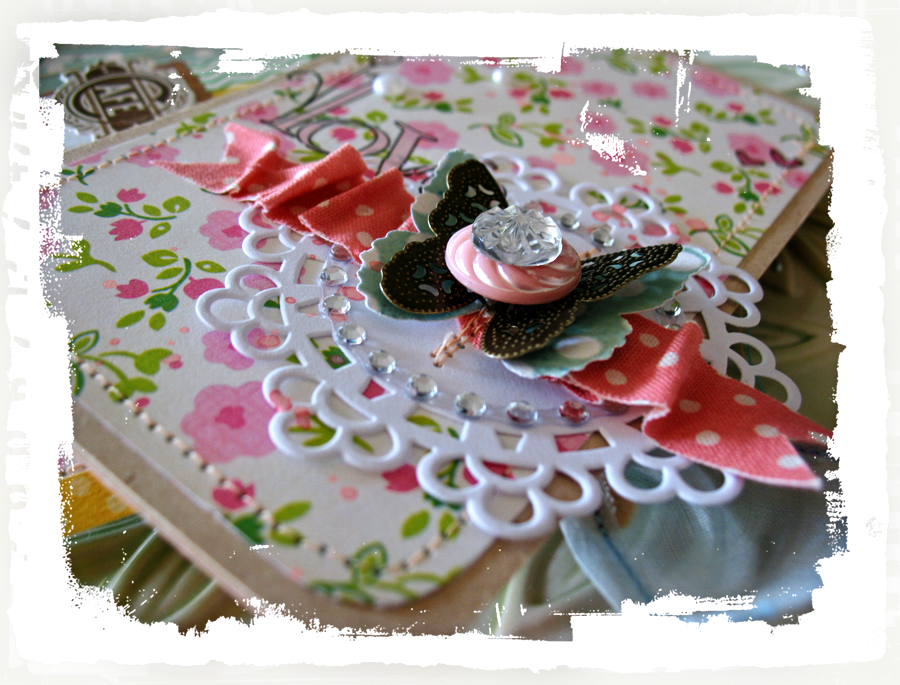
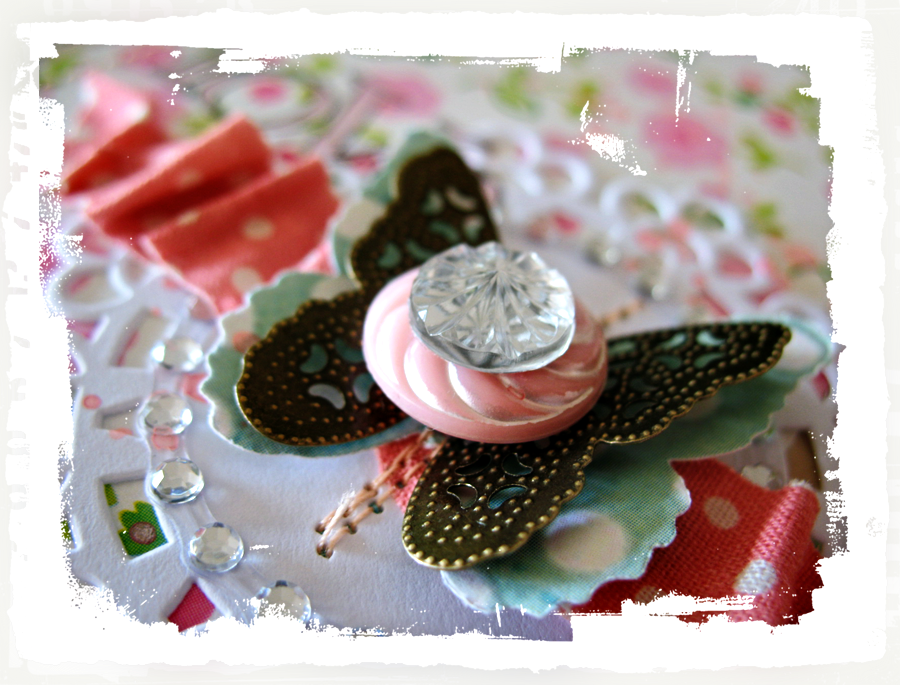
There's lots of layering on this mini, trying to use up some really small pieces, tucking them in here and there. I LOVE this antique brass butterfly from Making Memories!
Don't be afraid to add some inks and sprays to these layouts, too.
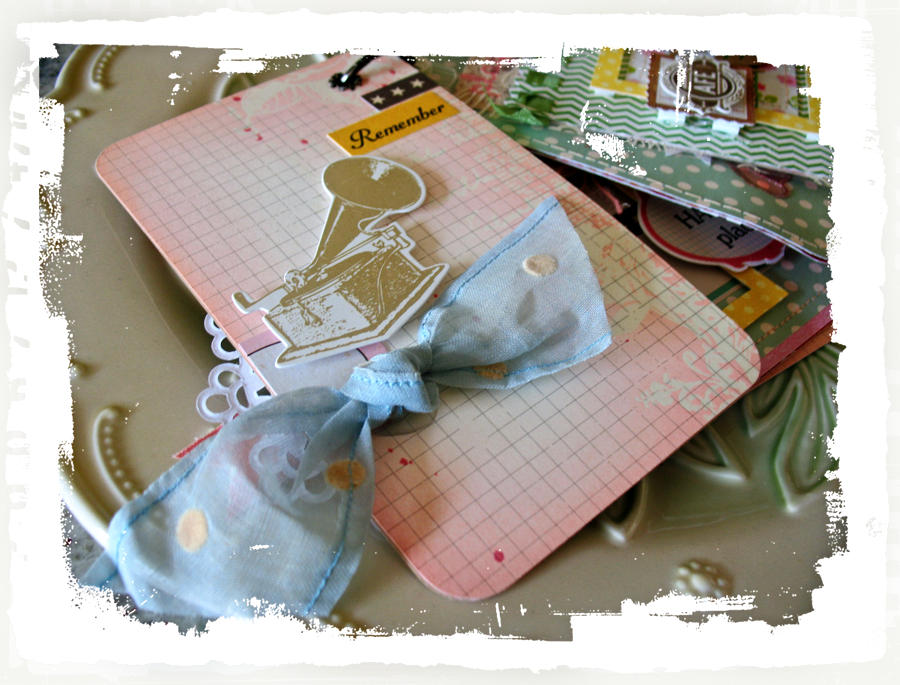
This is a great way to use up lots of those leftover stickers, too! Just run them off of the edge of the page, and trim them down.
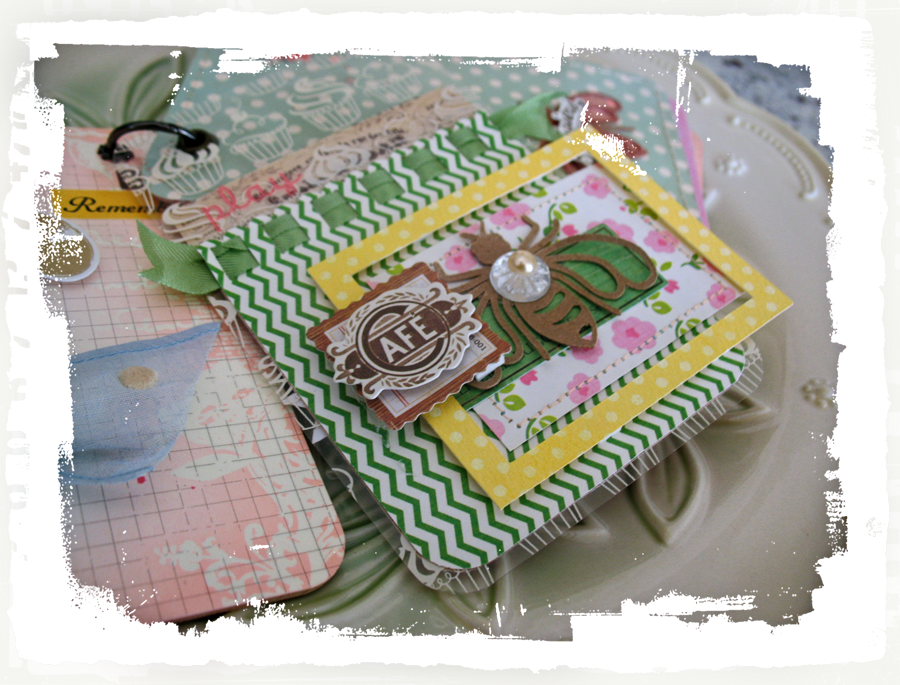
You can also run small pieces through your Cricut and cut out some really cool shapes like this bumble bee or the little doily below.
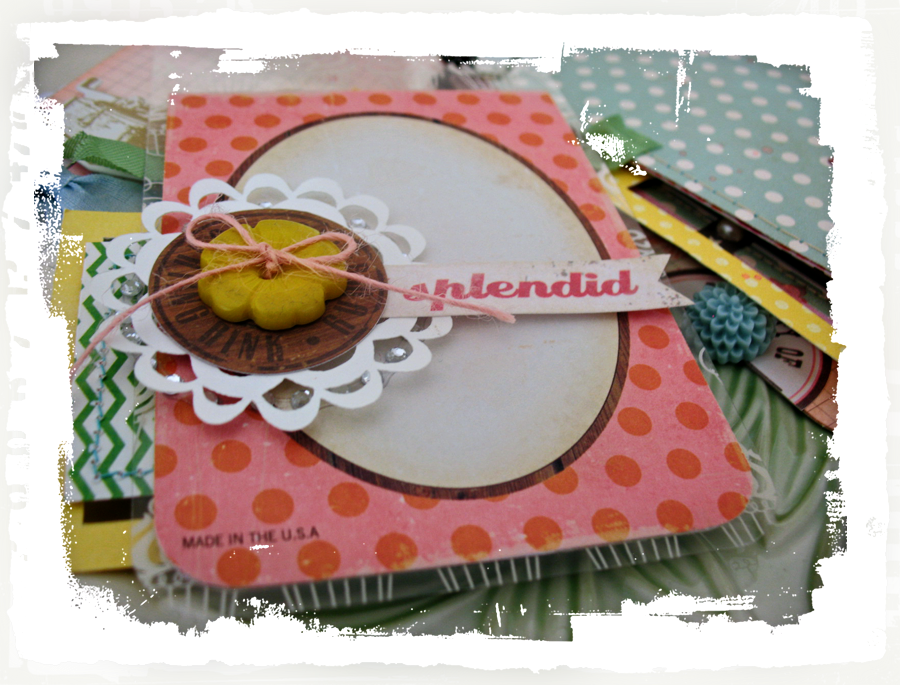
Teeny tiny ephemera pieces add a little dimension to pages, too.
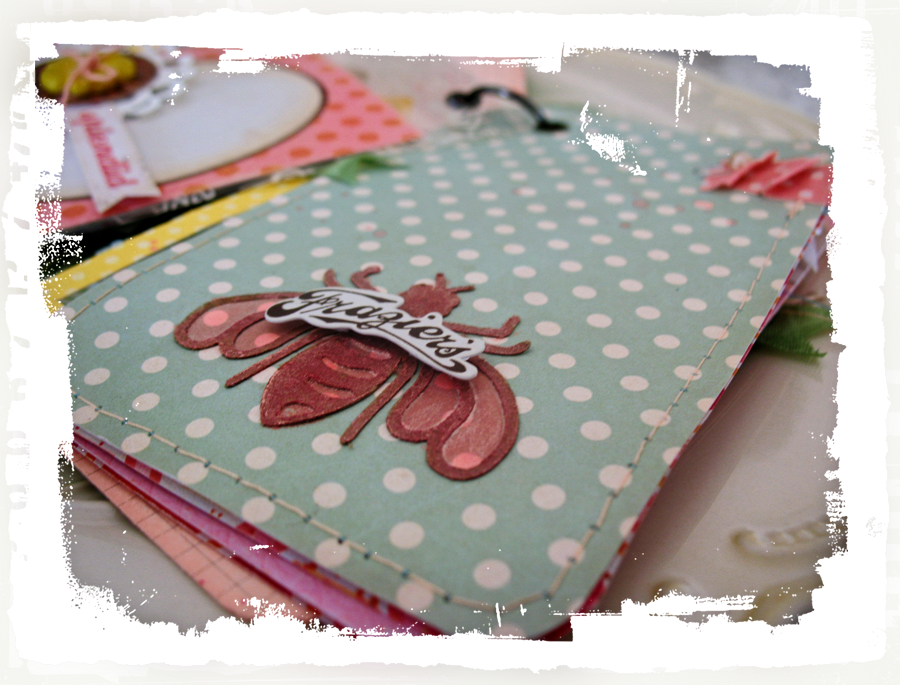
Mini banners are a great way to add a little pop to your pages, too, like this one I made using the Lily Bee stickers and then stitching across them. I must confess that I also have tons of almost empty bobbins, so I even used up all of them in an effort to declutter - I KNOW. It's a little crazy, but it works, and nobody ever sees the bottom thread...
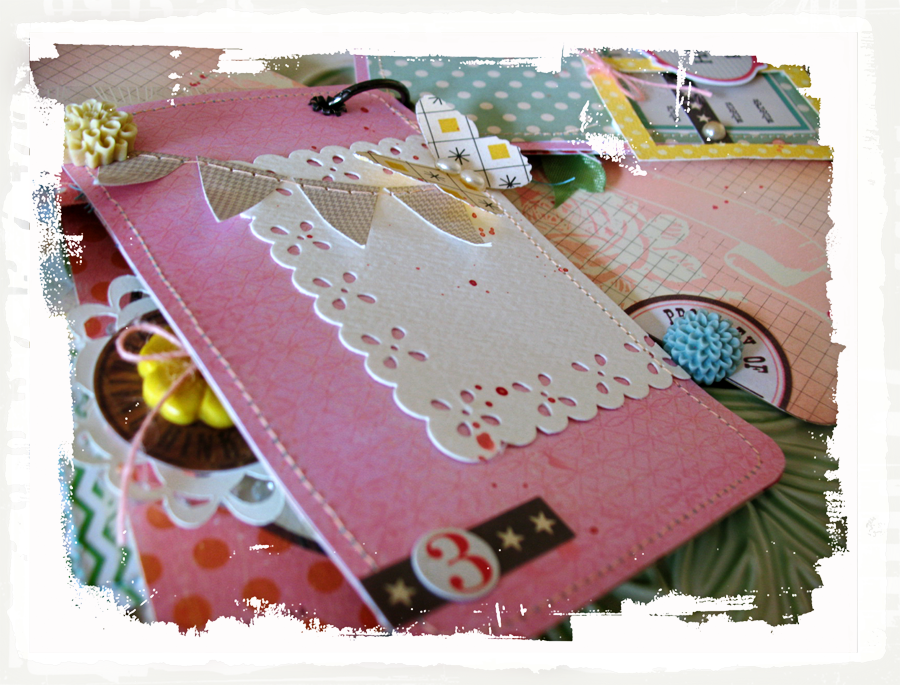
Small pieces also make good frames.
Punch out shapes from teeny scraps like the butterfly below.
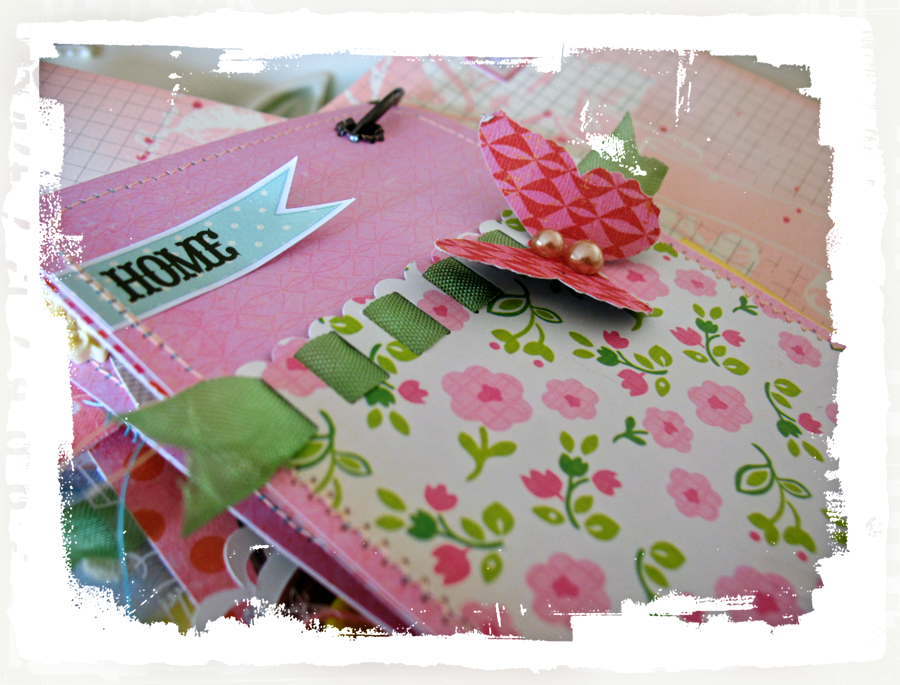
So grab your pile of scraps and get busy! It was such a fun little project to make, and didn't take much time, either!
Happy scrappin'!
Britt
So remember last week when I was trying to figure out how to use up all those scraps? Well, I figured out one really great way!
Make a mini album! This one is 3x5 - the perfect size to use up lots of little pieces. I used mostly the Salt Water Taffy and Mary Ellen kits for this one.

I started by making the bases for all the pages the same size, and stitched most of them so that they would have a feeling of continuity that is really important, especially when working with something small.

There's lots of layering on this mini, trying to use up some really small pieces, tucking them in here and there. I LOVE this antique brass butterfly from Making Memories!

Don't be afraid to add some inks and sprays to these layouts, too.

This is a great way to use up lots of those leftover stickers, too! Just run them off of the edge of the page, and trim them down.

You can also run small pieces through your Cricut and cut out some really cool shapes like this bumble bee or the little doily below.

Teeny tiny ephemera pieces add a little dimension to pages, too.

Mini banners are a great way to add a little pop to your pages, too, like this one I made using the Lily Bee stickers and then stitching across them. I must confess that I also have tons of almost empty bobbins, so I even used up all of them in an effort to declutter - I KNOW. It's a little crazy, but it works, and nobody ever sees the bottom thread...

Small pieces also make good frames.

Punch out shapes from teeny scraps like the butterfly below.

So grab your pile of scraps and get busy! It was such a fun little project to make, and didn't take much time, either!
Happy scrappin'!
Britt
Monday, August 22, 2011
Goof ball

Did yall know that I am married to a comedian??!
Oh yeah, he thinks he is soooo funny goofing up all my pictures!!
Oh yeah, he thinks he is soooo funny goofing up all my pictures!!
Doesn't he know his face is going to stay that way if he keeps making faces like that??!

I used the Mary Ellen kit from Noel Mignon to make this layout.
And I totally ripped off the star idea from this layout by Maggie Holmes in the September issue of Creating Keepsakes.
And I totally ripped off the star idea from this layout by Maggie Holmes in the September issue of Creating Keepsakes.

Have yall seen the sneaks of the newest kit Noel is working on??

This one is called "Study Hall".

Doesn't it look fabulous??

Check out this thread to see even more sneaks for this new kit.
It goes up for preorder on August 25th!!
:)
Have a great week!
gretchen
It goes up for preorder on August 25th!!
:)
Have a great week!
gretchen
Friday, August 19, 2011
Banner Day

A dear friend of mine had a baby shower thrown for her this past weekend, and I was asked to make a little banner for the party. I love doing these for baby showers because they double as decor and as something the mama can use either at the hospital when the baby is born, or at home in the nursery.
I whipped this one up using the Salt Water Taffy kit.
 I started with triangles cut from white cardstock and covered them in scraps of text paper.
 Punches definitely saved the day with this banner and made it a snap to create in no time.
 I tried to emboss the butterfly stamp from the kit, BUT I apparently didn't emboss all of the powder (don't laugh at me!) and it started to rub off. Instead of re-doing it (because I'm a dork), I just stamped with black ink on a piece of yellow cardstock and covered it up. I also added some Stickles on top to make it glittery.
 I started with triangles cut from white cardstock and covered them in scraps of text paper.
 Punches definitely saved the day with this banner and made it a snap to create in no time.
 I tried to emboss the butterfly stamp from the kit, BUT I apparently didn't emboss all of the powder (don't laugh at me!) and it started to rub off. Instead of re-doing it (because I'm a dork), I just stamped with black ink on a piece of yellow cardstock and covered it up. I also added some Stickles on top to make it glittery.
  Make sure to stop by the message board or the facebook page to see sneak peeks of the new kit "Study Hall" coming out! It's gonna be a cute one! :)
Tuesday, August 16, 2011
My Growing Heaping Pile of Scraps
Do you have one? Mine is rapidly getting out of control.
This week I have been concentrating on getting my studio back under control. I am reorganizing and making room for the enormous amounts of mixed media supplies I have been collecting. I mean, a pile of bubble wrap and doilies and canvas and brushes and randomness can be appealing, but not when it's smack dab in the middle of your workspace. In fact, it's been really messing with my mojo.
SO
One of the projects I've taken on is organizing/using up my scrap paper and ribbons. And this is no small task, lemme tell ya.
I generally store my scraps in an album. I have about six clear plastic sleeves that I have stitched into different size pockets, and each sleeve has its own theme. There's shabby, tomboy, diva, hippy, beige - in which all the neutrals live. But before they make it into the album they sit in the top tray of my cardstock tote, where I try to use the most current pieces up as fast as I can. And do you get a total sense of satisfaction when you use up an entire sheet of paper? I do. It just feels so good!
Anywho, because of this major mojo block, I was surfing around Pinterest this morning, looking for some inspiration for my scrap horde, and here's what I found:

Punch shapes out of them to make cute cards. This would make it super easy to make lots of the same cards.

Use small scraps to piece together a layout. Love the way this looks!

Make a teeny tiny mini album!

Tie those ribbon scraps around a string of lights to make a super stinkin' cute garland!

Explore your artsy side by slappin' together some mixed media magic!

Decoupage some bathroom tiles - these work well as glue gun plates, too!

Cut out alphas to make this adorable canvas to decorate your home! P.S. This was made by Virginia - dontcha just love it!?!

Make lots of teeny tiny embellies for invitations and cards.
I am definitely going to be using some of these ideas to deplete my scrap stash. What do you do with your scraps?
Happy Scrappin'!
Britt
This week I have been concentrating on getting my studio back under control. I am reorganizing and making room for the enormous amounts of mixed media supplies I have been collecting. I mean, a pile of bubble wrap and doilies and canvas and brushes and randomness can be appealing, but not when it's smack dab in the middle of your workspace. In fact, it's been really messing with my mojo.
SO
One of the projects I've taken on is organizing/using up my scrap paper and ribbons. And this is no small task, lemme tell ya.
I generally store my scraps in an album. I have about six clear plastic sleeves that I have stitched into different size pockets, and each sleeve has its own theme. There's shabby, tomboy, diva, hippy, beige - in which all the neutrals live. But before they make it into the album they sit in the top tray of my cardstock tote, where I try to use the most current pieces up as fast as I can. And do you get a total sense of satisfaction when you use up an entire sheet of paper? I do. It just feels so good!
Anywho, because of this major mojo block, I was surfing around Pinterest this morning, looking for some inspiration for my scrap horde, and here's what I found:

Punch shapes out of them to make cute cards. This would make it super easy to make lots of the same cards.

Use small scraps to piece together a layout. Love the way this looks!

Make a teeny tiny mini album!

Tie those ribbon scraps around a string of lights to make a super stinkin' cute garland!

Explore your artsy side by slappin' together some mixed media magic!

Decoupage some bathroom tiles - these work well as glue gun plates, too!

Cut out alphas to make this adorable canvas to decorate your home! P.S. This was made by Virginia - dontcha just love it!?!

Make lots of teeny tiny embellies for invitations and cards.
I am definitely going to be using some of these ideas to deplete my scrap stash. What do you do with your scraps?
Happy Scrappin'!
Britt
Subscribe to:
Posts (Atom)


