Showing posts with label Inspiration. Show all posts

Monday, June 20, 2016

Inspired by Photos and the "Happy Days" Classic Kit

It's Meridy here, and this week the design team's goal is to tell you where we got the inspiration for our layouts.  I'm using the "Happy Days" Classic Kit today, and there are a few more of these kits in the store if you haven't got one yet.  

The layout I'm sharing was inspired by the photos my 6 year old took of me and his new baby brother.  I am nursing the baby in the photos, and since that's what I'm doing multiple times a day, it's not a surprise that my oldest son wanted to take pictures of me feeding his baby brother.  When I looked at the photos, I knew that I wanted to briefly tell about excited I am that we overcame some major hurdles in getting him to be able to nurse.  Nursing was not always easy for him, and after a 2 week NICU stay and 3 more weeks of his weight loss, I was overjoyed to be able to follow up with some happy scrapbook layouts!


I started out with 6 photos (2-4x6 and 4-3x4), so I knew I wanted to make a double page layout.  I really liked the XOXOXO patterned paper by Amy Tangerine, so I used that as the base all the way across both sides of the layout.  I added a few more strips of patterned paper and then started piling up the matted photos and scraps of patterned papers to build up the design.  


The thick yellow ribbon worked very well with the color scheme in the layout, so I added a bit on the upper left and some more on the lower right hand side of the layout.  I added my sticker title directly on top of the photo and a journaling card to house my story. 


Finally, I choose embellishments such as some yellow buttons, clips, hand painted wood veneers, and rubber pieces to dress up the photos.  I still felt that I needed a few finishing touches, so I used a notebook paper border punch to punch a few strips of paper and placed those under the embellishment clusters. I finished off the entire layout with Heidi Swapp and October Afternoon mist splatters. 


I'm so glad that my son took these pictures of the baby and I and I'm so glad that I was able to tell the follow up story of the baby's rough start.


Thank you for joining me today, stop back every day this week to see how the rest of the Design Team was inspired!

Tuesday, February 18, 2014

Pinterest Inspired


Hello!! I have a fun little pinterest inspired tag to share with you all today. I love looking to Pinterest for fun ideas and prompts. Last week, during the "Book Of Love" crop, I visited Pinterest a few times to find ideas for adding different textures and layers into the album I was making.

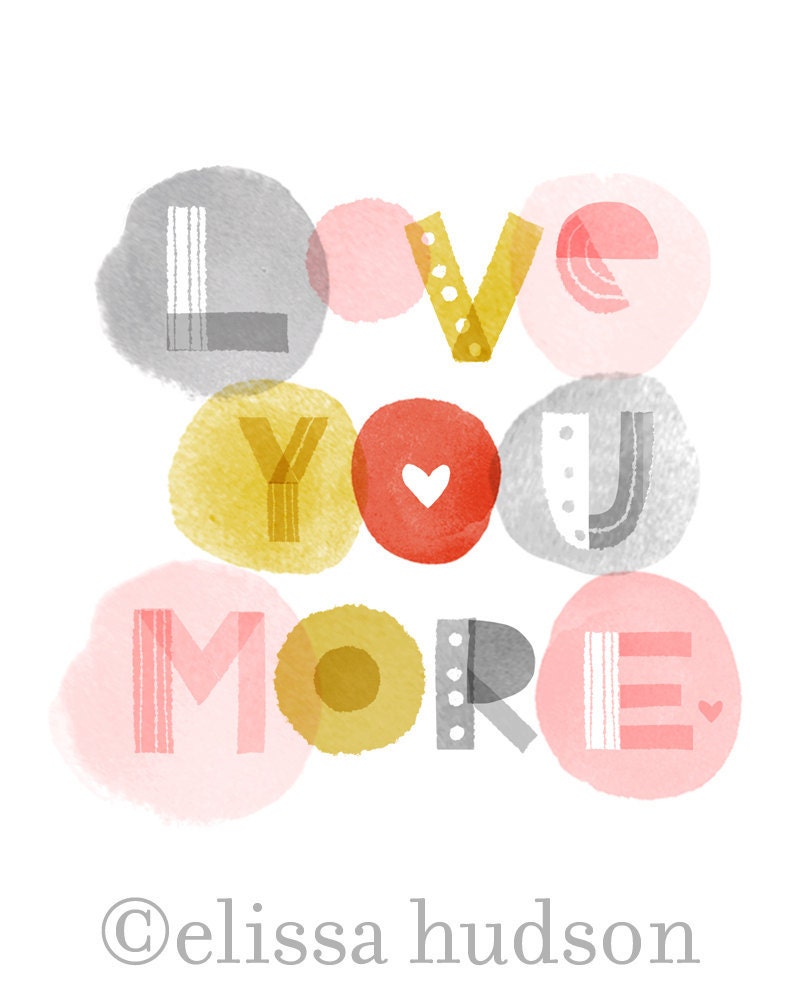
love you more wall art print

I stumbled across this image, which instantly made me think of the Fancy Pants, Devotion paper that was included in the February "Book Of Love" kit.

By fussy cutting out some of the hearts, and hand cutting letters, I was able to create this cute, fun, little tag that was a perfect addition for my album!


I kept it very simple, I really wanted to watercolor, tone on tone effect to stand out!


Tuesday, January 28, 2014

Lovely Day Together

Hi all!! I have a layout to share with you today using the Fresh Start kit. For this layout, I was inspired by all the fair ribbons that have been part of some of the few past collections that have came out. Here are a few examples:

American Crafts - Dear Lizzy Neapolitan Collection - Fair Ribbons at Scrapbook.com $4.99
These are from the Dear Lizzy Neapolitan and the My Girl collection, both from American Crafts.

I thought a fun way to incorporate these would be not as an embellishment, but as the main focal point. Instead of using a rosette type embellishment on the top, I simple centered everything under my photo. 


I fussy cut the banner element from one of the Elle's Studio papers, and then simply added in more texture and dimension with additional layers and embellishment.


My final layout has all of the embellishment centered right under my photo, which help to draw your eye there. Using the lighter color pallet with the darker tones in my photo helps my photo to really stand out and take center stage!


Tuesday, January 22, 2013

Ringing in the New Year!


Welcome to banner theme week on the blog! I love banners...I've decorated with them in my home and use them time and time again on my layouts. They are fun, festive, can be easily customized and make me REALLY happy!

I've been busy scouring the web pinning all types of banners to get your creative juices flowing. For my layout today I chose this inspiration piece. I was drawn to the addition of the fringe to the banner and the colors too...so beautiful.
I used the gorgeous Soda Shoppe kit along with the inspiration piece to create a layout of my honey and I out on New Years Eve. The first time in years we actually went out of the house to celebrate, lol!

The combination of the Glitz Bokeh paper and banner was just what I needed to set the mood for the party theme of the layout and the colors matched the inspiration piece but with the addition of blue too.


The bling in the glitz frame and glitter on the American Crafts Thickers helped me keep with the festive party theme.


To dress up my banner and give it a more festive look I rolled up small pieces of the Heidi Swapp fringe to mimic the look of the fringe in the banner of my inspiration piece.  To finish it off, I made a gold paper garland and laid it over the top of the banner.
I hope this has inspired you to make a banner of your own. They are great design additions to your layouts and home decor.

Make sure you check back here everyday this week for more banner ideas and see our Pinterest Inspiration Monday board.

Friday, August 10, 2012

Cassandra Cyr, You've Been Lifted! :)


This week, we've all been lifting some of our fabulous community members- they are so inspiring! 

I fell in love with Cassie's gorgeous fall layout using Crate Paper. All the layers and the rich colors are just incredible. Cassie's projects always have lots of details and a great design- and this one was no exception. It was really fun to lift and to be inspired by her style! 


I wanted my layout to feel softer and more delicate to fit my photo, so I used the great West Coast kit - the colors and lovely feminine details in it fit the feel of this layout perfectly. 


I loved Cassie's big fabric flowers, so I mimicked it on a slightly smaller scale with the fabrips in the kit. I popped a doily behind it to still give the same feel of a large circular element on that side of the page, but it works better with the size and orientation of my photo than a large flower. 


I think my favorite thing on Cassie's page was the strip with circular elements- what a fun addition! I will definitely be using that idea again! :) Thanks, Cassie, for your inspiration! 


*******************************************************

I also have been drawing inspiration lately from the reality show, Project Runway. 

They recently had their "unconventional products" challenge, where they created garments out of candy! So fun! 

One of the ideas I took away from the show is that they used one shape (in this case, circular and shark shaped candies) to created other shapes on the dress, so I adapted that to my layout and used strips of paper to create large, layered circles. 


The color palette was also adapted from the inspiration piece on the show- gorgeous shades of blue. 


What's been inspiring YOU lately?

Tuesday, July 24, 2012

Girls Rule!


Hi everyone! I'm here with a layout using chevrons for our Monday Inspiration. I carried the chevron design through my layout in my shapes and the pattern of my paper!

I used the July Boardwalk kit...the bright colors are perfect for summer photos!  The flair button can be found in the shop. Here are a couple close-ups for you.


You can look forward to more arrow and chevron projects on the blog all week long. I can't wait to see how they inspire you!

Monday, July 23, 2012

*Look Close*


Good morning everyone! Happy Monday!

Have you noticed that THE print right now is Chevrons?
They are everywhere.
In home decorations, on clothing, on scrapbook pages. 
EVERYWHERE. I it!
I'm a fan. BIG fan. Especially when arrows are part of the mix.

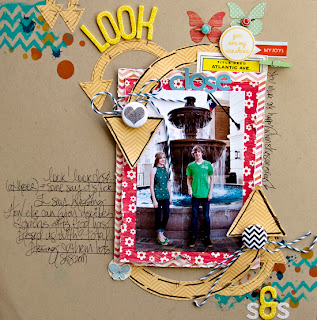
Today I'm sharing a layout I made with arrows & chevrons.
It's part of the Monday Inspiration over at the Noel Mignon board!
You have to go check it out! LOTS and lots of lovely things to keep you inspired
to make lots and lots of things from either chevron and/or arrows.

Here's my take on the inspiration:


I used the July Boardwalk kit here.
(The cardstock, inks and buttons are added from my stash)

Here's some close up shots:


I created the arrows using my Silhouette Cameo & files from Silhouette.
I had so much FUN making this layout.
Adding elements from the kit really tied it all together.
Make this week a wonderful crafty one.


Friday, May 18, 2012

My Shadow & The Princess Rogue


I got to playing with the Jack & Jill kit the other day, and had such a blast playing with it. Here's the results of my playing! 

This first one is based on the nautical themed Inspiration Monday we had on the message board last week: 

(everything is from the Jack & Jill kit except for the map paper, which is from the Primrose Lane kit)


I LOVED taking my inspo from the nautical theme... it really stretched my boundaries and pushed me to create in some different way! 

*************** 

I was still in the same mode for this next layout, so I kind of flipped my basic design of the banner strips and made them larger. I got my inspiration for the color scheme from my little girl's dress; I played around a lot with coordinating accents and it was fun! 


(Mostly everything is from the Jack & Jill and Primrose Lane kits.... and can you tell that I'm addicted to this new punch in the shop?!) 


Make sure to join the message board and get ready for some good times in just a couple of weeks! :)


Sunday, April 1, 2012

Inspiration Sunday- Photography Edition

I know one of the hesitations I had when I started getting into photography was that I didn't have a "fancy camera/DSLR" (at the time), and I didn't have special photo editing software. So I had to learn how to work with what I had available and to get creative with that! I think that was some of the best ways I could have learned how to take better looking pictures. Today's Inspiration Sunday focuses on two things that everyone has readily available: posing and props. 

It's crucial that when you take pictures, you pose your subject in a flattering way. Depending on if it's an infant, child, woman, man, couple, or group, there are a lot of little tricks that can work to your advantage for each type. Here's a few I dug up for you today: 

8 Different Flattering Poses for Women: 


Common Posing Mistakes and How to Fix Them: 
 
(source: I Heart Faces)

Before I go take family portraits, I love to study different types of posing and sketch out a few ideas that I think would work for the family I'm photographing. This next link has LOTS of fun ideas! 

For a lot of us, we're doing candid capturing of everyday life. This is one of my favorite articles (and series of photographs) about taking pictures of your kids: 


Another simple way to make photos stand out is with props:
I've seen lots of different materials being used lately as backdrops. Why not dye an old lace tablecloth or curtain a fun color? 

Or what about the twinkle of white lights? 

A simple word or sign can make all the difference in setting a tone for a 
photograph or series of photographs:

(source: Polish My Crown)
(source: meg duerksen)

This is a GREAT article on using multiple props. 

 Or if it's really impromptu, even just chalk! 

(source: Favim)

(source: Tara Whitney- unknown photographer from contest)


Click through here for more chalk fun photographs! 

(source: I Heart Faces)


You can also check out my own photography pinterest board... I've been gathering ideas there for a while now. There's so much amazing inspiration out there on this subject, and it doesn't cost any extra money or lots of fancy equipment! :) Happy snapping!