Monday, July 9, 2012

Imperfectly Perfect, Perfectly Imperfect

Hi everyone!
Happy Monday to you. Hope your weekend was a great one!

Today I wanted to share a layout I made using July's Boardwalk:

I've been wanting to scrap these goofy pictures I took of my husband & I
using my iPhone and a photobooth app.
We had some spare time waiting for a movie to start &
I just kept snapping away.
I call this Imperfectly Perfect.
That's us!

One thing I thought was funny - when I showed my husband my layout
after I'd finished it,
he thought it was cute how I added an "exclamation point."
I did?
I didn't realize it...
looking at it, I see what he means.
My smaller version of our shoot on the right.
See? Imperfectly Perfect.

also, noting:  I used button flair made by one of our very
own board members:  Shelley Haganman!
I loved them so much & knew they were perfect (no pun intended, I promise)
for my layout.

Here's some close up shots:


thanks for letting me share with you today!
Hope your week is perfectly PERFECT.

Sunday, July 8, 2012

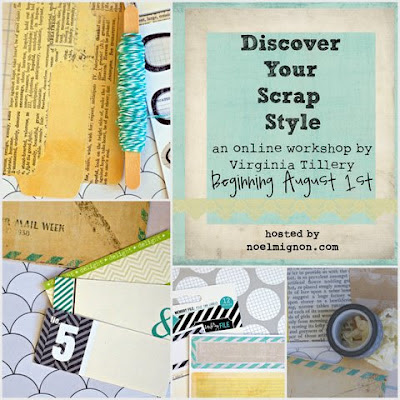
Virginia's "Discover your Scrap Style" Class and Kit (with a giveaway)!


Have you all signed up for this upcoming class yet?  If not, what are you waiting for?  Not only are you going to get to spend time with the super sweet Virginia and the other class goers for a few days, (WHAT FUN!), but you will be learning how to define your work, and hone in on your strengths as a scrapper.  It's all about shining the spotlight on what makes your scrapping style "you", and celebrating it!   Oh, and you also get a fun, exclusive kit to play with along in class too!  You can see all the kit contents, and order it HERE, but I only have a handful left, so get's yours soon!

Now, as if the class and kit weren't enough, one box will have a very special gift in it!  That's right, one lucky class goer will receive a hard copy of the Heidi Swapp Signature Series book in with their kit!  Class starts on August 1st, so hurry and get your kit and class spot reserved!  **PLEASE NOTE**  We pushed this class back a few weeks so that you could add it to your August box and qualify for free shipping on both kits.  If you are a current subber and want to add this to your August box, I will refund all shipping fees so they both ship for free :) :) YAY!


Hope to see you in class!
-Noel

Friday, July 6, 2012

How I Made My Layout Go from Drab to Fab


I started playing with the Boardwalk kit earlier this week and started this layout,
but it just didn't feel "finished" to me, so I set it aside for a few days. It just didn't feel like me. 


I pulled it out again and began tweaking it, and adding all those 
special touches that make a layout me. 

I added a flower to make a bigger "design triangle:"


I distressed all the edges with my scissors:


And I added some doodling and crumpled the little paper flower: 


I also added a paper strip and a piece of ribbon to ground the bottom of the layout: 


I love how a few simple touches make a layout look a little more polished and put together. 

***************************************************

Let me help you figure out what sort of things you can do to help you define your scrapbook style and make your scrapping process feel more you!

Join me for my class: 


Details here: click here.

Thursday, July 5, 2012

Happy 5th Birthday To.....My House!


First, lemme just say how honored and beyond stoked I am to be typing this post today :)
I've been a fan of Noel's kits since the very first one.

Okay, on to the fun stuff.

This Saturday is the 5th birthday of the house we built here in Mississippi and made a home.  I'm having a lil dinner get-together with a few great friends and knew that I wanted to celebrate our home and make the dinner extra special.

To do just that, I decided that the I would break out the "Hudson Valley Kit" from this past November.  This kit is absolutely perfect for the task at hand, because I knew that I wanted to use mostly various shades of brown and white as my colors for decorating the table.


First, I broke out my Silhouette and made cute lil pockets (library card pockets actually) to hold utensils and to make the house.  The twine was a perfect finishing little touch.  The chalkboard clips are actually from Michael's in the dollar bin.


Napkin rings are a must and I love that chair paper so much I thought that they would be perfect as the ring's focal point.


The tag pp made the perfect food place cards.  After cutting the tags out individually, I found that folding them in half before typing on them helped with placement. 


And now my favorite piece.  The cake topper.  There just might be a three layer cake with buttercream frosting that this bad boy is going to sit on.  :)

I cut out the house with a piece of the woodgrain pp in the kit with my Silhouette.  I then mounted the house on a wood square that is covered in parchment paper to go in the middle of the cake.  The banner then will be placed into the cake on the sides of the house kind of like you see here.


Close up of the house.  The numbers are part of our address.


Silhouette was used again for making the doilies.  The buttons in this kit were absolutely perfect as the final touches on the banner.  The paper with the grey button?  That's the strip that runs at the bottom of pp that you normally throw away. I so love how companies now are doing something with that.  The polka dot tape is actually some washi tape from my stash.

Well, I hope you enjoyed with I created with the "Hudson Valley Kit".  And while it's sad that the kit is sold out, if you were lucky enough to snag one, I hope this inspires you to break it out and create with it.


xo

Wednesday, July 4, 2012

Happy 4th of July!!

Photobucket 

 Hello everyone!!!  HAPPY FOURTH OF JULY!!!  I'm super excited to be here with you all to share my first post :)  I'll be honest, I created a layout a few weeks back to share for this post but as we got closer I found out that I would be posting on the holiday.  I knew I MUST get a little more crafting done & create something extra to share to put you all in that 4th of July spirit!!!

Before I became a design team member, I was a shopper and subscriber of Noel's store & monthly kits :)  I went through my last 3 kits and mixed & matched all sorts of fun papers and goodies to dress up this antique style wood star.

Photobucket

That is what I LOVE about Noel's kits - they are so easy to mix & match between them :)  I cut patterned papers to cover the sides of the star as well as the center of the star.  To jazz up the middle, I layered a bunch of embellishments & papers from the Boardwalk, Summer Wind, and Jack & Jill kits.  I also used that great Crate Paper black star ribbon & the adorable Jillibean Soup corrugated cardboard star to help add a festive touch to this piece :)

Photobucket

You may have noticed that kraft script patterned paper peeking out behind the Crate grid circle sticker - I have to confess, it's a DIY :)  I've just recently gotten back into to stamping and it is a great way to create your own patterned paper.  I started with a sheet of kraft card stock & stamped a text image onto the paper.  Then I punched out a scalloped circle shape & inked the edges with some Colorbox chalk ink.  Do you have any stamps collecting dust in your crafty space???  If so, break them out :)

Now I mentioned earlier in this post I had a layout to share as well.  On the 4th of July my family is at the beach, it is a tradition we began a few years back.  A wonderful week full of family & fun!!!  It is perfectly fitting then that being the 4th, the layout I created captures a recent moment of my youngest son at the beach :)  I just adored the soft color palette of the Summer Wind kit & found it contained just the right "ingredients" to showcase this sweet pic of Nicholas meeting his first sand crab :)

Photobucket

I loved the font of the American Crafts thickers in this kit!!  While the natural kraft color was great, I decided to cover them with some real sand to add something special to these letters :)  You can see amidst the title work is all kinds of goodies layered up from Hambly Screen Prints, Elle's Studio, Pink Paislee, My Minds Eye, and American Crafts.

Photobucket

In the top left hand corner of the pic I added some more layering of embellishments to balance the page out.  That adorable cloud is from the Hambly rub-ons in the kit.  I wanted to give the illusion of it just floating there so instead of adhering it directly to the patterned paper on the page, I put it on a transparency.  Then I simply cut it out & tucked it behind the tag.  This is also a great way to avoid rub-on disasters :) You know when you put it directly on a page & then realize you don't like it there or maybe you are mid-rub and the paper shifts and suddenly your image looks like it's broken :)  By the way, in the past I've had great luck saving myself from a bad rub-on job by simply erasing the rub-on from my paper with a good quality art eraser.  You lose the rub-on, but save the page :)

Photobucket

I hope you enjoyed my first post!!!  Thanks so much for stopping by :)

Tuesday, July 3, 2012

Best Friends Forever


Hi everyone! I'm so excited to be here sharing my first post and layout with the fabulous Boardwalk kit. From the moment I opened the July kit, it felt like it was hand-picked just for me. I love the bright, cheery colors and the fabulous mix of embellishments...perfect for all my summer photos, like this one of my daughter loving on the dog.


I love the dimensional flowers included in the kit and placed one on each side of the banner. I made a third flower to place next to the title from a piece of patterned paper and secured it together with a brad.


I wanted to use a script font for part of my title so I cut the words "best friends" from the blue cardstock using my Cameo.


I added my journaling to strips of cardstock and added a cluster of butterflies and brads to finish it off.


I'm sure you will love the Boardwalk kit as much as I do and I can't wait to see what YOU create with it!

Thank you so much for coming by! Have a fabulous day!

Monday, July 2, 2012

She Loves To Dream


Hi! Happy Monday! I'm so excited to be sharing my very first Noel Mignon post today.

Thank you all for the welcome, it's truly a DREAM to be here!

I just had the best time playing with the new July  Boardwalk kit.
My first thing to pick up and play with were the butterflies. I LOVE butterflies!
To add them to this layout of my beautiful daughter was a lot of fun:


I had the BEST time using the mist and the mask to color my butterflies.
Normally I'd leave them "natural" like they come, but after experimenting
with the mist & some inks I had on my desk...I knew they were perfect for my girl's page.


the dark blue makes me SO happy. LOVE how it draws the turquoise from her top right out.


I put the mask right on top of the largest wooden butterfly & sprayed.
After that, I dropped a few drops of a turquoise ink on top & this is the outcome.
I LOVE it.

here's one more shot of that butterfly:

Now I hope you have loads of fun creating with your July kit!
Don't be afraid to get those fingers dirty with the mist & get out some inks or paints
to add to the fun!

Thanks for letting me share with you today.
Again, it's MY pleasure to be here with all of you!