Showing posts with label May Arts. Show all posts

Tuesday, October 3, 2017

Red Maple Trees with the Apple Crisp Daily Diary

Fall is here and it so happens that it is my very favorite season.  Here in Utah we get a beautiful change in the leaves and the slight nip in the air as the weather begins to cool down.  This months kit is perfect for documenting this season.  I decided to make a full page spread with the Apple Crisp Daily Diary kit and document my love of the red maple and the glorious color it turns in the fall.

I started with the Jillibean Soup pattern paper for my background. I used the large die cut letters for my main title and then added the 3x4 cards around it.  I chose to use two of them for embellishing, one for journaling, and one for my picture.

I then took the 6x6 Echo Park pattern papers and added a few strips among the 3x4 cards and added more across the top.


Noel combined some of my favorite embellishments this month:  letter stickers, enamel dots, and cork stickers.  I picked from the Tim Holtz word phrases and paired them with the heart cork and a couple of enamel dots.


Once I had placed everything down I went back and outlined the title letters with the AC Marker from last months kit and a few staples along the top.  Another very simple page put entirely together using the kit and a few must haves that are in my moving scrapbook tool kit.  At this rate I might need to get rid of all my stash and go back to all the basics . . . nah, that is probably too extreme, but it's nice to know that all I need is a few tools and Noel's kits and I am set.  :)

Happy Scrapping!


Sunday, December 11, 2016

Deck the Halls | Oh What Fun Daily Diary kit

Welcome Noel Mignon friends!  Wendy here today to "Wrap It Up" with washi and ribbon today using the Oh What Fun Daily Diary kit. 


I began my page with the washi border to set the boundaries for my page and to establish my color choices.  With such a strong plaid washi I stayed with mostly reds for the page.


I wanted to wrap up my page, so I used the ribbon to give my photo block somewhere to rest, 
but also to give the illusion of wrapping a present.


I wanted to give the large 25 a place of honor and I wanted to bring in a visual triangle of gold with a few other touches to complete the page.


Another piece of the gold triangle - don't you love those puffy stickers?


And an ornament hung from the washi with a splattering of stars 
to add to the story of our Christmas tree.

I hope you have been inspired to "Wrap It Up" with us this week - make sure you use both washi tape and ribbon on your projects - and share what you create on the Noel Mignon FB page!


Thursday, March 31, 2016

Bit of Flair Challenge and "Kill-A-Kit" Layout Share- "Picture Perfect" Classic Kit

Hello!  I can't believe it's already the end of March---where did this year go!??!!  Today I'm sharing a layout for the "Bit of Flair" challenge that the DT took on this week.  I also had a very productive scrapbooking month, and wanted to do a "Kill-A-Kit" layout share as well.

I will start with my "Bit of Flair" Challenge.  I used both pieces of flair that came in this month's kit on this layout about my daughter and her new baby brother...


Here is a close up of the left hand side of the layout, I used the stamp set in this month's kit to create my own "patterned" paper on the bottom half of the layout.  I inked the stamp with the Lawn Fawn ink that came in last month's kit and stamped 3 "generations" of the image before reinking it.  Then I continued the same process with a teal ink that I had in my stash.  


For the title of my layout, I fussy cut around the "love" sentiment on one of the cut apart sheets in the kit and inked the edges.  I then cut the "every moment" phrase from the patterned paper that I used, I cut it from part of the paper that would be covered by the photos, mounted it on pop dots, and placed it directly over the "every moment" phrase that was printed on the paper. Next I colored the letters in with the Tim Holtz marker that came in this month's kit.  I added the heart charm and the enamel dot from the kit and finished it off with 2 buttons from my stash.


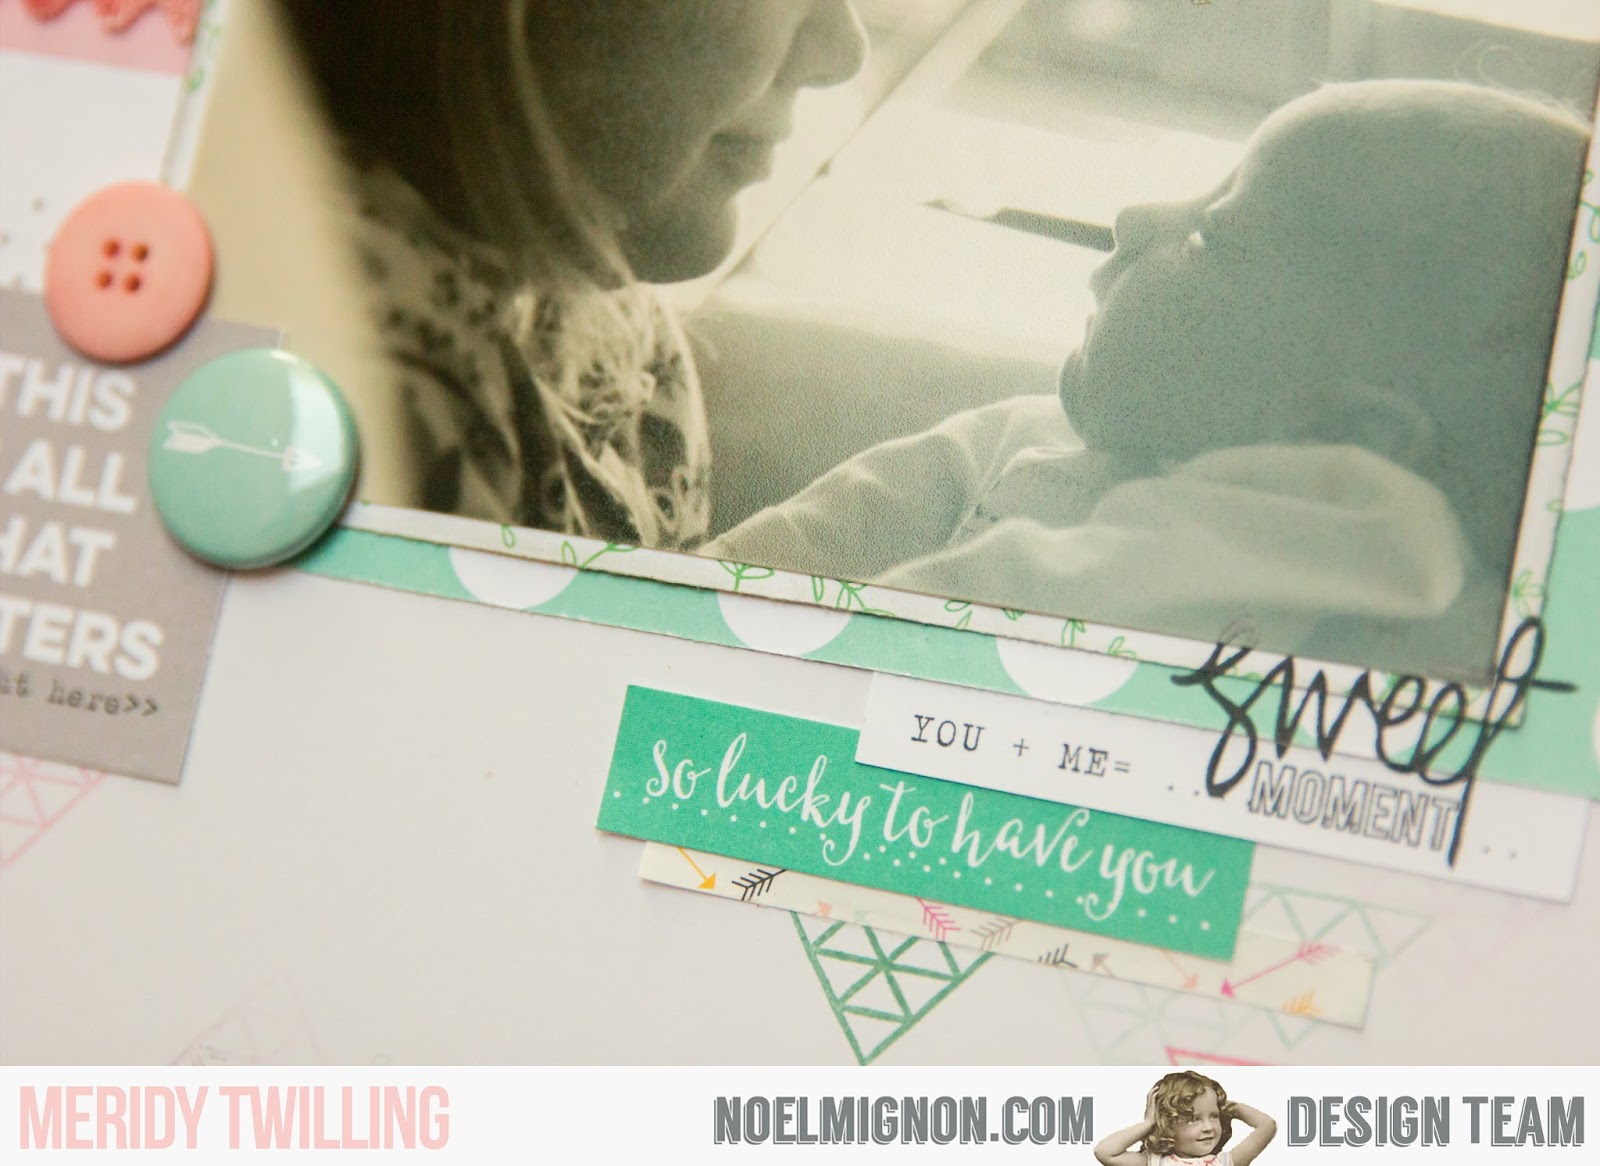
Below is a close up of the "sweet moment" stamp from this month's kit that I used in combination with some of the cut apart sentiments. 
 

You can see that I used one of the flair buttons on the bottom left of this photo, along with an enamel dot, a couple of more buttons, and some of the beautiful self adhesive velvet ric rak.


The right side of my layout was more of the same types of embellishments as the left side.  I cut the phrase "special memories" from the background paper and popped it up with pop dots, added a couple of cut apart journaling tags, a piece of ric rak and a few more buttons.  I place the other piece of flair on the bottom right hand side of the bottom picture along side a few more buttons and that completed the layout!


To wrap up today's blog post I wanted to quickly share all of the layouts I made to "kill" this month's "Picture Perfect" Classic Kit.  I created 8 double page layouts and 1 single pager.  I nearly killed the kit, I can probably squeeze 3 more layouts out of the scraps if I really try.  

I did add cardstock from my stash in with the kit to create most of the base pages of these layouts.  I also add a couple of embellishments here and there (a few buttons, a doily, a couple of Thickers titles, and a small piece of ribbon).  But for the most part, a majority of these layouts come straight from my Noel Mignon kit---such an awesome kit, and as usual, I got so many layouts from it!


Wednesday, March 23, 2016

Somebunny Special-"Picture Perfect" Classic Kit

Today's layout is honoring "Somebunny Special" using the March 2016 "Picture Perfect" Classic Kit.  (I think there are just 2 more of these kits in the store, so if you are thinking about purchasing one, you may be in luck!)

I live in the desert where we don't have many lush green landscapes or wildflowers.  But last year for some reason, the wildflowers were AMAZING, more than I ever remember seeing in the 30 years I have lived here.  Naturally, I had to take pictures of my kids in them.

Well, my son fell asleep in the car on the ONE mile long car ride to the flowers (he must have been really tired).  This set of pictures is showing how my 8 year old daughter is trying to wake him up, cheer him up, and help him feel better about taking pictures when he would rather be sleeping.  She even kisses his forehead, trying to make him feel better.  She is a very special and caring little girl to her brother (most of the time).  My son---well he is just eating up her attention.  I'm really glad I was able to capture this moment.


To create this layout, I used a piece of Pinkfresh Studio patterned paper as a base for the layout.  The paper already had a perfect combination of geometric shapes and flowers in a color scheme that coordinates with the photos.  The rows of yellow triangles along the bottom of the paper brought out the yellow flowers in my photos.  I built up the photo by layering multiple scraps and some "Carpe Diem" washi strips behind it.

How could I resist the yellow Maya Road resin frame!?!  I used a 1" circle punch to punch an image of a little bird from another piece of Pinkfresh Studio paper from the kit, and added that to the middle of the resin frame.

A little velvet ric rac, a few enamel dots,  and a puffy sticker rounded out this small embellishment cluster.


My journaling is accompanied by a stamped sentiment from the Pinkfresh stamp set included in this month's kit, a few more enamel dots, and 3 puffy stickers.  To keep the layout looking coherent, I try to use the same types of embellishments in all of the small embellishment clusters around the page.


The cluster at the top of the page also includes puffy stickers and enamel dots, I added a small sentiment label from the Elle's Studio Little Moments cutouts to round out this cluster.


And that wraps it up for my layout about "Somebunny Special" this week.  I would love to see some of your creations using the "Picture Perfect" Classic Kit.  You can share them on the Noel Mignon Members Facebook page. 


Tuesday, March 15, 2016

Ric Rac Challenge-"Picture Perfect" Classic Kit

I'm still creating with the design team's "Ric Rac Patty Whack" challenge from last week, I also use the beautiful May Arts self adhesive ric rac from this month's "Picture Perfect" Classic Kit on my layout...


This 2 page spread is about my daughter and how she is always looking for ways to layer her wardrobe and trying new combinations of clothes to create cute outfits---a real Fashionista!!! I snapped these pictures really quick before school one day because I thought she looked like such a pre-teen and so grown up.


I used the Pinkfresh Studio "Ombre Wall" paper as the background of the title page of this layout, focusing on my favorite photo of the morning.  I stacked a few smaller scraps of paper behind the photo to create a layered "stack" of photo mats.  I also added a couple of the cut apart pieces from the Elle's Studio Cutouts and the Pretty Little Studio feather die cut to pretty up the layered papers.  I grounded all of it with the self adhesive velvet ric rac.


I used some purple Thickers that I already had in my stash, along with the Elle's Studio black alpha stickers to create my title, and dressed it up with a few enamel dots and the camera Carpe Diem charm.  Prettying up my titles is one of my favorite parts of scrapbooking.


I added a few more of the Elle's Studio cut apart pieces to the right side of the layout to use for my journaling.  


I added the same patterned papers, enamel dots, and ric rac to this side of the layout to keep it looking coherent and cohesive. 


I am really enjoying working with the "Picture Perfect" Classic Kit so far this month, it has a beautiful, cheery color palette that is working great with lots of my photos.  There are a few more of these kits available in the store if you would like to pick one up!

Thanks for joining me today! 


Saturday, January 2, 2016

2016 Priorities-"Sweet Charlotte" Classic Kit


It's "New Year's Resolution" week here on the blog so I decided to create a 12x12 layout about my priorities in 2016.  I used the "Sweet Charlotte" Classic Kit for this layout.

The first thing you will probably notice is that there are no photographs on this layout.   Every so often I will create a layout without photos. I decided that I do not need any photographs to document the planning of my goals this year. If I decide to do a "follow up" layout at the end of 2016---to document how many of these goals I met, I will probably include photos. 


This layout in particular, I created with the idea that it will not go into an album. But instead I will display it either in my kitchen or my front room. This way I can see it and be inspired to keep plugging away at my goals all year long. Since I am not planning on putting it into an album, I felt very comfortable using thick embellishments, like the Pom Poms and the flowers.  I would typically not use these thick embellishments on a layout, but rather a card or some type of home decoration. 


I "painted" the wood veneer banner using the Heidi Swapp mist that came in this month's kit.  I like it better painted than plain because it is more visible on the layout when it is teal than it was when it was plain light wood color.


I liked the challenge of not having any photos on this layout. It was more about the process and the artwork than trying to enhance the photographs.  Do you ever create layouts without photos? 

Thank you for stopping by today!  Happy New Year!!!


Saturday, August 15, 2015

Career Day-"Country Life" Classic Kit

Hi again!  I have another layout using the "Country Life" Classic Kit.  I totally ADORE this kit, it's so bright and fun!!! 

When I saw the sewing/crafting themed papers and rub ons from Jillibean Soup in this kit, I knew exactly what photos I wanted to use.  My daughter had to dress up as a career she would be interested in for Spirit Week at school last spring.  She decided to dress as a Fashion Designer.  Best of all, the colors in the photos I took worked PERFECTLY with these papers!!!


The denim pocket from Inaginisce could not have been more perfect to add to a page about fashion design.


The little stitches on the Jillibean Soup rub on sheet were a subtle little addition to the journaling strips on this layout as well.


And to add some texture, the May Arts blue lace was just what I needed!


Thank you for joining me today!  I hope you are inspired to pull out some bright fun photos to use with the "Country Life" Classic Kit.  If you don't already have the kit, I believe there are still one or 2 left in the store.  Have a great weekend!!!!!