Showing posts with label Gifts. Show all posts

Tuesday, December 23, 2014

Easy Peasy, Christmas Chreasy!

Or something like that... I've never been good at naming blog posts. Winky winky.

So today I just wanted to stop in quickly to show you a card that I made for my mother-in-law to hold one of her Christmas gifts. So it's a card slash giftwrap kind of post...


I made a fairly simple card, without any dimension to it at all. Mostly because it was quick and easy that way, but also because my Mother-in-Law doesn't really like a lot of "stuff" globbed on. So thankfully, her preference for a more simplistic design worked in my favor! All I had to do was make a card base and cut a mat for the 4x6 card from the Cable Knit Daily Diary kit and glue it all together.


Inside the card, I just glued down another 4x6 card that could accommodate the message I wanted to write.
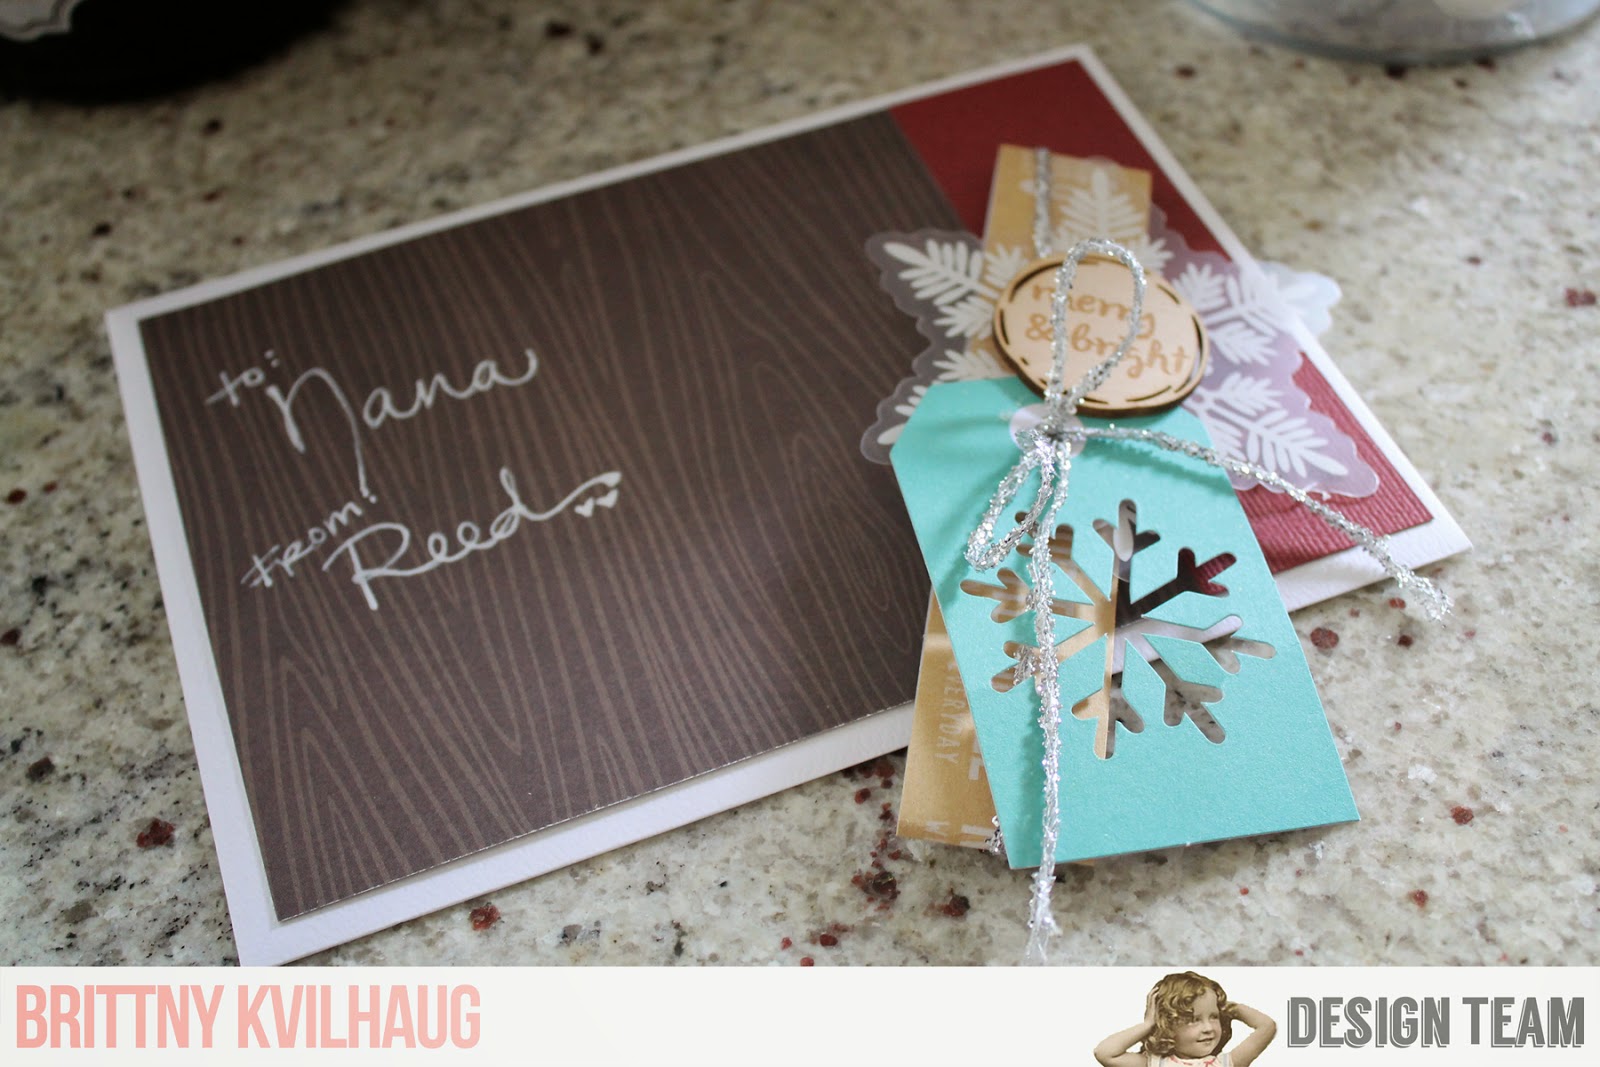

Usually, I leave an envelope it's plain ol' utilitarian self. But since this would be sitting under the tree, I figured I should dress her up a bit. To do this, I just cut a scrap of the same paper I used to mat the card on the front of the card, and a scrap of the same paper I used for the card base. Then, I wrapped a piece of that awesome kraft tape from the Maple Creek kit around the whole card, and decorated up the front of that with a tag, a piece of that cute tinsel string, and a wood veneer from the Cable Knit kit. The snowflake was from my stash. So now the envelope has a "ribbon" that my MIL can unwrap, making this boring card and envelope feel a little more like an exciting gift. Which it is. Cause it's from me and all. Again with the winky winky...

I hope you are all enjoying this Christmas week so far! This year, Christmas is at our house, so I am running around like a crazy person today, getting all the last-minute cleaning, decorating, re-decorating, baking, wrapping, and crafting done, so that I can enjoy this first Christmas Day with our Baby Reed! Can't wait to see him on Christmas Morning! 

Merry Christmas to you all!!

Thursday, December 18, 2014

Packing up Christmas treats!

We're heading into the last days of school as I'm sure most of you with kids are. I've been working on getting some treats together to give to teachers, friends, neighbors, etc. 

One of my favorite treats to make is blizzard bites (recipe at bottom). It's easy to make and it is so yummy! There are so many ways you can package it up...little baggies, jars, gift boxes, etc. I love using mason jars because 1) I can a lot and always have jars on hand, and 2) it looks cute and protects the goodies inside.


What I love about Noel's kits is there's almost always a sheet of patterned paper that has those wonderful 3x4 tags on the back that can be used for a multitude of uses from accents on your layouts, to pocket scrapbooking, to cards & tags.

So I went ahead and cut all of mine out & used them for packaging up my holiday treats and used some ribbon & embellishments to decorate my jar.

I also used up a few for some quick and easy Christmas cards.


And finally, I just had to make some gift tags with that awesome stamp that came with the classic kit. Seriously guys, I am using that thing on everything. I just love it!
I simply cut the kraft cardstock from the kit into 3 1/2 x 4 1/2 pieces, snipped the edges to make it look more like a shipping tag, then stamped on them & added some patterned paper & washi at the bottom. Super easy & cute!

I hope you all have a wonderful holiday week! I'll be back after Christmas with some new layouts to share!! 

And here's the recipe for those yummy blizzard bites (just right click to save & you can print out on 4x6 cardstock). And when I made my most recent batch I used 2 pkgs of vanilla almond bark & had a little leftover so I made some chocolate covered pretzels :)


Thursday, May 8, 2014

Mother's Day Plaque


Hello friends!! Mother's Day is coming up this weekend, and I like to try and always make a personalized gift for the wonderful mamaw's and grandma's that my kiddos have. I made sure and got some updated group photos of them together over Easter weekend, and knew that I was going to make a photo plaque that  can be  display either at home or at work.

I started out with two chipboard mini album pages, I adhere them together using some strong liquid adhesive, and I taped the seam along the back. Using the Heidi Swapp heart stencil and blush ColorShine that we received in our "Book of Love" kits back in February, and some modeling paste. I made a a soft, dimensional background, and base for my layers.


I chose to work mainly with the Chickaniddy Crafts papers that were included in the kit. I loved the colors that were in these papers, and thought that they worked perfect for the look I was hoping to achieve.

I wanted to keep this fairly simple, I cut my papers into pennants and layered them through the middle of my "plaque", then by cutting one of the kraft tags included in the kit, I was able to make another pennant shape that I layered under my photo layers, to make it have more presence on the  piece. 

I loved this paper clip, and knew I wanted to put it in this spot, but when I tried to actually "clip" it, I was losing more of the design that I wanted, so by using a strong adhesive, I layered right on top of my photo. I added one of those cute clear butterflies underneath to help it stand out even more, and add in more layers.


I wanted to have the embellishing a little heavier on the opposite side. Layering in stickers and labels, made for a great base. I removed the bow for one of the clothespins, and adhered it using foam adhesive.

Hoping that my mom loves this as much as I think she will. I know she will at least get a kick out of the photo. It was our best out of about 10...trying to get all those kiddos to cooperate wasn't working so well for us! ;)


Thursday, February 6, 2014

All You Need Is Love

I've seen lots of hand-cut lettering recently on Pinterest and thought it might be fun to try my hand at it while creating this framed gift for Valentine's Day.  The frame is 10" by 10" and I printed out six 2 1/2" x 2 1/2" pics to go along the top and bottom of the project.  The new Book of Love kit is full of some great patterned papers that were perfect for my letters.  I found it looks better if you use a large variety of colors & prints - it adds to that eclectic feel :)

 photo allu_zps8196d33b.jpg

After gluing down all the letters, I used a toothbrush and some paint to add all the specks of white you see below.  It added some nice, subtle texture to the project.  Then I machine-stitched through each line of text and added in a few of those adorable wood hearts from the kit.

 photo allucu_zpsd00917b7.jpg

The frame was simple to make and would be a great way to use up your scraps!!  I'd love to see your own version of hand-cut lettering - feel free to share with us on our Facebook page :)

Wednesday, December 11, 2013

Gift bag idea

OK raise your hand if you are thrifty {coughcoughcheapcough} like me and hate to pay more than like $1 for gift bags??! 
They are out there if you look hard enough but inexpensive gift bags aren't around every turn.
So sometimes I resort to just making my own. 
And it does not have to take a lot of time!
{time is money, right??!}
Here are a couple of plain paper bags that I dressed up with some of the paper, stickers, & ribbon from the "Ribbon Candy" kit. 


Fold the top of the bag to close it.
Then all you need is hole punch & a little adhesive to attach everything to the bag. 
Punch 2 holes at the top and thread your ribbon through the holes. 
Then decorate at will!


Cheap, easy, and cute!
Thanks for stopping by the blog today.
:)
Merry Christmas!

Tuesday, November 26, 2013

Thankful Buckets


A friend of mine inspired me the other day with some little goodies she'd left on her bed for her kiddos to surprise them when they got home from school. Most days, I get home at the same time as my kids, so I don't get to do little surprises like that... but this week, I am off for Thanksgiving and was excited to make these little "thankful" prizes for my kids. 


They are very simple, really... just some little strawberry baskets I purchased on etsy filled with baggies of our favorite chocolate drizzled popcorn for an afternoon snack. I added tags made with the Gather Together and Union Square kits. 


Just like any other mom, I find myself getting into a rut with fussing and reminding and nagging and everything else with my kids... and I want to be more mindful of telling them of the good they are bringing to our home. That is the point of these little tags... so that they know, regardless of them leaving their shoes and backpacks on the middle of the dining room floor for the bazillionth time, that I am THANKFUL they are in our family... thankful that they are ours. 


I hope they love them... and that they feel that they are loved! 


Friday, February 15, 2013

Valentine's Love


I think it must be every scrapbooker's curse to at least once have something spill all over one of their projects. I had a lovely layout all created with Julie's awesome sketch, but as luck would have it, my trusty cup of water was toppled over by one of my smaller companions all over my desk, and the main victim was my layout. :( Wahhh wahh! I'm in the process of re-creating it, and I'll be posting it later this weekend.

In the meantime, I do just happen to have another project I can show you today (thank goodness!). A friend of mine asked if I could make a gift for her to give to her husband for Valentine's day, using old photos of them. I was so excited to be able to help her out! 

She gave me several school photographs to choose from, and I converted them to black & white to give them a more "timeless" feel (and so I wouldn't have to work to compete with the colors).

I covered a canvas in text wrapping paper I picked up in the Target dollar spot a while back, and then added a layer of burlap on top of that. A cardstock frame cut out with my Silhouette machine added an elegant contrast to the rugged edges of the burlap. 


The burlap heart from the Lasting Love kit made a fun focal point, and an accent cut from corrugated cardboard added the right texture to complete the simple design.

I used cool office clips attached with two brads (and some hot glue for security) to clip  up mini collages made from papers & labels from the Lasting Love kit and the photos on top. I wanted to keep the whole piece simple, shabby, and elegant, and I think I accomplished it. And now I want to make myself a piece just like it! Ha! 


Friday, February 8, 2013

You Are Loved


Have you joined Vine yet? It's a new app for your phone that helps you create simple six second videos. It's like Instagram but with little videos. It's so fun! Leslie Ashe & myself are already on there... (you can find me as Mrs_Caulfield.) It's a fun way to show snippets of a project you are working on too- here's one I did this week of this project:

And below is the final project, made with the Lasting Love & Soda Shoppe kits (they combine well together!).


The little banners in the Lasting Love kit are so cute draped across a frame.


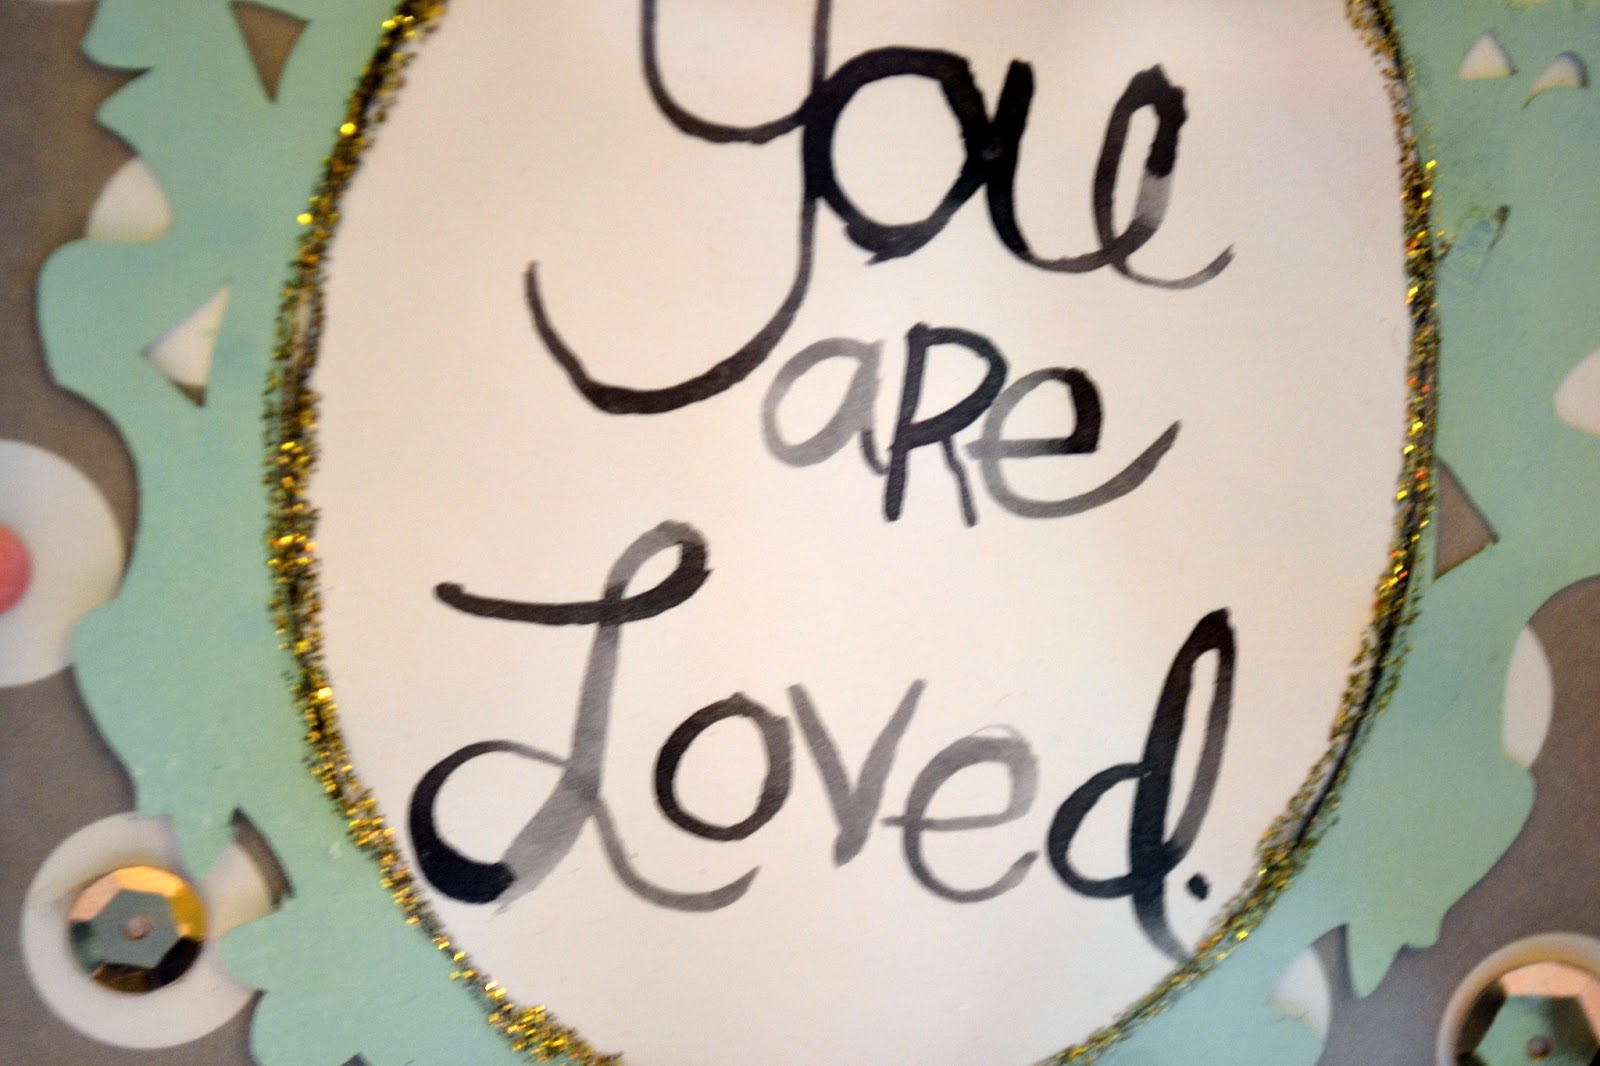
The words are painted with mist and a fine tipped paintbrush. I love the way the letters are different gradients. 


This little Valentine in a frame will be going to a teenage friend of mine. I think it's such an important age to be reminded that regardless of who is taking you out (or not taking you out!) on Valentine's Day, you are loved. 

Friday, December 14, 2012

Quick & Easy Christmas Gift


You know we all have them- those random little gifts we need to give someone- we don't need to spend a lot of money, but we do want to give them something special. 

I love these wood frames for times like that! They are $1 and easy peasy to customize! 

I painted this one pink and did red polka dots on it, covered in Stickles glitter. 


The sides are given a special touch with the decorative tape in the Glad Tidings kit. I think it's so much more fun to do that than to just paint them! :)


Even though all of these items are from a the Christmas themed "Glad Tidings" kit, they are not necessarily super Christmassy looking! This could be out in someone's home any time of the year, but is using supplies you have on hand right now. 


I love it! So much, that this one may stay with me... and I may make a new one for a gift. Hee! 

Monday, November 29, 2010

Gift It


I've been thinking a lot about what to get my family and friends for Christmas this year, and I'm sure you're all having these thoughts as well. Let's face it, we're all trying to be careful right now - maybe cutting back on the number of gifts your giving each receiver, or choosing names from a hat (our extended family has always done this) or maybe you want to give everybody just a little something with that kind of "specialness" you just can't get in a store.

I've decided to give a few people scrapbooks filled with semi-pre-made layouts all ready for the finishing touches to be made.

Here is an example of the kind of page I'm talking about using the Dear Diary kit. You'll notice I've borrowed a couple of cuties from Noel!


See how I've left some blank spots? That's where the receiver can do her own journaling or add any other additional photos or mementos. You could also just make up layouts without any photos at all. This is perfect for the busy mom or the sister-in-law who wants to scrapbook, but just never finds the time. This way you can share your creativity with your loved-ones and also help them out in the the nostalgia department!


You may be thinking, "Who has time for that!?" but I can promise you it goes so much faster than scrapping your own photos. Follow a sketch. Make a few of the exact same page for multiple people. Use the same sketch for every page, using different color themes.


This is also a great way of using up your scraps and leftover kit contents. If you've used those burlap alphas to death on your pages, you can still use them all up on a gift. You won't have to look at them anymore, but you won't have wasted them either (that's always my goal).

You can do a simple album with maybe 12 pages in it for each month of the year. Or do a calendar using the same principle. When the year is over, they can just cut down each page and make it into an album.

There are LOTS of gift ideas to keep your holiday craftiness fun, inexpensive, and always appreciated over at the message board. Come pay us a visit!

Happy scrapping!

xoxo
Britt