Showing posts with label card. Show all posts

Tuesday, June 19, 2018

Flamingo Gift Set with the Big Splash Classic Kit

I have been a little stumped this month of what I could do with all the fun prints and colors in this kit.  We aren't big into tropical vacations and all the fun flamingo items had me scratching my head.  After browsing through the Silhouette store I ran across a few flamingo items that I thought were adorable.  I decided to pair them together and make a cute gift set.  


I started with the bag and cut it from a couple of sheets of pattern paper and the cardstock from the kit.  I used the flamingo washi tape along the top of the bag and used a bit of the yellow ribbon and leaf die cut to tie around his neck.  


Next up was the card.  My silhouette really did most of the work and I assembled it all together using some foam adhesive and chalk ink around his feathers.  I then finished the bottom of the card off with more flamingo washi tape, a sentiment, and puffy flower stickers.  


These will be great paired together to wrap up a special gift later in the summer.  


How have you been using this months kit?  We would love to see your projects over on the Noel Mignon Members Facebook page.  

Happy Scrapping!


Saturday, February 13, 2016

fun with letters and love

Hello!

I am continuing this week's topic of "Love Letters" and have a couple of projects to share with you.

Each of the designers this week has either shared their take on the challenge, which was to either use a letter as part of their project or to find a creative way to use letters on their page.

I have loved the way others use large cut-out wording on projects, so that is what I decided to do for this week.

But, before I share that layout, here is a card that I created in honor of Valentine's Day and the cute little hedgehog stamps included in this month's Heart of Gold Classic Kit. I did a little bit of word play with the Pink Paislee Memorandum alpha stickers on this card.


As I mentioned, I love the look of large diecut titles. Instead of using my Silhouette Cameo for this one, though, I typed the word "love" using the WordArt function in Microsoft Word. I used  the outline version of my chosen font and printed it out in 120 point on a sheet of 8 1/2"x11" cardstock. From there I used my craft knife to cut out the letters and then backed each one with patterned paper. 

This is a great way to get the diecut look for those who may not have a diecutting machine available. 


After adding the patterned paper to "love" I mounted that onto the charcoal grey cardstock from the kit and trimmed leaving a 1/4" border all the way around. From there I adhered that to a piece of patterned paper that I'd misted with blue Heidi Swapp Color Shine


The triangle strip was handcut from the Pink Paislee Memorandum "Memo" patterned paper. 

I added the white paper heart doily and lots of stickers, washi tape and enamel dots to finish off the page. 

I used the Patina spray mist from last month's kit to draw lines for my journaling, which is about my daughter's love for gymnastics. 


Thanks for stopping by the blog today. 

How have you/do you use letters in a creative way on your projects? 

I challenge you to create a project using this week's focus for your page. 

Check back on Monday for a new challenge!

Monday, June 8, 2015

A Quickie!

Good Morning, Monday!

I have a quick card for you all today, that  I made for a friend's wedding this past weekend. I used the Happy Go Lucky kit for this one, and you know what? It's a pretty classy kit, disguised as a super fun-loving one. I love that lazer-cut. It makes for a sweet little background, bottomed out by that beyond-amazing gold foil heart paper. Swoon! I used ribbon from my stash to match the theme of the wedding, and topped it off with that oval diecut from the kit that says, "Treasure every moment." Does it get more perfect for a wedding sentiment? Nope!


 I wrapped our gift to them in some coordinating Kraft and gold polka dot wrapping paper, tied with a jute bow and tassels. I seriously hope they loved this package as much as I do!


Friday, November 21, 2014

I treasure you!

Hi friends! I've got a quick card to share with you today that I plan on giving as a part of the hostess gift I plan to give our Thanksgiving hostess. This kit, Maple Creek, is so perfect for this kind of sentiment. I love all the rich colors that work so well with the season.


I chose to layer my sentiment on top of a punched shape, and on top of a tag so that it would stand out on the card. I also chose to punch the bottom edge of the brown Basic Grey patterned paper with a scalloped border punch. I went back and layered the yellow reverse side of that same paper underneath the brown to add more emphasis and texture. I'd forgotten how much I love my punches and it was fun to pull them out again! To finish off the card, I added brads to the right of the tag, and a snippet of the checkered ribbon through the tag. Now I'm all set to hand this off, probably with a Thanksgiving hand towel or a bottle of wine, to Josh's grandmother who will be hosting us this year.


Thursday, September 11, 2014

Challenge: use washi tape in a new way!

 Hi friends! The design team asked the members of our facebook community to give us a challenge, and one person challenged us to use washi tape in different way! 

It brought to mind something I saw on a blog post by Patter Cross about using up all those tiny little washi tape scraps leftover from projects. I loved the idea- she uses hers to make tiny little embellishment scraps. It got my mind to thinking about how it would look cute as title work or a greeting on a card! Here's the process:

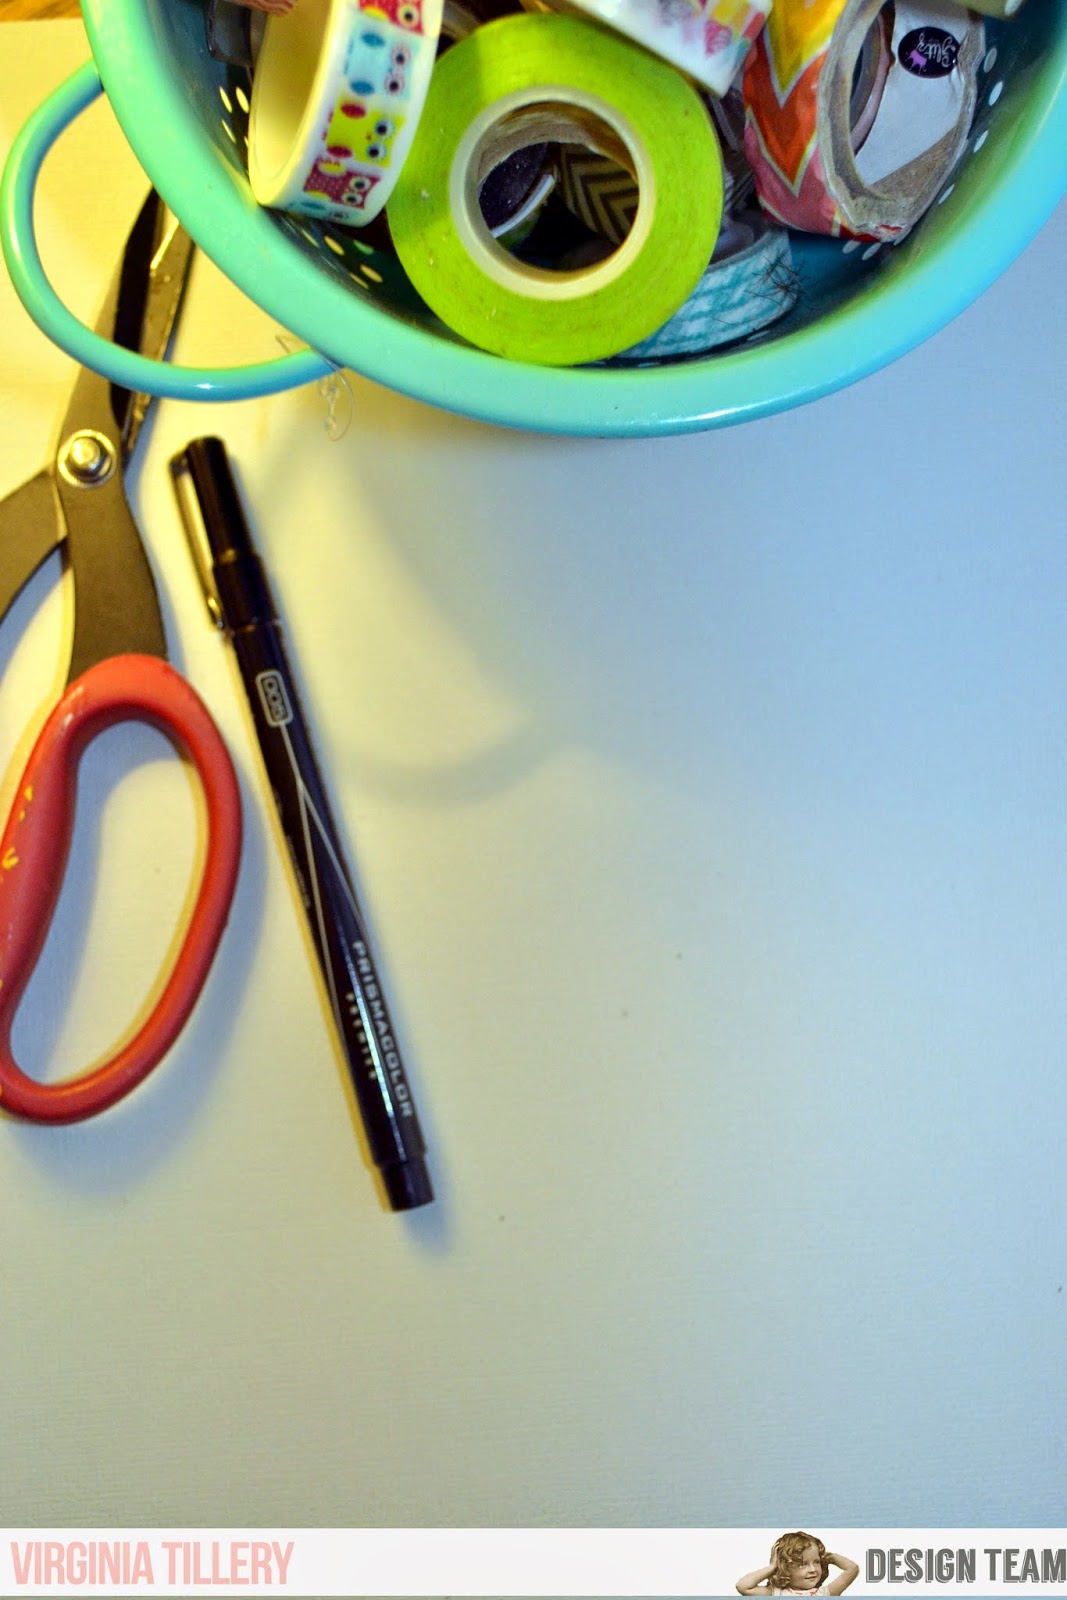
1. Gather some cardstock, washi tape, and scissors. (Not pictured: mod podge & a foam brush)

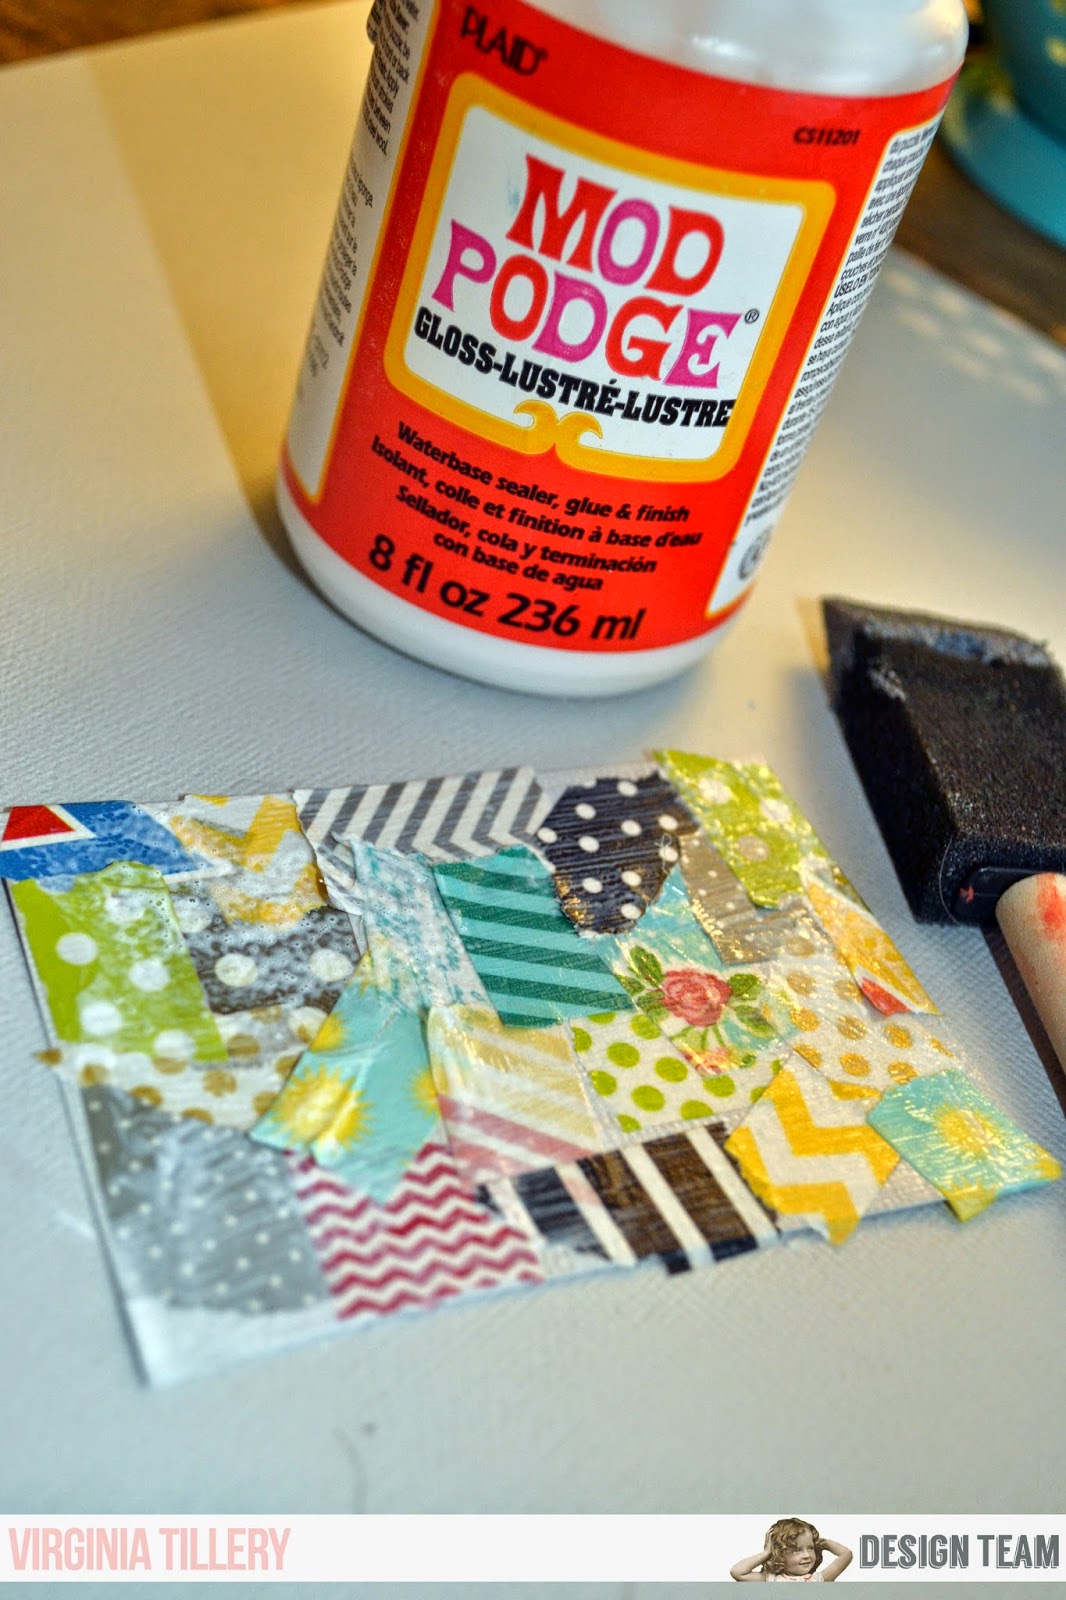
2. Tear off little scraps and stick them to a square of card. She does this over a course of time and explains this on her blog. 


3. Coat the card with mod podge or another clear sealant to keep the ends glued down.


4. Cut out whatever shapes you'd like! 


I used my letters to make a simple but funky little greeting on a card made with a few things from the Tea for Two kit (Sold out- but you can check out some of the new arrivals that were in the kit here!)


Because the design is so busy, I kept the rest of the card really simple (and let's be honest... card making is not my forte`. LOL). I hope it'll brighten someone's day! 


Thanks again to Patter Cross for the inspiration!


Tuesday, May 27, 2014

Smile


Hello friends!! I have a fun little layered card to share with you today! I always have so many fun bits and pieces left over from my kits, so I challenged myself to put some of those goodies to use on this fun card.


Layering the rub on under the photo overlay added fun dimension, then I decided to build up from the camera center. This cute flair badge added in some needed color, pins and clips added in even more texture and dimension. Cutting apart one of the chevron rub ons from the Maggie Holmes collection, I was able to make some small photo corners, and add in more of the gorgeous gold accent. Layered a few of the banner stickers, and I was left with a fun, colorful, dimensional, card for any occasion!


Thursday, May 1, 2014

May flowers


It's May!

Can you believe it?

This year is flying by way too quickly for me.

May is here and soon school will be over and Summer vacation will be in full-swing and then before we know it school will be back in session again. It seems like time keeps going by more and more quickly for me.

Our theme of the week is May flowers and the May kit, "Carousel," is perfect for this.

I decided to create a card for this week using some of the fun florals in the kit.


This peachy floral was one of my favorite papers in the kit and I thought it would look so pretty on a card. I actually ended up using both sides of the paper as well as part of the tear strip at the bottom of the page.

After adhering the patterned paper I added some of the cute Glitz washi tape and then cut one of the doilies in half. I adhered the doily, overlapping the two pieces and then trimmed off the extra. I added a Heidi Swapp banner piece on top of that, then some of those cute lace flowers and some twine. After that I chose a few of the sentiment stickers from the kit and it was done. It was pretty quick and easy. 

Here is a closer look at the layering: 


Thanks so much for stopping by the blog today. 

Have a good one! 

Make sure to share your projects with us on the Noel Mignon Facebook page. We'd love to see what you have created. 

♥♥

Tuesday, February 4, 2014

So Foxy


Hi Friends!! I am in full on valentine mode! I love this special day of celebrating those you love...I think you should tell/show them everyday, but having that one special day to get as mushy as you want is pretty fun.
I am not much of a cardmaker, so normally, as much as I hate to admit it, I end up buying valentine's for my family. This year though, I am determined to make them. They may be simple, but they will be from my heart, and that's what it's all about!

So, when I saw the cut apart paper from Jillibean Soup in the Book Of Love kit, I knew this was going to help me a TON! Then I saw the " So Foxy" card and knew it would be perfect for my hubby...anybody that knows us knows that that is SO us.

So, here is the card I created:


Simple, but cute, right? I think he will love it....even though my 5 year old informed me that, "it's way too pink for Daddy!" lol.

Don't forget to join us next week for our Book of Love crop!! It's going to be a blast!!!


Wednesday, December 25, 2013

Merry Christmas!

Wishing you and yours a very very merry Christmas!
Enjoy the day!


{made with this month's "Ribbon Candy" kit}

Wednesday, December 18, 2013

The countdown is on...

One more week until Christmas!
It's not too late to make and send out cards!
Here's an idea to help you out.


I used the "Ribbon Candy" kit to make this!
Merry Christmas and thanks for stopping by today!
:)


Wednesday, November 27, 2013

Have a great Thanksgiving!

I hope you have a warm, loving, fun-filled day with family and friends.


(made with the "Union Square" kit)
*****
There is so much to be thankful for!
:)

Friday, November 1, 2013

Happy Friday!!

Happy Friday everyone!!  November is here - YAY!!  Today I have a simple but fun card to share :)   I have been looking at the Pink Paislee gold star background from my Union Square kit for weeks now.  I LOVED it but was just trying to decided how I would use it.  I decided to trim off a portion of it and use it as a background for my card.  I had fun filling each star with brads and enamel dots :)

 photo nmcard_zps70ea4d78.jpg

Have you cracked open your star background?  If your not a card maker - no worries!!  I can see this working just as well as the background of a layout :)  Thanks so much for stopping by!!

Wednesday, October 30, 2013

Happy Halloween (a day early)!!

Hi there and good morning!
I made a couple Halloween cards with the Union Square kit.
It's not a Halloween kit per say.
BUT there are a couple stickers in there and some fun patterned papers that make it work!
Who says Halloween has to be just orange, black, and purple anyway??!


Don't you just love the sparkle that these Thickers have?!


One more!
I did throw a little orange on this one for fun!
:)


What am I going to do if this twine trend ever dies??!


Thanks for stopping by today!
Don't forget that January - June kit subscriptions are available for a little while longer. 
Better get yours now!!


Have a great day!
:)

Wednesday, August 21, 2013

Fun stamping technique!

Hey! Good morning!
I am not much of a stamper so it is a bit shocking that I am actually sharing a "stamping technique" today.
Well pick your jaw up from the floor because I am doing it!
Disclaimer: I am pretty sure this is not some earth-shattering, never-done-before technique but I am sharing it nonetheless.
:)
I am going to show you how to make the flower on this card using the teardrop-shaped ink pad in the "Our Summer" kit.


Hint: If you don't have this kit or an ink pad like this, you can also use one of the cateye ink pads.
Then all you need is that ink pad, a sheet of white paper/cardstock, pen, & scissors.


And this is what you do...
1). Stamp the ink pad all over the white paper. These will be your "petals". I use 5 petals for my flower but I stamped a few extra so I could choose the ones I liked best.


2). Outline the petals with black pen. Don't worry about outlining them perfectly. Sometimes the messiness is more fun!


3). Now cut them out. Once again, don't worry about cutting them out precisely.


4). Arrange them like a flower and add a fun center!


Done! Now you have a fun flower to add to a project!


Have a great day and thanks for stopping by the blog today!