
 Hi Everyone! Just sharing a quick storage tip post for you all today!
 Now I don't know if many of you know, but my family and I just went through a really big move this last June. And for the people that know me really well, it is no shocker to find that I am still unpacking boxes. LOL! My scrap room is in shambles, and will be for some time more, but it is on it's way to being a very organized room, as I finally have the time to be able to devote myself to it. I really wish I could share some photos of it with you right now, but I am waaaaay to embarrassed by the way it looks to even think about doing that! LOL! So instead I have a few pics of my old scrap space, which features several things I am still using to this day to help give me a super cheap and effectively organized space. I hope this will give you a few ideas on things you can use from your own home to help get you more organized in your scrap space!
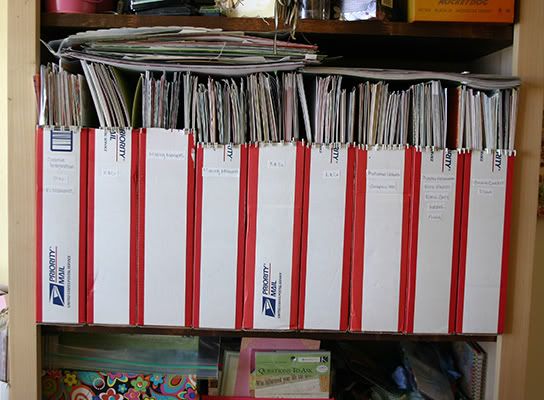
The first picture is of my paper storage. NOTE: Please igonore the stack of papers and LOs on top of my paper storage boxes, as this is actually counter-productive to what I am actually trying to help you work with. LOL! yeah things are much better now in that I don't have stacks of papers all over the place, or LOs that don't have a home. I was pretty lazy about that before, and have put a stop to it! :D Ahem. Right, moving on...So these boxes are actually the mailers that my kits come in! This allows me to recycle my boxes, and help with my paper storage at the same time! :D Now, true, they look pretty unsightly, but really they are very efficient and easy to use. I used file folders to seperate my papers from others (I organize mine by manufacturer, then by collection), and these folders fit in perfectly! I first determine the length I need to cut the box to by lining a file folder up to the outside. (I haven't made a new one in a while so I can't remember the size of them off hand! :P) I make sure that the bottom of the file folder is about an inch from the bottom of the box, that way the papers will always be suspended and never touching the bottom of the box which will keep them from buckling and bending. Once I have that measurement determined, then I just take my exacto knife and slice the box top off at the line. (I really hope this all makes sense!) Then the file folder slides in nicely and your papers sit right inside those files. A great way to reuse! I do see though that these look pretty bad, but I have plans on covering mine with paper bags! :D Another great way to reuse everyday items!
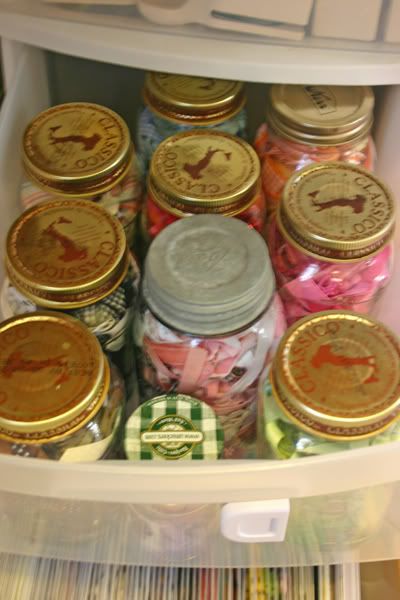
One more great item to use from your home in your scrap space are pasta sauce jars! :D I love my jars! In the pic below (which is really bad by the way! Sorry about the quality) I have used lots of jars to help organize my ribbons! This may not be your style in organizing ribbons, but it totally works for me. I don't own a whole ton of different kinds of ribbons, just a lot of repeats of the same thing right now, so putting them all into a jar together has never been a huge concern of mine. I seperated these here by color. (And can you possibly tell that we like Classico brand pasta sauce in this house? hmmm...LOL!) Anyway, you can do the same thing in smaller jars (like jelly jars) for all your buttons and what not! I love my jars. :D Possibilities are endless.
I really wish my room was further along so that I could show you more of what I am trying to achieve with it, but it is just so crazy in there that I can't make sense of a whole lot just yet. LOL! But I did want to share one more storage solution with you that I have found to be perfect for scrapbooking: Itso brand storage containers that I got from Target. :D We actually got this system for my daughter's room, but I ended up 'borrowing' a few of the bins for my own stuff because they work so well!!! My favorite bins are the fabric half size bins, as they are perfect for storing a kit in while you are working with it! They aren't real deep so you can still see things in it while being able to store quite a load of stuff at the same time, and they are big enough so that your papers can sit flat and not get all bent up because of being too short on one end or the other! I love these!!! This system is a great investment as the boxes are all really sturdy, and even the frame systems the boxes go in are really great! I can't say enough good things about this, clearly, as I seem to just keep getting more of the bins! :D
I will for sure keep you all posted as my room comes together!! I know there are a few others on the DT that are working on their rooms too so maybe we can all do a group post in the future and share all our spaces! It would be fun to see where everyone scraps. :D And if you have any great storage tips, please feel free to share them! I am all ears when it comes to good organizing!
Take care everyone!
~Amy
4 comments:
Just a question . . . Are your hanging flies for 12x12? I cant find any hanging files for 12x12 so can you please tell me what you use and where you get them. Thanks!!
Great tips Amy! Things I never thought of....like the boxes or the jars! Hahha! I LOVE it!
Thanks ladies! I am glad I had a couple ideas that could help! :D
Ashly-Sorry I didn't make that clear. :P They are just regular standard sized file folders that you get from an office supply store. So my 12x12 papers stick out the top quite a bit but that makes it easy for me to thumb through the pages instead of having to pull the whole file out. :D HTH!
okay!! I didnt realize the regular sized ones would fit 12x12 papers. Thanks Ill be trying this out with all my boxes :) I knew there was a reason I was keeping them all. Oh and I cover mine with duck tape :) it comes in such cute colors now
Post a Comment